
How to Take Professional Photos: 2026 Practical Guide
What if the biggest upgrade to your photos isn’t a new camera, but a more deliberate moment before you press the shutter? Learning how to take professional looking photos starts with noticing what’s already in front of you: the light, the edges of the frame, and the point you want people to notice.
If your pictures sometimes look flat, cluttered, or accidental, it can be hard to know what to adjust first. You don’t need expensive equipment to make a photo feel more intentional. A small change in where you stand, how you frame the subject, or where you focus can make the image clearer.
This guide gives you a repeatable process to use with the camera you already have. Learn to recognise useful light, simplify a composition, focus with purpose, and practise in a way that builds confidence. The goal isn’t to make every photo perfect. It’s to make thoughtful choices that bring the scene to life.
Key Takeaways
- Learn how to take professional looking photos by making deliberate choices, not relying on expensive gear or heavy editing.
- Use small changes in your position to find softer light and a cleaner background for your subject.
- Choose what to focus on and check whether bright and dark areas retain useful detail.
- Build a simple shooting routine, then compare a few frames taken from different positions.
- Use hands-on practice and feedback to notice habits you may miss when shooting alone.
How to take professional-looking photos starts with intention
A polished photograph doesn’t depend on a costly camera or a complicated edit. It depends on knowing what you want the viewer to notice, then making choices that support that idea. If you’re learning how to take professional looking photos, give each frame a simple purpose: show a person’s expression, the shape of a building, or the colour and texture of a dish.
A professional-looking photograph is the result of intentional choices that make the subject clear and suit the scene.
Before taking a picture, pause for a few seconds and follow this sequence:
- Notice the subject. Decide what matters most in the scene.
- Inspect the light. See whether it helps reveal the subject or makes it hard to see.
- Simplify the frame. Look for background details or objects at the edges that compete for attention.
- Focus. Place focus where you want the viewer’s eye to go, then check the result.
This pause gives each adjustment a purpose. The principles of photography cover a wide range of techniques, but you can start by observing one scene and making one considered change at a time.
What makes a photograph feel polished?
A clear subject helps viewers understand the image without searching for its purpose. Imagine photographing a cup on a table. If a bright sign, a passer-by, or a pile of objects fills the background, the cup may lose attention. Shift your position or angle to keep those distractions out of the frame.
Deliberate framing, steady focus, and light that falls consistently across the subject help a picture feel resolved. Not every image needs to be perfectly sharp or evenly lit. The choices should fit what you’re photographing and the feeling you want to convey.
Do you need a professional camera?
No. A phone or entry-level camera can teach you how distance, angle, timing, and light affect a picture. Before considering new equipment, learn how your current device focuses, adjusts brightness, and responds when you move closer or farther away. Photograph one subject from several positions, then compare which frame communicates your idea most clearly.
Equipment can offer more control in some situations, but it can’t decide what deserves attention. Careful observation often makes a more useful difference than a new camera body. If you’re starting from the beginning, learning photography concepts in a steady order can make the controls feel less intimidating and give your practice a clearer focus.
Keep your first goal modest: make the subject easy to recognise and remove one distracting element. As these habits become familiar, you’ll spend less time guessing and more time making photographs that feel like your own.
Use light and composition to make the subject stand out
Once you’ve chosen what to photograph, look at how light and framing shape the scene. A useful change may be as simple as turning your subject, taking a step to one side, or waiting for a cloud to soften direct sun. These adjustments can reveal shape, reduce glare, and separate the subject from the background before you change a camera setting.
Light direction and a simple background guide attention by showing the subject clearly and giving it room in the frame.
Find useful light before adjusting camera settings
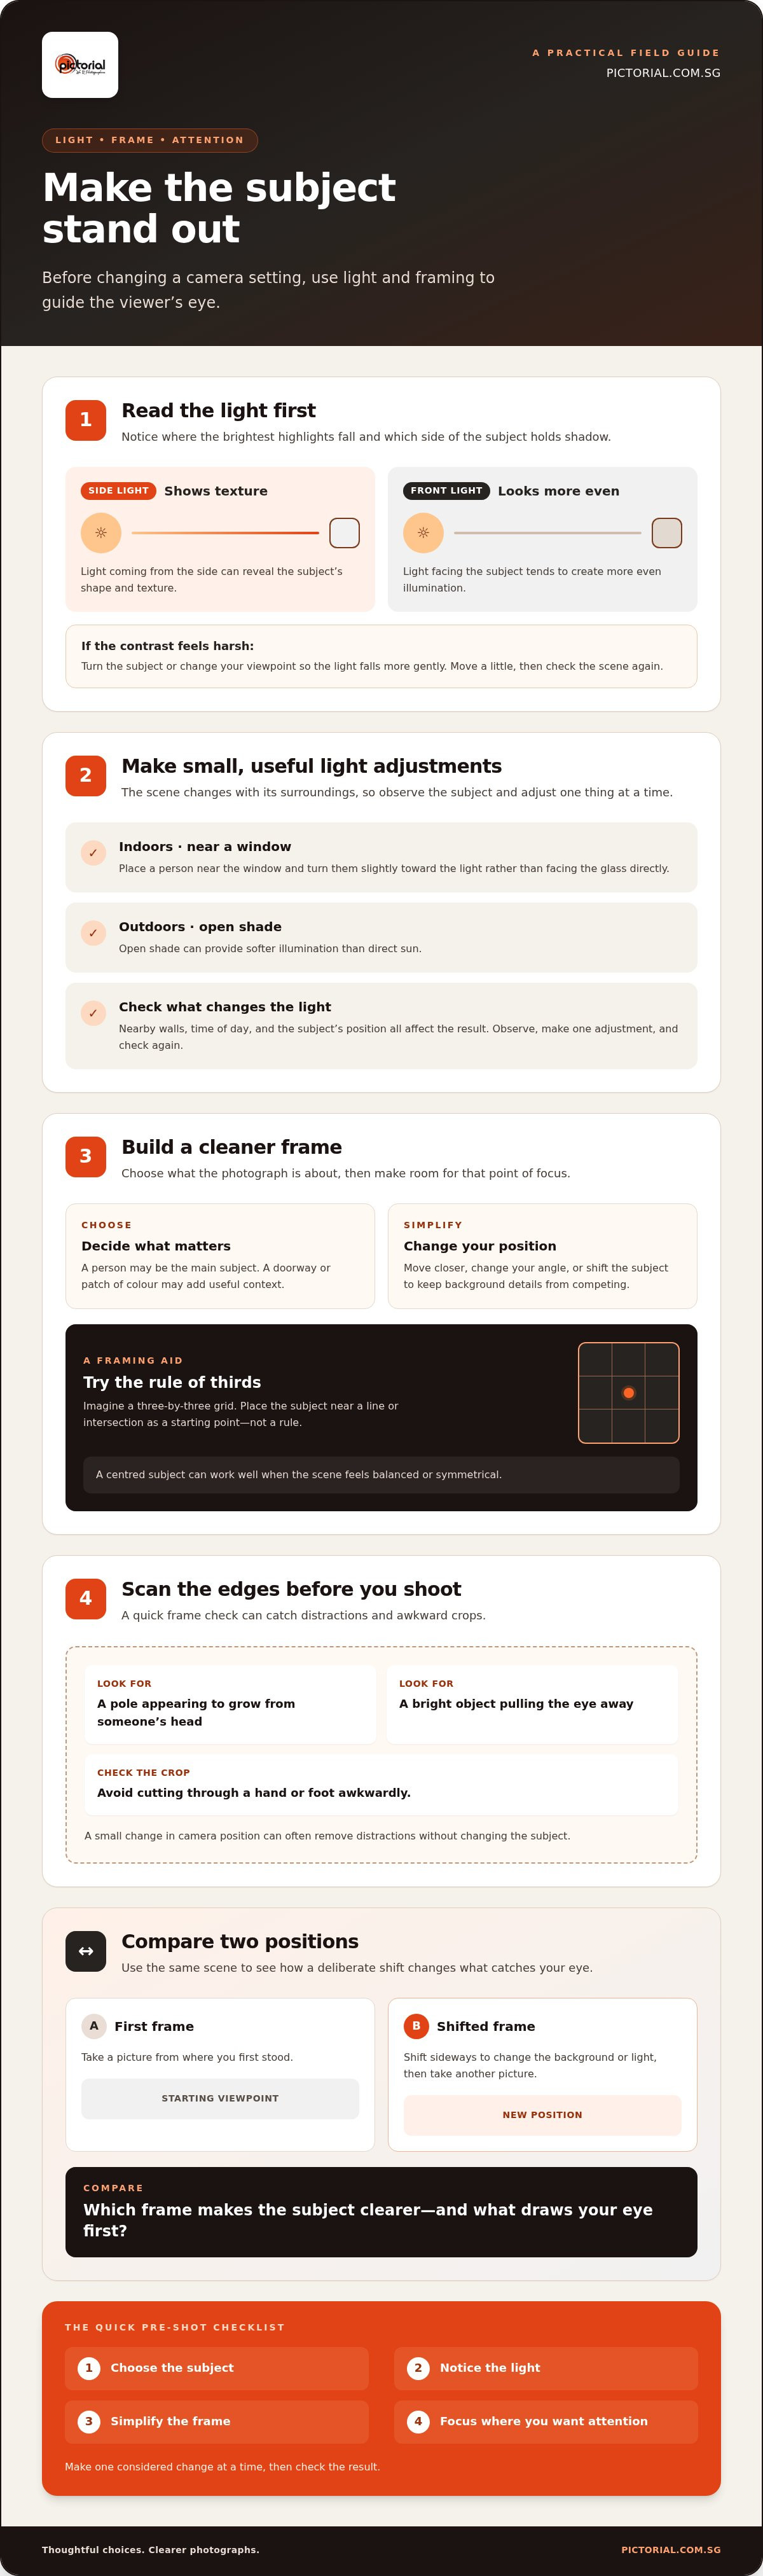
Notice where the brightest highlights fall and which side of the subject holds shadow. Light coming from the side can reveal texture, while light facing the subject tends to look more even. If the contrast feels harsh, turn the subject or change your viewpoint so the light falls more gently. Move a little, then check how the scene looks.
For a simple indoor example, place a person near a window and turn them slightly toward the light rather than facing the glass directly. Outdoors, open shade can provide softer illumination than direct sun. The result will vary: nearby walls, the time of day, and the subject’s position all affect the light. Observe the face or object, make one adjustment, and check again.
Compose a frame with a clear point of focus
Decide what the photograph is about before choosing what else belongs in it. A person may be the main subject, while a doorway or a patch of colour could add useful context. Move closer, change your angle, or shift the subject’s position to keep background details from competing with that point of focus.
The rule of thirds can help you try a less centred arrangement. Imagine the frame divided into a three-by-three grid, then place the subject near one of the lines or intersections. Treat it as a starting point, not a rule. A centred subject can work well when the scene feels balanced or symmetrical.
Before taking the picture, scan all four edges of the frame. Check for a pole appearing to grow from someone’s head, a bright object pulling the eye away, or a crop that cuts through a hand or foot awkwardly. A small change in camera position can often remove these distractions without changing the subject.
Try making two frames of the same scene: one from where you first stood, then another after shifting sideways to change the background or light. Compare what draws your eye first. This exercise shows how to take professional looking photos through observation and purposeful choices, rather than by adding more effects.
If you’d like to practise these choices with guidance, the Basic Photography Course covers foundational skills through practical learning.
Choose focus, exposure, and camera control for the scene
After shaping the light and frame, make sure the camera records the part of the scene you mean to show. Focus determines what looks sharp, while exposure affects how bright or dark the photograph appears. You don’t need to master every setting at once. Start by checking these two things on the screen or viewfinder before you take the picture.
Keep the subject sharp and exposure intentional
Choose the important detail first, such as a person’s nearer eye or the lettering on an object. Tap that area on a phone screen, or move the camera’s focus point over it if your camera allows. Check the preview rather than assuming the camera has selected the right thing, especially when several objects sit at different distances.
Next, look at the brightest and darkest parts of the scene. A very bright highlight or deep shadow may lose visible detail. Take a test frame, review it, and make one change at a time. If the subject looks too dark, try adjusting exposure or changing your position so the light falls differently. Separating adjustments makes it easier to see what helped.
When should you leave automatic mode?
Automatic mode is useful while you’re learning to notice what makes a scene work. It lets the camera choose settings as you practise reading the subject, light, and frame. If a photo doesn’t look as expected, review it and identify the issue before changing controls.
Manual control is helpful when you want a specific result and the camera’s automatic choices keep getting in the way. You might want a faster shutter speed to reduce motion blur, or a particular aperture to control how much of the scene looks sharp. Use manual control when you have a reason to take charge, not because it’s automatically more professional.
Consider a person standing in shade with a bright window behind them. The camera may expose for the window, leaving the person too dark, or brighten the person and lose detail outside. Try adjusting the exposure compensation control, if your camera has one, or change the angle so the bright background occupies less of the frame. Review the result and decide whether the person or the window matters more to the photograph. One clear priority helps guide your next adjustment.
You don’t need to get it right on the first try. Take a frame, inspect the focus and brightness, then make a single change and photograph the scene again. This steady process helps you learn how your camera responds without turning every shot into a settings puzzle.
To take professional looking photos, choose the control that serves the picture you want. Let automation handle routine decisions when it’s working well, and take manual control when a particular creative choice calls for it. With practice, you’ll recognise when each approach is useful and spend less time guessing.
Follow a simple before-and-after-shooting checklist
A repeatable routine gives you something steady to rely on when a scene catches your eye. Rather than adjusting several things at once, work through the same small sequence, take a few frames from different positions, and review what changed. Each photograph can then teach you something to use in the next scene.
Use the five-step routine in any scene
Name the subject, check the light, simplify the frame, confirm focus, then review the result. Keep this five-part routine in mind whether you’re photographing a friend, a plate of food, or a street scene. It helps you make one decision at a time without memorising a long list of camera settings.
- Choose the subject. Say what the photograph is about and what you want viewers to notice first.
- Inspect the light. Look at its direction and whether highlights or shadows distract from the subject.
- Simplify the frame. Reposition yourself or the subject to reduce visual clutter.
- Confirm focus. Check that the important detail looks sharp in the preview.
- Take and review. Make the photograph, then look for one thing to keep or improve.
For the next frame, change your position rather than adjusting everything. A step to the side might clean up the background; moving closer might make the subject more prominent. Take a few variations, then compare them to see which choice made the biggest difference.
Practise deliberately instead of taking more random shots
Give a short practice session one clear purpose, such as keeping the frame uncluttered. Choose one subject and photograph it from several viewpoints. Compare how distance, angle, and background affect the result while leaving other choices alone. This focused approach makes it easier to spot progress and build on it. A practical guide to improving your photography skills can also help you plan what to practise next.
After a shoot, review a small selection of images rather than scrolling without a goal. Ask yourself: Is the subject clear? Did anything at the edges pull attention away? Is the focus where I intended? Choose one answer to guide your next attempt. If the subject is strong but the frame feels busy, make cleaner framing your next practice goal.
Over time, this cycle of choosing, checking, photographing, and learning can make how to take professional looking photos feel less like guesswork. You’ll build a clearer sense of which decisions help a scene and which ones you can leave alone.
Explore practical photography courses
Build confidence through guided photography practice
Practising alone helps you learn your camera, but it can be harder to notice habits you repeat without thinking. You might keep centring every subject, overlook a distracting edge, or focus on the background instead of the detail that matters. Feedback from someone experienced can help you see these patterns. Repeating the same choices with real scenes makes it easier to apply what you learn.
Guided practice also gives you room to ask why a photograph feels unclear and try a different approach straight away. Instead of memorising rules in isolation, you can observe, frame, focus, and review with support as you work through the process.
What guided practice can help you work on
With practical guidance, you can practise recognising where attention falls, choosing what belongs in the frame, and handling your camera with more purpose. You don’t need to arrive with technical confidence. Bring your own camera or use the Complimentary camera loan (if needed). The photography courses page outlines options for different experience levels.
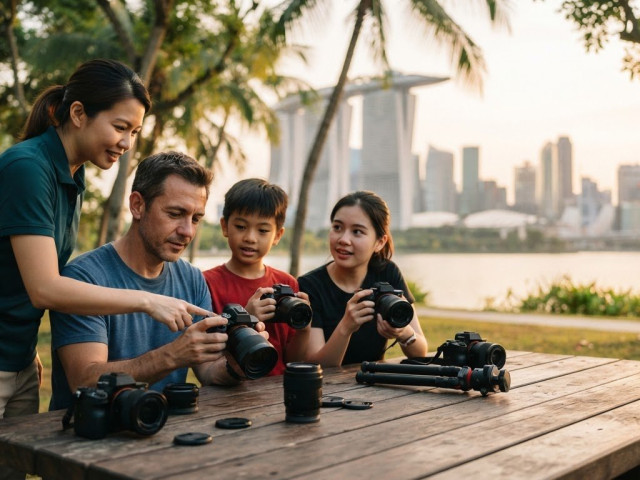
Pictorial’s Photography Starter Session offers hands-on photography instruction in small groups capped at three participants. It is 1 session, 3 hours, for All age, min. 9. Group availability is Monday‑Sunday (11 AM - 2 PM or 2 PM - 5 PM). Private availability is Flexible daily 8 AM - 7 PM. The session costs $118 in a group or $208 privately. It includes a Certificate of Completion.
A focused session connects the ideas in this guide to choices you make while photographing. Practise composing a frame, check where focus falls, then review what changed when you shift your position. Small, immediate adjustments make the process easier to understand and repeat on your own.
Take a relaxed next step
You can begin with curiosity, not a long list of technical skills. Notice what draws your eye in a scene, make a photograph, and stay open to trying another angle. Confidence grows through practice, and feedback can help you recognise progress that’s easy to miss when you’re learning by yourself.
If you’d like a guided place to start, the Photography Starter Session gives you time to practise with real scenes at a comfortable pace. Focus on the choices that matter most to you, then carry those habits into your next photo.
Make your next photograph a deliberate one
You don’t need to wait until you feel like an expert to make a more considered photograph. Pick a subject that interests you, slow down for a moment, and treat each frame as a chance to notice what works. That steady curiosity is a practical way to keep building confidence with the camera you already have.
If you’d benefit from learning alongside a guide, Pictorial’s Photography Starter Session offers a place to practise. Founded in 2005 and led by professional photographer Keith, Pictorial has taught more than 20,000 students. Classes are capped at three participants, so there’s room to work through questions while you practise. A guided session can help you turn ideas about how to take professional looking photos into choices you can make for yourself.
Keep your first step simple. Each time you pick up your camera, you’ll have another opportunity to see more clearly and make a photograph with intention.
Frequently Asked Questions
How can I make my photos look professional without editing?
Make the important decisions before you take the picture. Wipe smudges from your lens, avoid digital zoom when it makes details look soft, and wait for a moment when your subject looks natural rather than rushed. If you’re photographing food, clear away packaging and unused cutlery before framing the dish. A tidy setup and a well-timed shot can make the original image feel finished without relying on editing.
Do I need an expensive camera to take professional-looking photos?
No, you can create thoughtful images with a phone or a basic camera. More advanced equipment can help in specific situations, such as photographing fast action or working in dim conditions, but it won’t choose the right moment or point of view for you. Learn what your current device handles well. In bright daylight, for example, it may capture a moving person more clearly than it could indoors.
What is the easiest way to improve a photo before taking it?
Clean your camera or phone lens. Fingerprints and dust can soften details or create a hazy look, especially when a bright light is in the frame. Use a soft lens cloth, then take a quick test photo and inspect it. This simple check is easy to overlook, but it can improve clarity without changing any settings. Avoid wiping a lens with rough fabric, which may scratch its surface.
How do I make my subject stand out in a photo?
Use contrast to help separate your subject from its surroundings. A person wearing a light-coloured top may be easier to distinguish against a darker wall than a pale one. You can also use a natural frame, such as a doorway, to draw attention inward. Check that the colours or shapes around the subject support the image rather than competing with it, and adjust your position if they blend together.
Should I use manual mode for professional-looking photos?
Not necessarily. Manual mode is useful when you want consistent control over a setting, such as keeping a particular shutter speed for repeated action shots. For everyday scenes, an automatic or semi-automatic mode may be quicker and let you concentrate on timing. If you try manual mode, change one control at a time and take a test frame. That makes it easier to understand how each choice affects the result.
Can I take professional-looking photos with my phone?
Yes. Use the main camera lens for the clearest everyday results, and move closer instead of pinching to zoom when you can do so safely. On many phones, tapping your subject sets the focus point; holding your finger there may lock focus and exposure. This can help if the framing is right but the phone keeps shifting its attention. Keep the phone steady as you press the shutter.
How can I practise photography if I am a complete beginner?
Choose one familiar subject and photograph it in different conditions, such as beside a window in the morning and later in the day. Keep brief notes about what changed, then compare the images side by side. Look for one difference you can explain, rather than judging every photo as a success or failure. If you prefer structure, Pictorial’s Photography Starter Session offers hands-on instruction and practical outdoor shooting to give you a starting point for practice.

Disclaimer
© Pictorial | All Rights Reserved.