
How to Build and Update a Photography Portfolio as Your Work Develops
A polished online gallery is useful, but a printed portfolio gives an in-person meeting something tangible to discuss. Building a photography portfolio from scratch starts with a focused selection of images that shows what you do well, then presents that work consistently online and in print. The strongest portfolio feels considered, not crowded.
It’s understandable to feel unsure about which photographs deserve a place, especially as your skills and interests change. A clear process makes those choices easier and helps your portfolio reflect the photographer you’re becoming. You’ll learn how to choose opening and closing images, arrange photographs into a natural sequence, create a simple portfolio website and prepare print copies for meetings. You’ll also see how to review and refresh your work without rebuilding the portfolio every time you take a stronger photograph.
Key Takeaways
- Choose an opening image that draws people in and a closing image that leaves a clear impression; arrange the photographs between them so the sequence feels connected.
- Review your selection with fresh eyes as your skills develop, replacing weaker images when stronger work better reflects your direction.
- Build a focused website that makes your best photographs easy to find and view, with clear sections for the work you want to show.
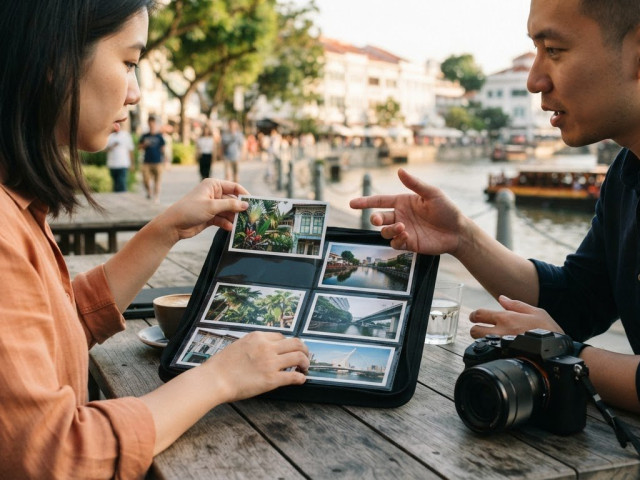
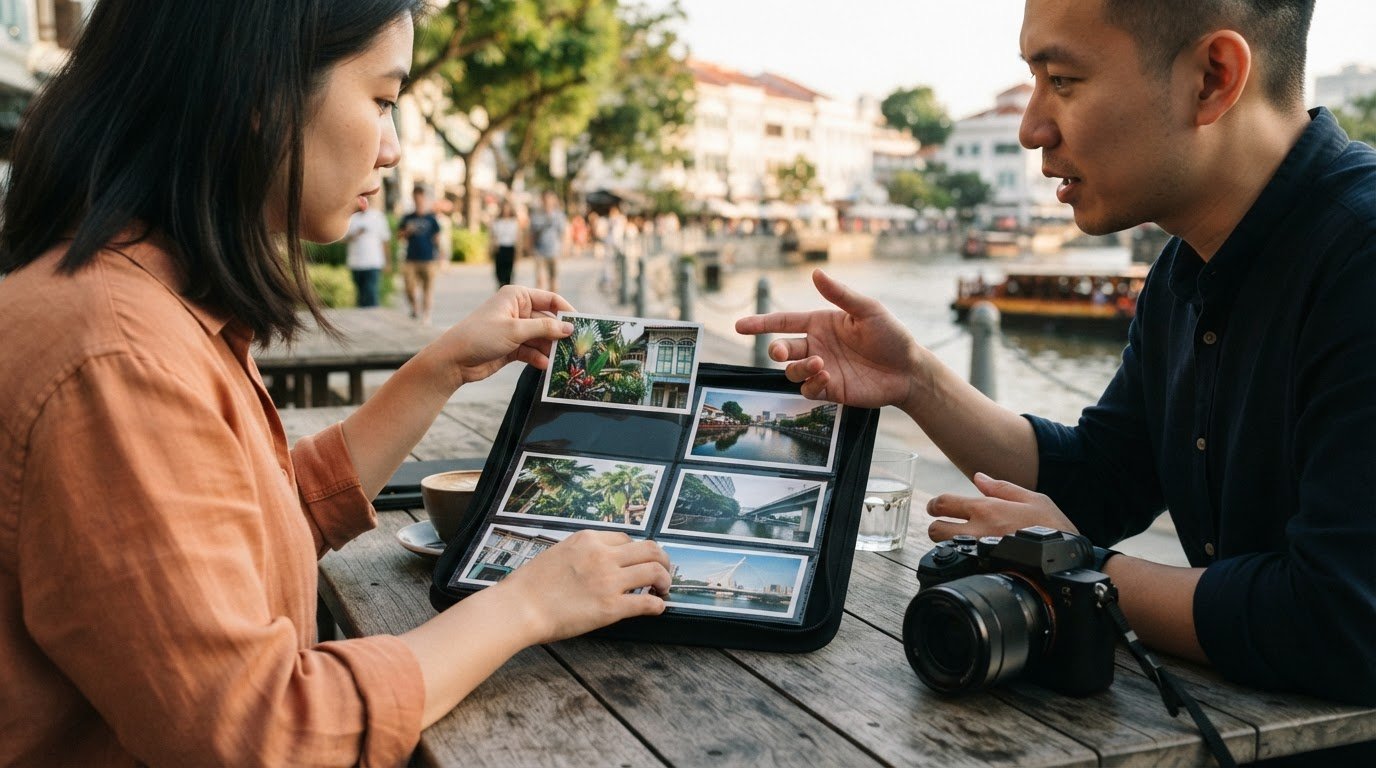
- Bring printed photographs to in-person meetings so you can guide someone through your work without relying only on a screen.
- Use the camera and experience you have to make deliberate images, then practise and learn as your portfolio grows.
Choosing impactful opening and closing images
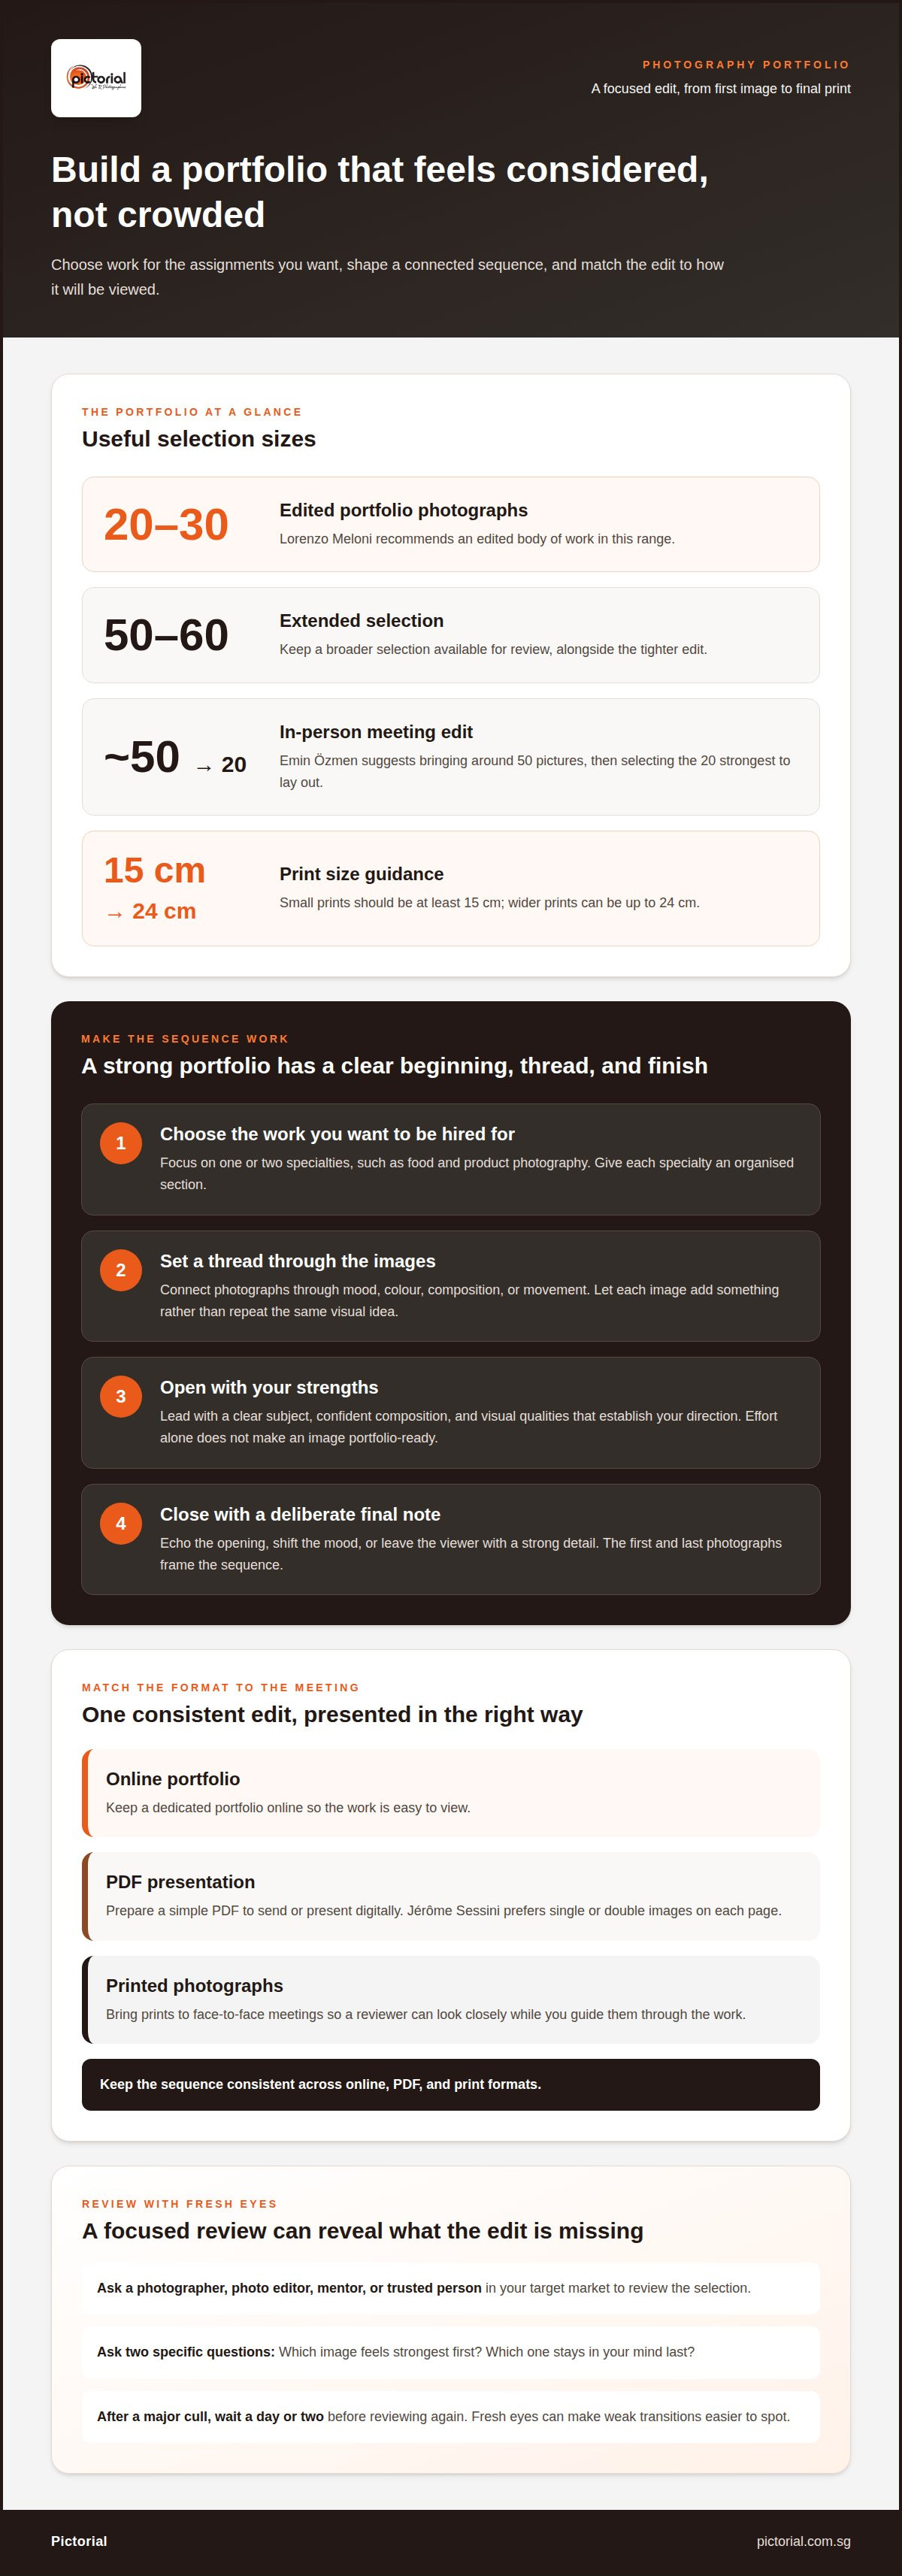
- Choose the work you want to be hired for. A portfolio is a sales tool, so identify the type of photography you want to offer before selecting images. Focus on one or two specialties, such as food and product photography, and give each an organised section. This keeps the collection clear while showing the kinds of assignments you want to pursue.
- Set a clear thread for the sequence. Arrange photographs around a shared quality, such as mood, colour, composition or movement. A portfolio can establish one theme while exploring it in varied, unexpected ways. For example, a series about street life might move from quiet scenes to busier moments. Each image should add something rather than repeat the same visual idea.
- Lead with an image that makes your strengths easy to see. Choose a photograph with a clear subject, confident composition and the visual qualities you want associated with your work. It should establish your direction quickly. Don’t choose an image only because it took unusual effort to make. A difficult shoot doesn’t make a photograph portfolio-ready if the image itself feels weak.
- End with a photograph that gives the sequence a final note. The closing image should feel like a deliberate finish, not simply the last file you reviewed. Look for a photograph that echoes the opening image, shifts the mood or leaves the viewer with a strong detail. Together, the first and last photographs frame the work and help the sequence feel complete.
- Choose a practical size for each presentation. Lorenzo Meloni recommends an edited body of 20 to 30 photographs, with an extended selection of 50 to 60 available for review. For an in-person meeting, Emin Özmen suggests bringing around 50 pictures, then selecting 20 strongest images to lay out. Small prints should be at least 15 cm, with wider prints up to 24 cm.
- Match the format to the meeting. Keep a dedicated online portfolio for easy viewing, and prepare a simple PDF to send or present digitally. Jérôme Sessini prefers single or double images on each PDF page. For face-to-face meetings, bring print copies so the reviewer can look closely as you guide them through the work. Keep the sequence consistent across formats.
- Ask for a focused review, then edit again. Invite a photographer, photo editor, mentor or trusted person in your target market to review your selection. Ask which image feels strongest first and which one stays in their mind last. After a major cull, wait a day or two before reviewing again. Fresh eyes can make weak transitions easier to spot.
Updating the portfolio as work develops
- Review the portfolio against your current direction. At each update, ask what kind of work you want the collection to represent now. Compare recent photographs with the images already shown. If you’ve shifted from landscapes to street scenes, for example, decide whether the older work supports that direction or distracts from it. Keep photographs that demonstrate the skills you want people to notice.
- Look for change in your photographs, not just new subjects. A developing style may take months or even years of shooting to emerge. Compare images made in different conditions and notice recurring choices, such as soft window light, close framing or muted colour. These patterns can help you recognise a point of view that may not be obvious in a single photograph.
- Use a simple rating system to sort a large archive. Photographer Nick Dale uses a Top 100 collection to keep track of favourite photographs. A similar shortlist can help you identify work worth considering without adding every recent image to your portfolio. Give each photograph a clear reason for its place, such as strong composition, distinct atmosphere or a subject you want to pursue.
- Separate personal favourites from work suited to a particular purpose. Nick Dale rates two-star photographs as his best non-wildlife shots, three-star images as good enough to submit to stock agencies for potential sale, and four-star photographs as his favourite sellable shots. His labels show how one photographer sorts images by purpose. Choose your own criteria and apply them consistently.
- Remove images that no longer support the collection. An older photograph may still matter to you, but it need not stay in the public portfolio if newer work shows your abilities more clearly. Move it to an archive instead of deleting it. For example, keep an early portrait series privately while featuring later portraits with more consistent lighting and framing.
- Make each update a deliberate edit. Add new work when it strengthens the portfolio’s direction, not simply because it is recent. Revisit the collection after a meaningful project or a clear change in your approach. If a new image repeats an idea already shown, use the stronger example. If it adds a fresh perspective, adjust the sequence around it.
- Keep a record of what changed. Note which photographs you added, removed or moved, and why. After several updates, these notes can reveal how your interests and visual choices have shifted. A record also helps you avoid cycling the same image in and out without a clear reason. Let the work develop, then let the portfolio reflect that development.
Building a portfolio website
- Give the site one clear job. Make it easy for visitors to understand what you photograph and view your work. For example, a food photographer can make food images the main focus instead of mixing them with unrelated travel snapshots. A portfolio website should support the photographs, not compete with them. Keep the first screen uncluttered so visitors can reach the work quickly.
- Create a direct route to the photographs. Use plain navigation labels such as “Work,” “About” and “Contact.” Group related projects under clear names, such as “Street Photography” or “Food.” Visitors should be able to open a gallery without guessing where it is. Keep the main menu consistent across pages so moving between projects feels straightforward.
- Prepare image files for the web. Export photographs as sRGB JPEGs, a practical format for online viewing. Photographer Nick Dale uses images measuring 2500 pixels on the long side. Keep a full-resolution original separately, then use a web-sized copy on the site. This gives you a consistent working file and helps avoid uploading unnecessarily large originals.
- Keep pages light and quick to open. A photography website should ideally load in no more than a second or two. Large image files can slow a page, so resize copies before uploading and avoid placing every photograph on one screen. Test each gallery on a phone as well as a computer. If the first image takes too long to appear, reduce the file size or simplify the page.
- Let each image breathe. Use a clean layout with enough space around photographs, and avoid decorative elements that draw attention away from them. For example, a simple grid can suit related product images, while a larger single-image layout can give a quiet landscape more room. Keep captions short and useful, naming the project or adding context where it helps.
- Make the site comfortable to use on a phone. Check that photographs fit the screen, menu labels remain readable and links are easy to tap. Visitors viewing a portrait on a phone shouldn’t need to zoom repeatedly. Review each page at different screen sizes, then adjust image crops and spacing where they disrupt the viewing experience.
- Check the whole visitor path before publishing. Open the homepage, select a gallery, view several photographs and follow the contact link. Make sure each page leads naturally to the next and that no image appears stretched or incorrectly cropped. After adding new work, repeat this short test. A consistent look across the website makes updates feel considered rather than improvised.
How can I create portfolio-quality photos with limited equipment or experience?
- Choose one subject you can photograph repeatedly. A familiar subject gives you room to practise framing, focus and light without complicated logistics. Try a bowl of fruit near a window, a friend’s favourite object or a neighbour’s cat with its owner’s permission. Make several photographs from different angles, then compare which choices communicate the subject most clearly.
- Work with people and businesses already within reach. Ask friends to model, or photograph their children or pets with appropriate permission. You can also approach a new business about making product photographs in exchange for portfolio images. Agree on which photographs will be made and how they may be used before the shoot, so expectations are clear.
- Use available light deliberately. Place a subject beside a window and observe how the light changes across its face or surface. Turn the subject until shadows add shape instead of hiding important details. For a portrait, compare side light with softer light facing the window. You don’t need extra equipment to learn what each position does.
- Make a small plan before pressing the shutter. Decide what the photograph should show, then simplify the background and move distracting objects. For a product image, clear the table and check the edges of the frame. For a portrait, ask the subject to turn slightly toward the light. These choices help you take control before making technical adjustments.
- Practise one camera control at a time. Start by holding the framing steady and focusing on the intended subject. Then observe how changing exposure affects the result, rather than adjusting several settings without a clear purpose. A phone camera can also support careful practice: tap the subject to focus, hold the phone still and check the background before taking the photograph.
- Build a short sequence from each practice session. Photograph one subject as a wide view, a closer view and a detail. For a small café, that might mean the counter, a prepared drink and its texture. The three perspectives can show observation and variety without requiring a new camera or location. Keep only frames that add something distinct.
- Develop a consistent way of seeing. A personal style can come through in how you light subjects and process photographs. For example, you might favour side light and restrained colour across a set of still-life images. Use post-processing to support those choices, not to rescue every frame. Review the original and finished versions to see whether your decisions strengthen the photograph.
- Choose portfolio images for their result, not their difficulty. A photograph made with simple equipment can still show strong timing, composition or attention to light. Set the effort of the shoot aside and ask whether the image holds attention on its own. If a portrait has a distracting background or unclear focal point, practise that specific skill before adding another portrait to the collection.
Creating a dedicated online portfolio
- Give your portfolio its own focused page. A dedicated page makes it easier for someone building a photography portfolio from scratch to present selected work without unrelated posts or personal updates. For example, use it as the main destination for clients reviewing your food photography. Keep the purpose clear: this page is for showing photographs.
- Limit the page to work you’re proud to show. Photographer Nick Dale keeps an online portfolio of 36 photographs. Treat that as one working example, not a required target. Choose a collection that feels complete and gives each image room to contribute. Avoid adding photographs simply to make the page longer.
- Focus the collection on one or two specialties. Organise separate sections for areas such as portraits and food photography. This helps visitors understand what you do without sorting through unrelated subjects. If you’re still exploring, lead with the specialty that best represents your current work, then keep other subjects distinct.
- Make each section feel like a considered body of work. Within a portraits section, include varied settings and expressions while keeping the overall approach recognisable. Avoid adding photographs just to increase the count. A shorter set with a clear point of view is easier to follow than a mixed gallery without a visible connection.
- Use consistent visual choices across the portfolio. Keep colour, spacing and presentation aligned with the photographs. If your work uses soft natural light and muted tones, a loud page design may compete with it. Building a photography portfolio from scratch also means creating a consistent identity across your website and physical presentation.
- Give every section a useful label. Use straightforward names such as “Portraits,” “Food” or “Street.” Visitors should know what a gallery contains before opening it. If a project has a specific idea, add a brief title that clarifies its subject, then let the photographs carry the story.
- Review the page as a first-time visitor. Open the portfolio and ask whether the first section clearly shows your direction. Then move through each gallery and notice where the work feels repetitive or disconnected. If visitors must guess which images belong together, revise the section labels or separate the projects.
- Keep the online collection in step with your printed work. When you replace an image online, update the corresponding print selection at the same time. A simple note listing each added or removed photograph can prevent the two versions from drifting apart.
Pictorial
Pictorial can help you strengthen the photography skills behind a more considered portfolio. Its courses combine practical outdoor guidance with small-group learning, giving you opportunities to practise camera settings, composition and working with light. If you’re starting out, the Photography Starter Session offers a practical introduction. If you already have experience, the Intermediate Photography Course can support your next stage of learning. Structured practice and guidance can help you build skills to apply on your own shoots as you make and refine portfolio photographs.
Contact Pictorial to discuss your photography learning goals.
Let your next photographs shape the next version
Your portfolio doesn’t need to define your entire future as a photographer. Treat it as a working record of what you notice, practise and want to explore next. Building a photography portfolio from scratch is a starting point, not a test you must pass before sharing your work. Choose one skill to develop on your next shoot, then let the photographs show what you learned.
If guided practice would help you take the next step, Pictorial offers the Photography Starter Session, Intermediate Photography Course and Mobile Photography Essentials. Each supports a different stage or way of learning as you develop your photography. Choose the course that fits the skills you want to build now.
Keep making photographs, stay curious about what works, and give your portfolio room to grow with you.
Frequently Asked Questions
How do I choose a photography portfolio niche and target audience?
Choose a niche by connecting the photographs you enjoy making with the people who may need them. For example, if you often photograph dishes and ingredients, consider whether restaurants, food brands or recipe publishers are your intended audience. Think about the assignments you want to attract, then make the portfolio speak to that viewer. A clear focus helps someone quickly understand why your work suits their project.
How many photos should a photography portfolio include?
There’s no universal number, but 36 photographs can serve as one example of a compact online collection. Photographer Nick Dale uses that many in his online portfolio. Treat the figure as a reference, not a rule. Include enough images to show range within your specialty, while removing frames that feel repetitive. If a potential client asks to see a particular project, keep related work ready separately.
How do I select and sequence images for a strong photography portfolio?
Select photographs that show both dependable technique and your way of seeing. Then check how neighbouring images interact. For example, a close portrait followed by a wider environmental portrait can shift scale while keeping the subject connected. Avoid placing several images with identical framing together, even if each is strong on its own. Review the sequence on screen and in print, since image size can change how a transition feels.
What are the best free and paid platforms for hosting a photography portfolio?
The best option depends on whether you need a simple gallery or a customisable website. Free hosting can suit an early collection, while a paid platform may offer more control over layout, domain and site presentation. Before choosing, test how photographs appear on phones, how quickly galleries load and how easily you can replace images. Compare current features and costs directly, since plans and included tools can change.
What should a photography portfolio website include, such as an about page, pricing, and contact details?
Include a focused gallery, a short about page and a clear way to contact you. An about page can explain your approach and the subjects you photograph in plain language, without a long biography. If you publish pricing, clarify what each rate covers and how clients can request a tailored quote. Make contact details easy to find so someone interested in a specific project can take the next step.
How often should I update my photography portfolio, and what common mistakes should I avoid?
Review your portfolio after completing a project or noticing a change in your photographic direction. Update it when new work strengthens the collection, rather than following an arbitrary calendar. Common mistakes include keeping images only because they took effort, mixing unrelated specialties in one gallery and leaving outdated contact details online. After each edit, test the links and check that the photographs still represent the assignments you want.

Disclaimer
© Pictorial | All Rights Reserved.