
Natural Light Photography: How to Work With Changing Conditions
The best natural light isn’t always golden-hour light. Effective natural light photography techniques begin with noticing where sunlight comes from, how strong it is and how clouds affect it. Direct sun can create hard shadows, while cloud cover softens the light and makes it more even.
If changing conditions make exposure feel unpredictable, that’s a normal part of photographing outdoors. Observe the scene and adjust your camera to suit the light, rather than expecting the light to stay the same.
This guide explains how natural light works, how to meter dramatic scenes at sunrise or sunset, and how to use shifting conditions in landscape photography. You’ll also learn what to look for in golden hour, midday, blue hour, and overcast weather, so you can make deliberate choices with the light available in Singapore.
Key Takeaways
- Read the direction and quality of light before choosing where to position your subject; clouds soften sunlight, while nearby surfaces can bounce light back into shadows.
- In dramatic sunrise and sunset scenes, use partial or spot metering and take several frames to compare exposure.
- Choose your approach for the conditions: golden hour brings warmer, softer light, while midday sun can create strong contrast and overcast skies soften shadows.
- Watch how colour shifts between direct sun, shade and cloud cover, then use white balance to keep the scene’s tones intentional.
- For landscapes, look for changing cloud shadows, mist, leading lines and the meeting points of light and shade to build depth and guide the eye.
1. What Is Natural Light Photography and How Does It Work?
Natural light photography uses sunlight as its source, whether it reaches the subject directly or indirectly. While shooting, look for three forms: direct sunlight, diffuse skylight and bounced light. Direct sun creates defined shadows and strong highlights. Clouds spread sunlight across the sky, softening shadows. A pale wall can bounce light onto a face and lift shadows without another lamp.
Light direction changes the result. Front light reaches the subject from behind the camera and can reveal colour evenly, though it may flatten facial features. Side light comes from the left or right, shaping portraits with visible highlights and shadows. Backlighting places the brightest source behind the subject, creating a rim around hair or a silhouette when you expose for the background.
For portraits, look for one clear direction of light rather than bright light arriving from every side. Position someone beside a wall or at the edge of a building’s shade, then watch how light falls across their face. A white wall opposite the subject can softly fill the shadow side. This balance gives you control over the mood without losing the shape created by side light.
To find directional natural light, scan nearby surfaces before raising your camera. A tree trunk, pavement or building wall can show where sunlight comes from and whether it is hard or softened. For an outdoor portrait, move the subject a few steps at a time between open sun and shade. Compare how each position changes the shadows around the eyes, skin highlights and background.
Natural light gives an immediate, natural-looking result with little setup, but its intensity and direction change with clouds and time. Artificial light is more consistent, while natural-light exposure may require a higher ISO, which can introduce image noise or grain.
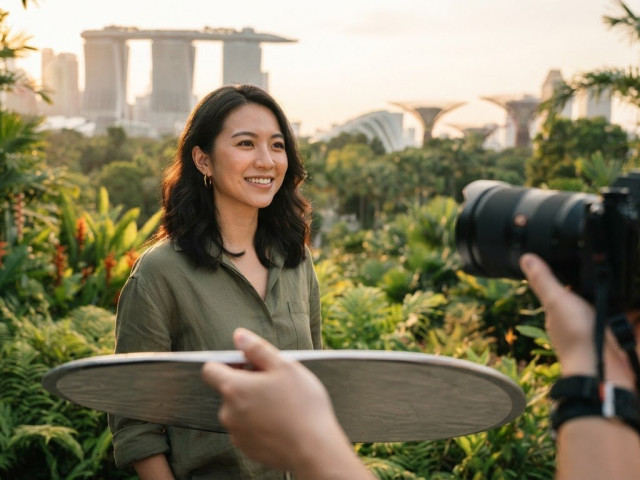
Place a diffuser between direct sun and the subject to soften harsh highlights. Hold a reflector opposite the light source to bounce light into shadows; a white board can work as a simple substitute. Keep both outside the frame, and check the face after each adjustment.
Useful beginner gear includes a camera or phone with exposure controls, a camera or lens you can hold steadily, and a simple white reflector. You can start without buying modifiers: a nearby pale wall can bounce light, while cloud cover can act as a broad diffuser.
In Singapore, practise in an accessible spot such as a shaded walkway or beside a bright window. Follow posted signs and property instructions, avoid blocking pathways, and ask before photographing people closely. For a first portrait, find open shade, check the light direction, then make a test frame.
2. Exposure and metering in dramatic light
Sunrise and sunset can put a bright sky beside a much darker subject, challenging the camera’s automatic exposure. The meter tries to make the scene neutral, which can wash out delicate twilight colours or leave a face too dark. Before adjusting exposure, decide what matters most in the frame: the sky, the subject’s skin or detail in both.
For a dramatic scene, switch to partial or spot metering and place the metering area over the part you want to expose carefully. If the sky’s colour is the priority, meter a bright section that still holds detail. For a portrait, meter the subject’s face rather than letting a bright background dominate the reading. Take several frames at different exposure settings, then compare the highlights and shadows.
Skin tones need a deliberate check. In backlit portraits, the camera may expose for the bright sunlight behind the subject, leaving the face too dark. Move the metering point onto the face, or add exposure until the skin looks natural while retaining detail in bright areas. Review the image on the camera screen and check the histogram if available, because a small display can make highlights look less severe than they are.
Aperture Priority is a useful starting mode for portraits. Choose the aperture and ISO, and the camera selects a shutter speed to match the light. For natural-light portraits, a low ISO around 100 helps limit image noise, while a shutter speed of about 1/160 seconds or faster helps reduce blur from camera shake or subject movement. Watch the shutter-speed reading as clouds pass or the subject moves.
Manual exposure gives you direct control when the light stays steady. Set the aperture for your preferred depth of field, choose a shutter speed that keeps the subject sharp, then adjust ISO until the exposure is suitable. If the light changes, reassess the meter and take a new test frame rather than assuming the previous settings still work.
- Protect the sky: Lower exposure if bright areas lose colour or texture.
- Prioritise the face: Meter skin in backlight, then check the background highlights.
- Compare exposures: Make several frames at sunrise or sunset to guard against a misleading meter reading.
For a soft, dreamy portrait, aim for a background about one to two stops darker than the subject. This separation keeps attention on the face without making the surroundings disappear. If a test frame looks too bright, reduce exposure and try again. If the face loses detail, meter on the skin again before reshooting.
3. Golden hour, midday, blue hour and overcast conditions
Time and weather change both the strength and colour of natural light. Golden hour is the hour just after sunrise and just before sunset, when sunlight appears warmer and softer. Twilight, dawn and dusk usually describe the half hour before sunrise or after sunset. These periods offer different conditions to work with, rather than one fixed look.
During golden hour, position your subject so low sunlight reaches them from the side or behind. Side light can add shape and contrast to a portrait, while backlight can create a bright edge around hair. For a flattering face, turn the subject slightly towards the light and check for deep shadows beneath the eyes. Warm colour can suit a calm, dramatic scene, but may also cast a strong orange tone across neutral surfaces.
At clear midday, sunlight is intense, hard and relatively neutral in colour. It can produce sharp shadows and high contrast, which may feel less flattering in a portrait. Move someone into open shade, or use the contrast deliberately for a black-and-white street photograph. In direct sun, look for graphic shapes on a wall or pavement rather than expecting soft, even light.
Blue hour brings a cooler cast, with light around 8000-10,000 K. The sky can hold colour after sunset, but ambient light is scarce, so handheld photographs are rarely possible. For a city scene, brace your camera on a stable surface or use a tripod, then keep the frame still as you make an exposure. Twilight colours are delicate; avoid letting automatic exposure brighten them until the scene looks like daylight.
Bright overcast weather spreads light across the sky and softens shadows, making it useful for outdoor portraits and wildlife. In Singapore, changing cloud cover can alter a scene while you shoot, so check the subject’s face and background after each shift. Gray skies often add little to a composition; frame them out unless their texture gives the photograph a clear mood.
To manage changing natural light, keep your camera settings consistent while the light holds, then review exposure when clouds pass or the sun drops. Take a test frame after each visible change, and adjust exposure if highlights lose detail or shadows become too dark. This simple cycle helps you respond to the weather without losing the moment.

4. Types and colour temperatures of natural light
Colour temperature describes whether light appears warm, neutral or cool, and cameras record these shifts as colour casts. It is measured in kelvin, written as K. A lower value looks warmer, with more yellow or orange; a higher value looks cooler, with more blue. Compare a white wall in sunlight and shade to see how the same surface changes colour.
Golden-hour light typically falls around 2000-4000 K, giving outdoor scenes a warm appearance. That warmth can flatter skin and bring a gentle glow to buildings or foliage. It can also make white clothing look cream-coloured. Before capturing a portrait, decide whether that warmth supports the mood, then set white balance to preserve or reduce it.
Neutral daylight is approximately 5500 K. Under clear midday sunlight, this setting gives a useful starting point for colour that looks balanced rather than strongly warm or blue. Check a neutral object, such as a white card, in the same light as your subject. If the card appears orange or blue on screen, adjust white balance before continuing.
Overcast and shaded natural light can range from 6500-10,000 K, so a scene may look cooler than one in direct sun. Clouds and snow can also make light cooler. In Singapore, a subject standing under a covered walkway may receive cooler shade while nearby pavement remains bright in direct sunlight. Metering and white balance can both need attention across that boundary.
Higher colour temperatures of 6000-10,000 K produce cooler, blue tones. Blue shade can suit a quiet or dramatic image, but it may make skin look pale. For a portrait, compare the face with a neutral object in the same light. If both look too blue, choose a warmer white-balance setting or adjust white balance when processing a RAW file.
Trees create another challenge. At midday, leaves can break sunlight into bright patches and deep shadows, creating uneven light across a face. Green foliage may also reflect onto skin and create a green cast. Move the subject into open shade away from the leaf pattern, or find a clear patch of light with an even background.
Before an outdoor session, photograph the same neutral surface in sun, open shade and cloud cover. Compare the frames, then choose a white-balance setting that suits the light and your intended colour. This simple test makes changing colour easier to recognise, especially when a scene shifts between bright sun and cool shade.
Hard natural light can still be useful. Strong shadows can create texture on a wall or dramatic shapes across a street scene. For consistent colour, keep your subject in one type of light rather than mixing sun and shade across their face. This gives you a clearer starting point for capturing the scene.
5. Natural light for landscape photography
Landscape light changes as clouds move, haze lifts or rain passes. Natural light photography techniques for landscapes begin with watching how light reveals depth, not simply waiting for golden hour. A cloud crossing the sun can briefly illuminate one ridge while leaving the foreground in shadow. Compose first, then wait for that patch of light to reach the part of the scene you want viewers to notice.
Partly cloudy weather gives you opportunities to work with moving light. Choose a stable composition, such as a path leading towards a hill, and watch how cloud shadows travel across it. Take a frame when the light balances foreground and background, then compare it with one made moments later. This approach makes changing light part of the image rather than a reason to abandon the scene.
Stormy weather can produce high-contrast scenes because rain clears haze and dust from the air. Look for a bright break in the clouds, then place it against darker land or water for separation. Protect your camera from rain and keep checking the sky’s brightest areas. Include clouds with strong texture; a blank gray sky often adds little to a landscape.
Fog, mist and haze reduce contrast progressively with distance. Use that effect to build depth: place a clear foreground tree or rock against softer shapes farther away. In Singapore, a misty view across a reservoir or park can create layers even without mountains. Keep a leading line, such as a boardwalk or shoreline, in the frame to guide the eye through those layers.
For broad landscape scenes, an aperture of f/8 to f/16 is suggested to keep foreground and background sharp. Focus on a useful point within the scene, then review the edges and distant details. If the light is fading, balance aperture against shutter speed and ISO rather than closing the aperture without checking exposure.
A reflector can bounce light onto a nearby foreground subject, such as a flower or rock, but it rarely controls an entire landscape. Treat the sun, open sky or a bright cloud as the main light source. To balance a bright sky with a darker foreground, frame carefully and decide which part needs detail. A neutral density filter reduces the light entering the camera, helping manage bright conditions when you need a longer exposure.
Look for leading lines and the interplay of light and shadow before pressing the shutter. Take one image with the strongest light on the subject, then another as cloud cover shifts. Practising natural light photography techniques means building your composition around where the light is going, not just where it is now.
Develop practical photography skills for changing outdoor light
Pictorial: Photography Starter Session
Pictorial’s Photography Starter Session is a practical next step if changing light still makes exposure feel uncertain. Beginners get hands-on guidance with core camera controls, including ISO, aperture and shutter speed, and practise applying them outdoors rather than relying on theory alone.
Small groups of up to three participants allow for personalised guidance during practical outdoor shooting. Bring your own camera or use a complimentary loan camera. The session suits anyone looking for a guided introduction before practising natural light independently; learners with more experience may prefer the Intermediate Photography Course.
To explore the session or ask Pictorial a question, visit pictorial.com.sg.
Make the Next Photograph a Practice Session
Your next step doesn’t need to be a carefully planned shoot. Choose one familiar place in Singapore, return when its light changes, and make a small set of photographs with one intention in mind. You might watch how a shaded path looks under passing clouds, or how a bright wall changes the colour of a nearby subject. Comparing those frames helps turn observation into a skill you can use deliberately.
Keep the process simple: notice the light, decide what you want the image to express, and make an adjustment you can learn from. With practice, natural light photography techniques become less about chasing perfect conditions and more about making thoughtful choices with the light in front of you.
If you’d like structured practice, Pictorial offers Mobile Photography Essentials alongside its Photography Starter Session and Intermediate Photography Course.
Each photograph gives you another chance to notice more, adjust with purpose and build confidence behind the camera.
Frequently Asked Questions
What Is Natural Light Photography and How Does It Work?
Natural light photography uses the sun to illuminate a scene, either directly or after clouds, windows or nearby surfaces alter the light. The photographer works with available light by choosing a position and adjusting exposure. For example, compare a person facing a window with someone turned sideways to it. The room stays the same, but the light direction changes facial shadows and the sense of depth.
When is Golden Hour?
Golden hour is the hour just after sunrise and the hour just before sunset. In Singapore, use the local sunrise or sunset time for the day to plan your shoot rather than relying on a fixed clock time. Arrive with your composition in mind, then watch how the warm light moves across buildings, foliage or open ground. Being ready lets you respond as the light changes.
What is natural light photography?
Natural light photography uses sunlight, including daylight filtered through clouds or entering a room through a window. The sun remains the source even when a bright wall reflects its light onto a subject. Work with the light already present: observe its effect, choose where to position yourself and adjust your exposure. A flash isn’t required to make a photograph using natural light.
How does the direction of natural light affect photos?
Light direction affects which parts of a subject appear bright and where shadows fall. Front light can show colour clearly, while side light emphasises shape and texture. Backlighting can separate a subject from the background with a bright edge, or leave the subject dark if you expose for the brighter background. For a portrait, turn the person slightly and compare frames to see how the shape of their face changes.
What camera settings work best for natural light photography?
Choose settings for the subject and the light, rather than relying on one fixed combination. For portraits, a low ISO around 100 and a shutter speed of about 1/160 seconds or faster can help keep images clean and reduce blur. For landscapes, f/8 to f/16 can keep more of the scene in focus. If shooting handheld, use the inverse of the lens’s focal length as a shutter-speed guide, such as 1/50 second with a 50 mm lens.

Disclaimer
© Pictorial | All Rights Reserved.