
Advanced photography course for exposure, composition and lighting
An advanced photography course builds on camera fundamentals, helping you shape exposure, composition, lighting and colour, work with RAW files, and understand how your learning is assessed. The goal is not simply to use more settings, but to make deliberate choices before you take the picture. For the course described here, students can request a certificate after completing all lessons and assignments.
If technical terms or assessment requirements feel daunting, that’s understandable. They become easier to manage when you connect each setting to what you see through the viewfinder and practise applying it in real shooting situations.
This guide explains the core skills involved, including how exposure, composition and light work together, and what motion, colour and RAW files add to your process. It also outlines how assessment and course completion can work, so you can judge whether the learning path suits your goals and what you’re ready to practise next.
Key Takeaways
- Connect aperture, shutter speed and ISO to the light and subject in front of you, then use composition to guide the viewer’s eye.
- Use metering, exposure compensation and the histogram together to spot when a scene may need an exposure adjustment.
- Practise panning and contrast control to handle moving subjects and challenging differences between light and shadow.
- Explore how colour choices shape a photograph’s mood, and how RAW files support a more flexible capture workflow.
- Build confidence with foundational camera settings before tackling landscape and seascape techniques, and understand what course assignments involve.
Photography concepts: exposure, composition and lighting
Advanced photography builds on camera fundamentals by combining exposure choices, composition and light. Practise making each decision with a clear subject or visual effect in mind.
Advanced Composition Techniques
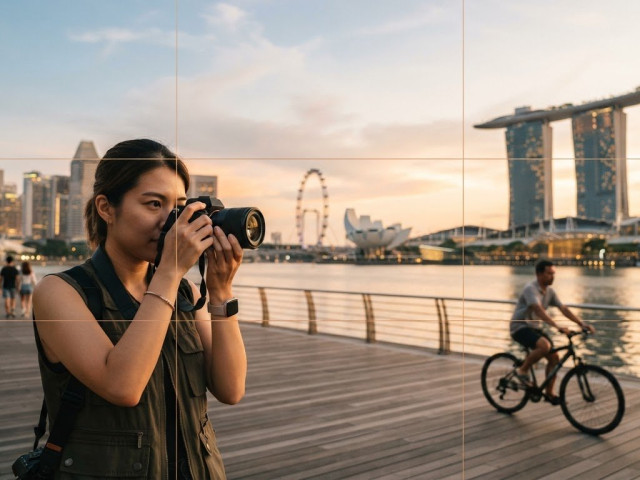
Look beyond placing a subject in the centre. Use foreground elements, lines, framing and negative space to guide the viewer through an image. For example, a path leading towards a person can draw attention to their place in a landscape. In an advanced photography course, assess whether each element strengthens the subject or competes with it.
Landscape and seascape photography rely on camera control. Understand aperture, shutter speed, focal lengths and the f-stop scale, then practise changing one setting at a time. Notice how each choice affects depth, movement and framing.
Composition for Visual Communication
Composition helps a photograph communicate what matters. A close crop can make a detail prominent, while a wider frame can show how the subject relates to its surroundings. Choose the frame to suit the message: a person surrounded by open space may appear isolated, while a tighter view can emphasise expression or action.
During a shoot, check the frame edges and background before pressing the shutter. Bright objects or crossing lines can distract from the subject. A small change in camera position may remove the distraction and make the image easier to read.
Planning Composition and Exposure
Before taking a photograph, decide what should stay sharp, what can fall out of focus and whether movement should appear frozen or blurred. Choose an aperture and shutter speed to support those decisions, then adjust ISO to balance exposure. With a backlit subject, consider how the bright background may affect the camera’s reading of the person.
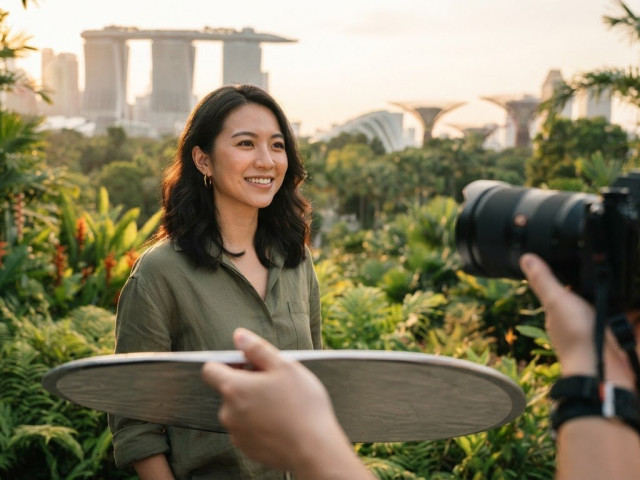
Light changes from one location to another. Practise with natural light and flash, observing how direction and softness affect shape. Side light reveals facial texture differently from even light, while flash can help control a subject against changing surroundings.
A group course follows a planned learning path, while private lessons focus on individual questions and direct guidance. Pictorial offers both group and private photography courses. Choose the format that suits you: a shared learning structure or teaching centred on your specific questions.
Prerequisites depend on the course level. For landscape and seascape modules, learners should already understand aperture, shutter speed, focal lengths and the f-stop scale.
In Singapore, cancellation, refund and attendance rules are set by each course provider. Read the terms for the specific course before enrolling.
Advanced study can develop exposure, composition and lighting skills. Practising with flash and natural light on location also helps you see how different lighting choices affect a subject.
Pictorial offers courses ranging from beginner to advanced levels, as well as mobile photography and broader photography programmes. Compare each course’s level and learning focus with the skills you want to develop.
Pictorial’s hands-on courses include practical outdoor guidance, and a complimentary camera loan is available if needed. You can practise with your own camera or use a loaner camera.
The National Silver Academy subsidy applies to Singaporeans aged 50 and above. Eligible courses must commence on or before 31 March 2027; funding arrangements depend on the course and scheme.
Bring your camera if you have one, along with its battery and memory card. A complimentary camera loan is available if needed, so you can still take part in practical work without your own camera.
For a structured next step in Singapore, the intermediate photography course can help learners build on camera fundamentals through guided practice.
Light metering, exposure compensation and histograms
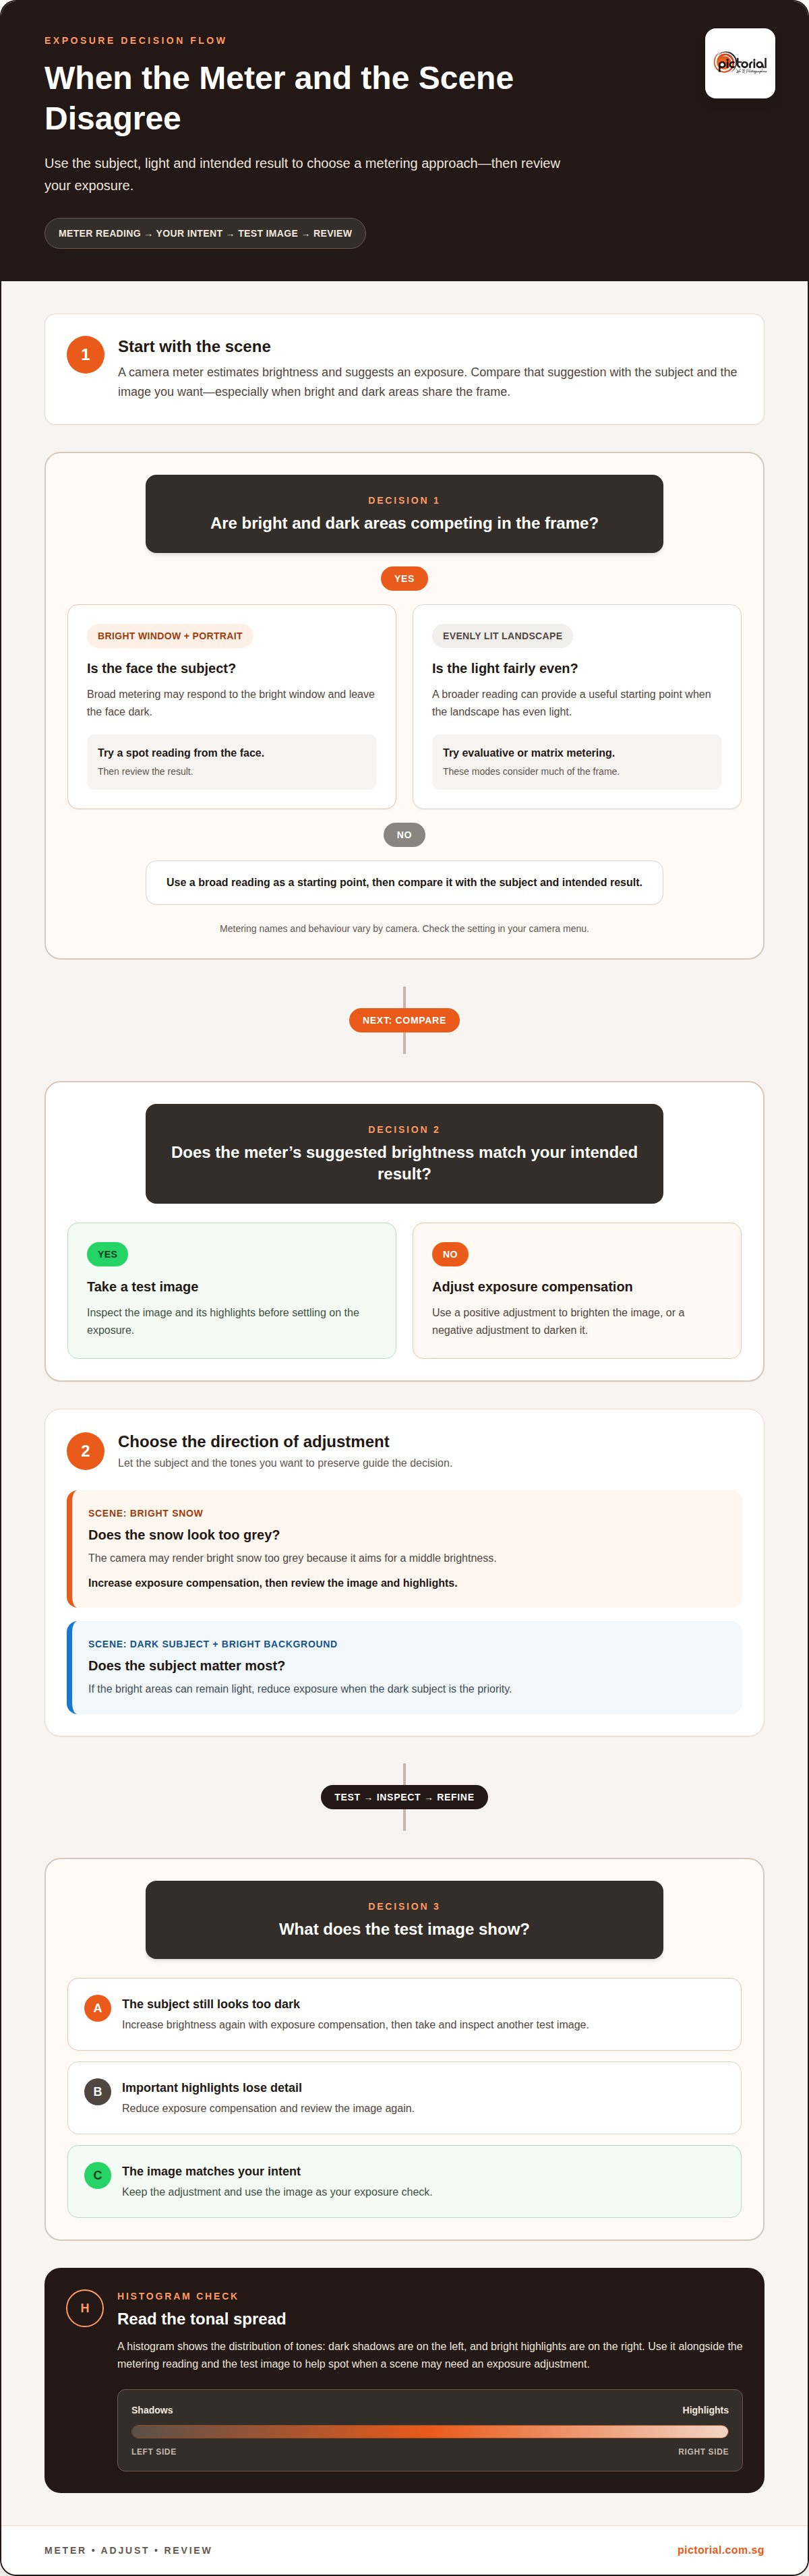
A camera’s meter estimates brightness and suggests an exposure, but the scene should guide your final choice. Compare the reading with the image you want, especially when bright and dark areas share the frame.
Light Metering Methods
Metering modes determine which parts of a scene influence the camera’s exposure reading. Evaluative or matrix metering considers much of the frame, while spot metering measures a smaller area. Names and behaviour vary by camera, so check the setting in your camera menu.
For a portrait against a bright window, broad metering may respond to the window and leave the face dark. Take a spot reading from the face, then review the result. In a landscape with even light, a broader reading can provide a useful starting point. Let the subject and light pattern guide your choice.
Exposure Compensation
Exposure compensation adjusts the camera’s suggested brightness in an automatic or semi-automatic exposure mode. A positive adjustment brightens the image; a negative adjustment darkens it. Use it when the meter reading does not match the subject’s tone or your intended result.
A snow scene is a useful example. A camera may render bright snow too grey because it aims for a middle brightness. Increase exposure compensation, then review the image and highlights. For a dark subject against a bright background, reduce exposure if the subject matters most and the bright areas can remain light.
Make one adjustment, take a test image and inspect it. If the subject still looks too dark, increase brightness again; if important highlights lose detail, reduce it. This review process connects the meter reading to the result you want.
Reading Histograms
A histogram shows the distribution of tones, from dark shadows on the left to bright highlights on the right. A graph crowded against either edge may indicate lost detail in those tones. Check it after a test image, especially in high-contrast light.
The histogram cannot tell you whether an exposure is artistically right. A night scene may contain deep shadows, while a bright beach image may naturally have more highlights. Compare the graph with the photograph on your camera screen and check whether important details remain visible.
Use the histogram as a second check, not as a target shape. If a backlit face looks too dark, adjust exposure compensation and take another image. If bright clouds lose texture, reduce exposure and review the new histogram. Use both the scene and the recorded image to guide your decisions.
Practise this sequence with a subject in changing light: choose a metering mode, take a test image, review the histogram, then adjust exposure compensation. Repeating the steps helps you recognise when the camera’s suggested exposure needs your judgement.
Motion, panning and contrast control
Motion techniques depend on whether you want a subject sharp or movement visible. Practise panning and controlling contrast by changing one camera choice at a time.
Capturing Motion
To pan with a moving subject, follow it smoothly through the viewfinder and press the shutter while keeping your movement steady. A slower shutter can blur the background while keeping the subject clearer, but the result depends on the subject’s speed and your tracking. Photograph a cyclist crossing the frame, then review whether the motion feels intentional.
With a static camera, a faster shutter can help freeze action, such as a runner’s foot striking the ground. To show blur instead, use a slower shutter and keep the camera stable. Compare the images to see how shutter speed changes the sense of movement.
Slow motion offers another way to study action. The course includes a filmmaking lesson using 60 frames per second. Try filming a simple action, such as water pouring into a cup, and observe how playback reveals movement that can be difficult to notice in real time.
Controlling Contrast
Contrast control means managing the difference between bright and dark areas. A face beneath a shaded tree against bright sunlight may leave either the face or the background without detail. Decide which matters most, then adjust the light or exposure to preserve it.
The course covers contrast control and exposure ratios in three lessons. An exposure ratio describes the relationship between brighter and darker light on a subject. For a portrait, compare the illuminated side of the face with the shadowed side; changing the balance affects how strongly facial shape appears.
On location, look for ways to soften harsh light before changing camera settings. Move the subject into open shade, turn them towards a brighter surface or use flash to lift shadows. Each option changes the balance between light and dark, so take a test image after each adjustment.
When a scene has both deep shade and strong highlights, decide which detail must remain visible. For example, a person standing in a bright doorway may need more light on their face. Controlled flash can lift the subject while retaining the setting’s contrast.
Review each result on the camera screen, comparing the subject with the background. Photographing the same scene with a sharp shutter, a panning movement and adjusted contrast makes the effect of each technique easier to recognise.
Colour psychology and RAW files
Colour choices shape the mood of a photograph, while RAW capture gives more room to adjust the recorded image. Practise both by photographing the same subject under different light, then comparing colour and detail.
Colour associations can guide a viewer, but context matters. A warm orange sunset may feel inviting, while orange in a crowded street can add energy or tension. Before shooting, identify the mood you want and notice which colours dominate the scene. Frame the subject so those colours support, rather than distract from, its story.
Use colour relationships deliberately. Complementary colours, such as blue and orange, create contrast; similar colours, such as green leaves against a shaded background, can make a quieter image. In a landscape, notice how the sky, water and vegetation relate before choosing your viewpoint. A small change in position can reduce a competing colour and strengthen the subject.
RAW files retain more image data from the camera than finished JPEGs, giving you more flexibility to adjust exposure, white balance and tonal detail later. For example, if indoor lighting makes a white shirt look yellow, a RAW file provides more room to correct the colour balance while retaining the original capture.
That flexibility works best when you also consider exposure and colour while shooting. Set a suitable white balance for the light, check how the camera renders a neutral object and take a test frame. RAW does not replace careful technique; it gives you more latitude when an image needs refinement.
Try a simple comparison: photograph one subject as a RAW file and a JPEG using the same camera settings. Review both on a screen and note how each handles a bright window, deep shadows or a strong colour cast. The differences depend on camera processing and viewing conditions, so assess the files themselves.
For a portrait, a muted background can keep attention on skin tone and expression. For a landscape, a cool sky beside warm ground can divide the frame into distinct visual areas. Choose colour to suit the subject, then use RAW capture if you want more control over the final tonal and colour balance.
Course completion and assessment requirements
Course completion depends on the requirements of the specific course. Before enrolling, check what practical work and other requirements are part of the learning path.
How long do advanced photography courses take, and what are the schedules? The course described here is designed to take six weeks, with self-paced study also available. Its lessons are prerecorded, so students can work through them at their own pace.
The course contains nine parts, giving learners a sequence for building and applying skills. Treat each assignment as a practical check: identify the technique, make an image that uses it, then explain the decisions behind the result. A portrait assignment, for example, could show how you handled light and framed the subject.
Assignments are posted to a class group, where Martin, Samantha and the creative advisors respond. Their feedback gives students a chance to compare their intended result with the image they made. Read comments alongside the photograph, note one specific adjustment, then apply it in a later assignment. This turns feedback into a repeatable practice rather than a score alone.
Before sharing an image, review it at full size and check whether it communicates the intended subject. Consider whether the result reflects deliberate choices rather than an accidental camera setting. For a motion photograph, assess whether the movement looks intentional. For a landscape, consider whether the framing directs attention to the main feature.
Pictorial’s Advanced Photography Masterclass includes advanced guided sessions with personalised feedback and critique, as well as a Certificate of Completion. Check the course requirements so you know what to complete and what the certificate represents.
Use the six-week design as a planning guide, not a reason to rush through difficult material. Set aside regular study time, complete an assignment after the relevant lessons, and revisit any technique that needs more practice. Self-paced lessons allow students to work through the material at their own pace, while the class group offers a place to share assignment work and receive responses.
Before enrolling in any photography course, read its completion terms carefully. Check whether assignments are required, how feedback is delivered and what students must finish before requesting a certificate. These details help you match the course structure to your schedule and learning goals.
Explore the photography masterclass
Pictorial: Photography Starter Session
Pictorial’s Photography Starter Session is a practical starting point if you want to strengthen camera fundamentals before moving into advanced techniques. Small classes are limited to three participants, with outdoor shooting and personalised guidance. Bring your own camera or use a complimentary loaner camera provided by the school.
If you already understand the basics, the Intermediate Photography Course may better suit your next step. Choose a learning path based on the skills you want to practise, whether that’s camera control, composition or shooting with a mobile phone. A steady foundation makes it easier to take on more demanding assignments and make deliberate choices in the field.
Visit pictorial.com.sg to explore the course options.
Choose your next step with confidence
Choose a learning step that matches the photographs you want to make. If you are building camera confidence, begin with a course focused on the basics; if you are ready to practise more advanced techniques, consider the Advanced Photography Masterclass. Deliberate practice helps carry new skills into the field.
Pictorial offers the Photography Starter Session, Intermediate Photography Course and Mobile Photography Essentials, among other courses. Compare the course focus and format with the way you want to learn, then take a practical next step. You do not need to have every technical choice figured out before you begin.
Keep observing, practising and making images with intention. Each thoughtful frame is a chance to build confidence in your own decisions.
Frequently Asked Questions
How do I choose the right photography course for advanced skills?
Choose an advanced photography course that matches your current camera skills and the images you want to create. Look for practical shooting, useful critique and lessons focused on technique rather than editing software. For example, if you want to improve portraits, check whether students practise shaping light and directing a subject. A suitable advanced photography course should also offer feedback in a format that helps you apply each lesson to your own photographs.
Which advanced photography courses are available in Singapore?
Singapore offers advanced photography classes. Advanced study may cover exposure, composition and lighting; the advanced techniques course also covers remote wildlife photography, flash and natural light on location, and capturing and merging HDR and panoramic images.

Disclaimer
© Pictorial | All Rights Reserved.