
The Next Skills to Learn After Photography Basics
The next step isn’t more complicated camera settings. If you’re wondering what to learn after photography basics, focus on composition, light, focus, steady shooting habits and colour, then practise one skill at a time. These skills help you make deliberate choices instead of relying on luck.
It’s normal to understand exposure and still feel unsure why a photo doesn’t look the way you imagined. The difference often comes down to how you frame the scene, work with available light or choose what stays sharp. Short, focused exercises make these decisions easier to recognise and repeat.
This guide covers practical ways to build each skill, from using a grid to explore composition to noticing how colour shapes a photograph’s mood. You’ll also find habits for learning from the images you take. There’s no need to master everything at once: steady practice gives you more control and helps you develop your own way of seeing.
Key Takeaways
- Use a 3-by-3 grid to test how placing your subject near grid intersections changes the balance of a frame.
- Notice where light comes from and how its softness or direction affects the mood and detail in your image.
- Choose a focusing method that suits your subject, then check what the camera has kept sharp.
- Build a steady practice by reviewing your photographs and choosing one clear point to improve next time.
- Pay attention to how nearby colours work together, and adjust white balance to keep the scene’s colours looking natural.
1. Composition techniques
Composition is how you arrange subjects and visual details within the frame. Learn terms such as foreground, background, negative space, balance and leading lines by spotting them in a photograph. For example, a path can lead the viewer’s eye toward a person, while empty space gives that person room in the frame. A useful tutorial connects each term to a visible choice, not just a definition.
Start with the rule of thirds. Imagine the frame divided into 9 sections by a 3-by-3 grid, then place a prominent subject near one of its intersections. This can help you compare proportions and angles, but it isn’t a rule every image must follow. Take 5 photos using different compositions, then compare how each frame directs attention. Try centring the subject in one image and placing it off-centre in another.
Next, look beyond the grid. Leading lines, repeated shapes, frames within a frame and changes in viewpoint add structure to a photograph. A railing can guide the eye toward a subject, a doorway can frame a person, and repeating windows can create rhythm. Before changing settings, move a few steps left or lower the camera. Small changes in position can remove distracting edges and make the subject easier to read.
Composition also develops alongside exposure control. If you’re deciding what to learn after photography basics, practise manual exposure by changing aperture, shutter speed and ISO one at a time, then observe how each setting affects brightness and detail. Use the meter as a guide, and try exposure compensation if the camera’s automatic reading makes a scene too bright or dark. A bright sky behind a shaded subject is one situation where checking the result and adjusting exposure can help.
For landscapes, scan the foreground, middle distance and background before framing the view. You might use a path as a leading line and keep distant buildings as the subject. For street photography, choose a clear background, watch how people move through the scene, and frame before they reach a useful position. These steps help you compose deliberately rather than relying on one camera setting.
Advanced composition means choosing which conventions to use, combine or break. Try symmetry in a reflective scene, a low viewpoint for a tall subject, or negative space to make a small subject feel isolated. If you’re considering what to learn after photography basics, these choices are a practical way to develop visual intention. Ask what the viewer notices first and whether the frame supports that intention. In a strong composition, every line, shape and subject has a reason to remain.
To build a portfolio and pursue paid work in Singapore, select images that show a consistent approach and fit the kind of assignment you want. Arrange them in a clear sequence, then prepare a concise introduction and discuss the brief, deliverables, schedule and fee with prospective clients. A focused portfolio helps people understand what you can photograph; thoughtful planning helps you approach each assignment professionally.
2. Lighting science and light manipulation
Light changes a photograph before you touch the camera settings. Notice its direction, softness, colour and strength, then decide what each quality should contribute. A covered walkway, for example, can provide open shade while the bright surroundings remain visible beyond it. Turn your subject toward the open area and compare the result with direct overhead light. Facial shadows and contrast will change even if the framing stays the same.
Start by comparing direct light, diffused light and shade. Direct midday sun can create hard-edged shadows on a face or building. A cloud softens those edges, while a shaded doorway can give a subject more even light. Golden-hour light is soft, so it can suit portraits and outdoor scenes. During a short shooting exercise, photograph the same subject in these conditions and observe how shadow shape changes.
Then practise shaping the light, not just finding it. Move your subject closer to a window, turn them toward the light, or use a pale surface to bounce light into a shadow. A white wall can act as a simple reflector; a dark surface can reduce unwanted bounce. Change one thing at a time, then compare exposure and the detail visible on the lit and shaded sides.
For indoor scenes, identify each light source before setting exposure. A window, ceiling lamp and desk light may all affect the same photograph. Switch off an unnecessary lamp or reposition the subject so one source dominates. If mixed light gives a face uneven colour, choose a cleaner source first. Digital adjustments may help later, but they can’t replace noticing how the light falls across the scene.
What camera lenses and lighting gear should you buy after learning the basics? Start with the lens that suits your usual subjects; a 50 mm lens is one versatile option, while existing window light and a simple reflector can teach you to shape light before buying more equipment. For wider scenes or close details, different focal lengths create different framing options, so choose based on what you actually photograph.
Try this sequence: place a subject beside a window, take one frame with them facing the light, then turn them sideways for another. Keep the aperture and other settings consistent so the light direction is the main change. Compare shadow detail, highlights and background brightness. Repeat outdoors in open shade, then in soft golden-hour light. These comparisons show how light affects exposure and mood.
Light can also guide the kind of image you make. Portrait photography depends on shaping light and exposure for flattering results, while product photography may involve styling an object, setting up lights and combining exposures. If you want guided practice with foundational camera choices, explore the Basic Photography Course as a way to strengthen those skills.
Portrait photography depends on managing light and exposure to create flattering images. Consistent settings make it easier to judge how light direction affects facial shadows.
3. Autofocus modes and focusing techniques
Autofocus works best when its mode suits your subject’s movement. For a still subject, use single-shot autofocus, often labelled AF-S or One-Shot, so the camera focuses once when you half-press the shutter. For a moving cyclist or child, continuous autofocus, often called AF-C or AI Servo, keeps adjusting focus as the subject moves. Camera labels vary, so learn the names in your own menu.
Focus area matters too. A single-point area lets you choose where the camera focuses, which helps with a still object behind foreground branches. A wider area lets the camera track movement across more of the frame, useful when following a runner. Place the focus point over a subject’s eye for a portrait, or over the important detail on a stationary object. Check playback rather than assuming the camera chose correctly.
Practise tracking a predictable subject. Follow a friend walking across a park, keep the focus point over their face, and press the shutter as they move. Compare this with focusing on a stationary bench using single-shot mode. The contrast shows when continuous adjustment helps and when locked focus is more dependable.
Focus can be accurate while the photograph still looks soft. Subject movement, camera shake and shallow depth of field can all affect sharpness. A shutter speed of 1/500 second freezes action, while 1/30 second creates motion blur. Try a faster shutter for a moving dog, then inspect whether its eyes are sharp. For a still portrait, use a stable stance and avoid placing the focus point on hair or clothing.
Manual focus is useful when autofocus hunts or selects the wrong plane. At close range, such as when photographing a flower through leaves, switch to manual focus and turn the ring slowly. Magnify live view if available, then check the petal edges or another fine detail. For a landscape, focus on the main area of interest and review both foreground and distant detail. The goal isn’t to make everything equally sharp, but to control what holds attention.
Build a short practice routine: photograph a stationary subject, a person walking toward you, and a subject moving across your view. Use the matching autofocus mode, keep the focus area on the important detail, and review each image at playback. Note whether focus missed, the subject moved, or the shutter was too slow. This diagnosis helps you adjust one choice next time instead of changing settings at random.
To master focusing, learn your camera’s focus-area options and test them in everyday scenes. A portrait at home, a passing bus in Singapore, and a bird perched on a railing each call for different decisions. When you can explain why a frame is sharp or soft, you’re making deliberate choices instead of relying on autofocus alone.

4. Beginner mistakes and good photographic habits
A beginner may review a photograph only for sharpness and miss a tilted horizon, clipped edge or distracting background. Before pressing the shutter, scan the corners and check what competes with the subject. Afterward, review the image at full size and identify one specific issue. This habit turns each photograph into useful feedback rather than a pass-or-fail test.
Consistency grows through deliberate practice, not by taking pictures without a purpose. One exercise is to make 10 photos daily while focusing on exposure, then compare how brightness changes across scenes. Henri Cartier-Bresson is quoted as saying a photographer’s first 10,000 photographs are their worst. Treat that figure as a reminder to keep practising, not a standard you must reach before your images matter.
Keep a simple record of the choices behind each photograph. Note the subject, light, camera settings and what you would change next time. If a portrait looks flat, for example, record where the light came from and whether the background distracted from the face. These notes help you spot patterns across images and avoid repeating the same mistake.
Use a repeatable review routine. First, remove frames that are clearly out of focus or poorly timed. Next, compare the strongest images for expression, framing and exposure. Finally, select a small group that tells a clear story. A themed mini-project about shadows, colour or texture can give your practice direction, while a first mini-portfolio of 10 best images provides a manageable set to review.
For a beginner in 2026, the best editing workflow starts with organising and selecting images, then making restrained adjustments to exposure, contrast and colour. Choose software that supports your camera’s files and the adjustments you need; no single program suits every beginner. Keep an untouched original, make one adjustment at a time, and compare the result with the original before exporting.
Guides can offer structure, but reviewing your own work builds judgement. After a portrait session, ask whether the subject’s expression feels natural and the background supports the image. After a landscape walk, check the horizon and look for bright areas that draw attention away. Choose one lesson for your next session, such as simplifying the frame or watching for distracting edges.
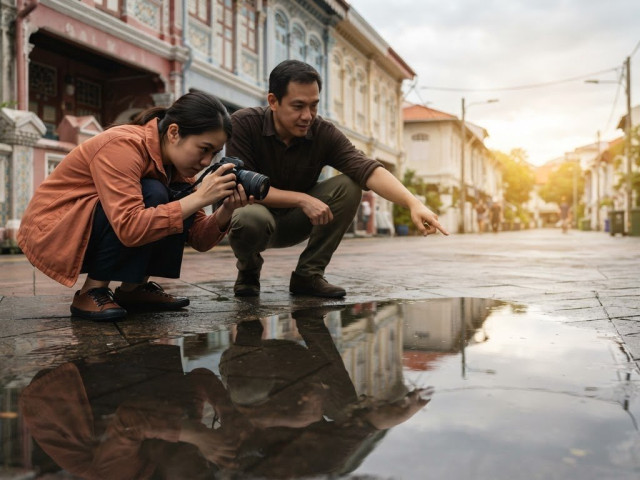
Make room for experiments that may not work. Try one themed set around reflections at a sheltered walkway, then review which images communicate the idea most clearly. Save those alongside your strongest work and remove near-duplicates. A steady cycle of planning, shooting, reviewing and refining helps you understand your progress without needing every frame to be perfect.
5. Colour schemes and white balance
Colour shapes how viewers read a scene before they notice finer details. A red sign against a blue wall feels different from the same sign against orange. Start by noticing the dominant colours in your frame, then decide whether they support the subject. This builds a foundation for making intentional images rather than relying on colour adjustments after shooting.
Try simple colour relationships in familiar settings. Complementary colours sit opposite each other on a colour wheel, such as blue and orange. A blue shopfront beside a warm-toned sign can create contrast that draws attention. Analogous colours sit next to each other, such as green and yellow-green. Look for them in a garden and frame the scene so the related hues create a calmer effect.
White balance helps your camera interpret the colour of the light. A white shirt under warm indoor lamps may appear yellow, while shade can make it look blue. Use the camera’s daylight, shade or tungsten preset to see how each changes the same scene. Auto white balance can be a useful starting point, but check whether the preview preserves the colours you saw.
For a practical comparison, photograph a white object near a window, then move it beneath an indoor lamp. Keep framing and exposure steady, changing only the white-balance setting. Compare the whites and skin tones in both images. This exercise shows why the same object can look different under different light sources and helps you choose a preset deliberately.
Colour temperature describes whether light appears warmer or cooler. You don’t need to memorise technical values to use it. Compare the image with the scene and adjust the setting if a neutral surface looks strongly blue or amber. In a mixed-light room, moving closer to the window or switching off a nearby lamp can simplify the colour before you take the photograph.
White balance can also be a creative choice. A warmer setting may suit a sunset, while a cooler balance can reinforce the feel of a shaded urban scene. Keep skin tones believable in portraits, unless a deliberate colour effect supports the image. Review the original and adjusted versions side by side, so a beautiful colour treatment doesn’t overwhelm the subject.
To practise, choose a scene with clear colour relationships, set a white-balance option and take a test frame. Check a neutral surface, then assess whether the surrounding colours still feel right. Repeat with another setting and compare the images. This routine builds a reliable eye for colour and helps you decide whether a change improves the photograph.
Pictorial: Basic Photography Course
Pictorial’s Basic Photography Course is a natural next step if you understand camera basics but want guided practice applying them. It helps you strengthen foundational skills such as exposure and camera control through hands-on photography in Singapore. Small groups of up to three participants allow for personalised guidance, and you can use your own camera or borrow a complimentary one.
Consider this course if you want support connecting technical choices with the photographs you make. If you’re still deciding where to begin, a Photography Starter Session may suit you; if you’re ready to build on an existing foundation, explore the Intermediate Photography Course. Choose the course that fits your current experience.
Contact Pictorial to discuss the Basic Photography Course.
Keep Developing Your Own Photographic Eye
Knowing what to learn after photography basics gives you a starting point, but your next step can be guided by the photographs you want to make. Choose a subject that keeps drawing your attention, then practise with it regularly. Over time, your choices will become more deliberate, and your images will reflect what matters to you.
If you’d like structured guidance as you continue, Pictorial offers a Photography Starter Session, Intermediate Photography Course and Mobile Photography Essentials. Each offers a way to keep learning in line with your current interests and experience.
Look closely, stay curious and let each photograph teach you something useful. Your next step doesn’t need to be a dramatic leap; steady practice is progress.
Frequently Asked Questions
Step 14: What’s Next?
Choose one subject you enjoy photographing and make a small project around it. For example, follow the changing activity at a neighbourhood coffee shop, focusing on the people, objects and quiet moments that give the place character. Select a few images that work together, then note what you want to try differently next time. A focused project gives your practice direction without requiring new equipment.
What photography skills should you learn after the basics?
Build skills that help you handle a whole shoot, not just individual frames. Practise anticipating a subject’s next move, keeping your camera ready and making a consistent set of images for one purpose. At a family gathering, for example, you might capture a welcome, a shared activity and a quieter moment afterward. Reviewing the sequence can show whether you’re recording a meaningful event or collecting disconnected snapshots.

Disclaimer
© Pictorial | All Rights Reserved.