
Photography Projects for Beginners to Build Creative Skills
The best photography projects for beginners start with less, not more. Choose one subject, one patch of natural light, or one daily routine, then make a series of pictures that show it in different ways. A simple limit gives you room to practise composition and notice details without getting stuck deciding what to shoot.
If you’re unsure where to begin, that’s normal. You don’t need elaborate equipment or a faraway location to build creative skills. An everyday object, a quiet corner at home, or a short walk offers plenty to explore. These ideas cover composition, daily shooting, self-portraits, natural light, and playful experiments, with practical ways to make each project your own. Start with an idea that feels manageable, take your time, and let each frame suggest what to try next.
Key Takeaways
- Choose one lens or focal length and photograph familiar objects from fresh angles to practise composition without adding extra choices.
- Build a daily or weekly photo habit with a routine, a place or a self-portrait as your subject.
- Use window light, shadows and changing light angles to reveal texture and shape without relying on flash.
- Try focused exercises such as making 10 images of one object or telling a story in three frames.
- Experiment with a single theme, colour or viewpoint to discover new ways of seeing ordinary scenes.
1. Composition with a single lens or focal length
Using one lens or focal length gives a composition exercise a clear boundary. Instead of changing equipment, move around the subject and notice how distance, angle, and background affect the frame. Photograph a mug from above, at table height, and close to its handle. The object stays the same, but each viewpoint changes what feels important.
For this project, use a camera with one lens or a fixed focal length. Everyday objects make easy subjects, so you don’t need extra props. Choose one object, make several frames from different positions, then compare how each composition directs attention. These photography tips turn a simple camera exercise into deliberate practice.
Try a colour study using the rainbow sequence ROYGBIV: red, orange, yellow, green, blue, indigo, and violet. Find an everyday example of each colour, such as a red apple or green leaf. Place each subject against a quieter background, or include contrasting colours to create tension. Notice whether colour leads the eye toward the subject or competes with it.
Kitchen tools offer useful shapes for a composition challenge. Arrange a fork, spoon, and glass on a plain counter, then look for circles, lines, and repeated edges. Photograph the arrangement from above for a graphic, flat view. Next, lower the camera until the fork’s tines overlap the glass. Small changes in position can make familiar tools more interesting.
Use framing to create a visual boundary around your subject. A doorway, chair back, or gap between stacked plates can surround a smaller subject and guide the viewer’s eye. For example, place a lemon inside a plate’s circular rim, then shift the camera until the rim doesn’t cut across the fruit. Check the edges of the frame before each shot.
Lighting also changes composition. Set a glass of water beside a window, then move it until the light creates a bright edge or reflection. Turn the glass slightly and watch the highlight shift. Keep the background simple so the light pattern stays clear. Light direction can give a smooth surface more definition.
Keep the challenge focused: use one lens or focal length, one subject, and a few deliberate viewpoints. These limits reduce choices while helping you see how framing, colour, shape, and light work together. For guided practice with camera fundamentals, the Basic Photography Course for Beginners offers a relevant starting point.
The Kitchen Geometry exercise uses everyday tools to create graphic compositions. Try a different photographic approach while keeping to one lens, and see how the constraint changes what you notice.
Photographing everyday objects from unusual angles can help beginners develop their composition skills. A fork, light on a glass of water, or piece of fabric gives you details to explore from a fresh perspective. Keep the lens fixed as you shift your viewpoint, then compare how each detail sits in the frame. The aim is to notice new arrangements in familiar subjects, not to add equipment.
2. Daily photography and self-portrait projects
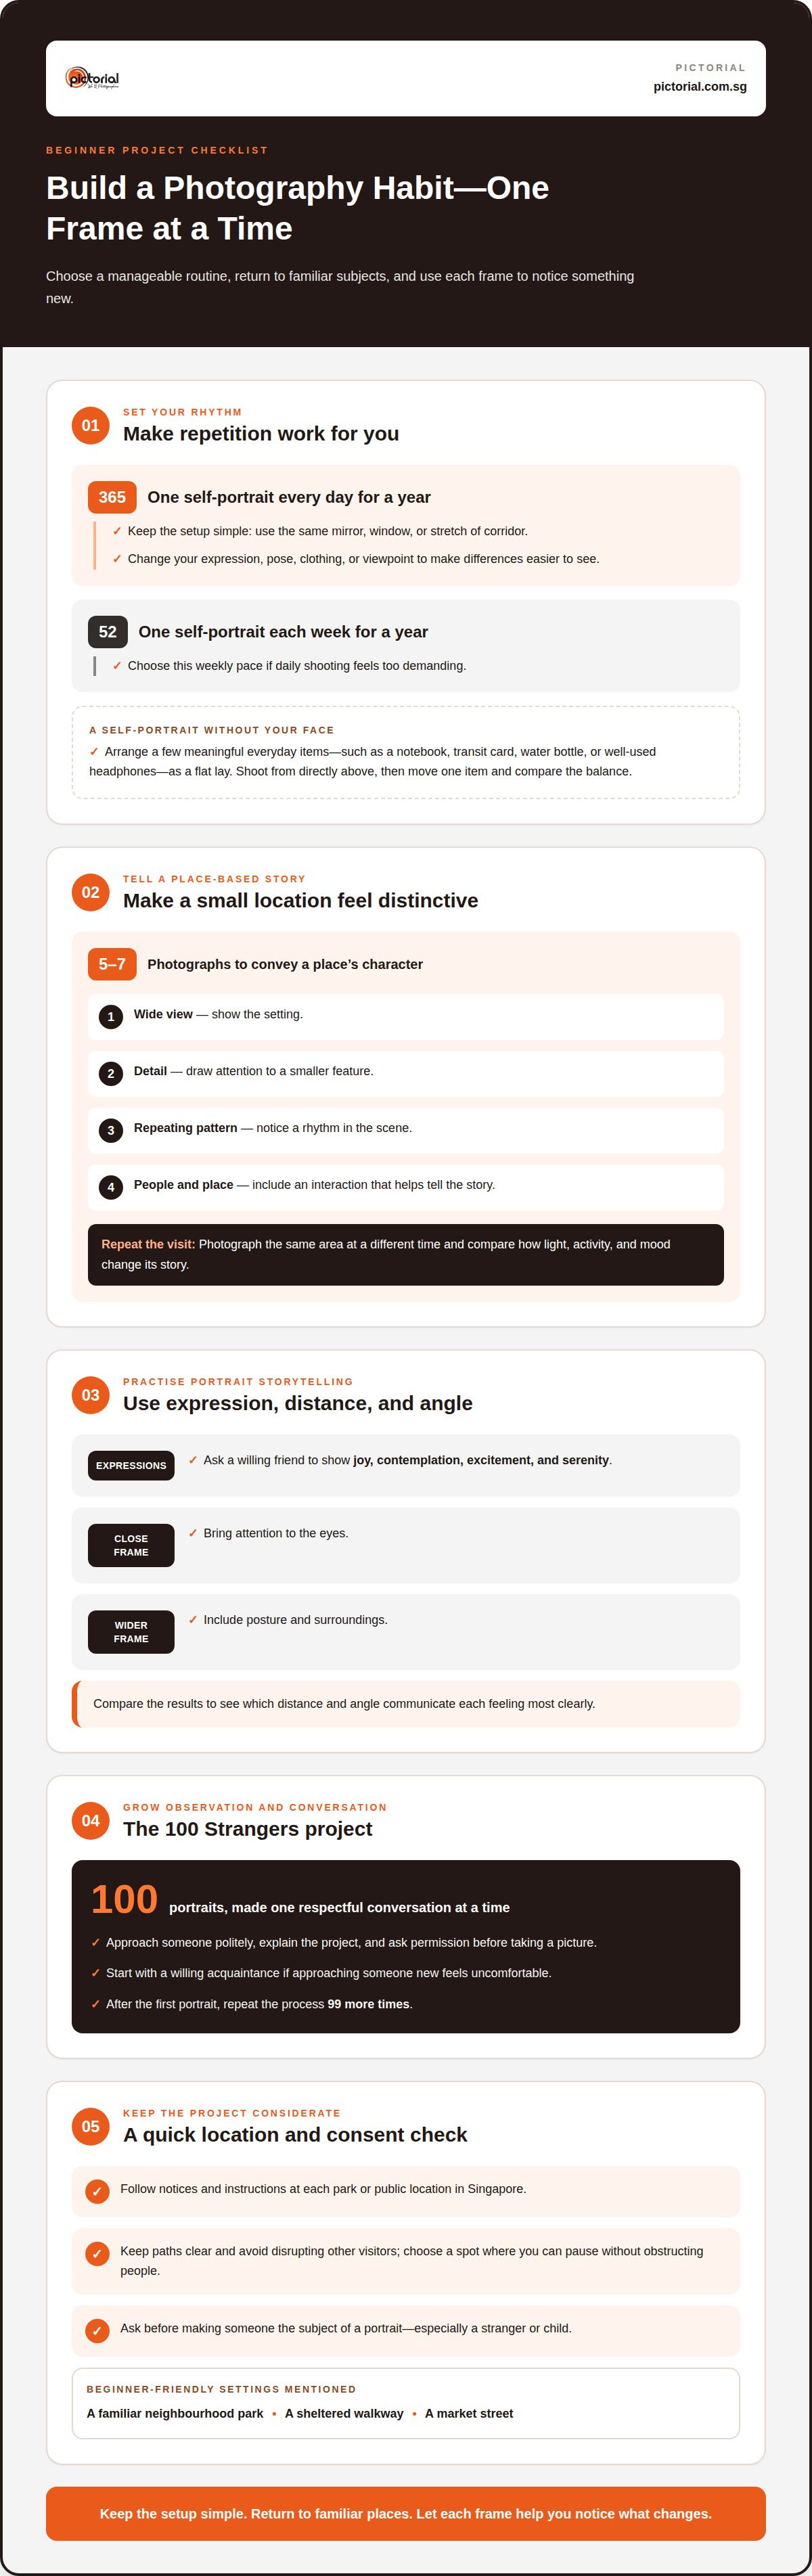
A daily project trains you to notice small changes instead of waiting for a special occasion. For a 365-day challenge, take one self-portrait every day for a year. Keep the setup simple: use the same mirror, window, or stretch of corridor, then change your expression, pose, clothing, or viewpoint. A repeated setting makes those changes easier to see. If daily shooting feels too demanding, make one self-portrait each week for a year through a 52 Weeks project.
Your face doesn’t have to appear in every self-portrait. Empty your bag and arrange a few meaningful objects as a flat lay: a notebook, transit card, water bottle, or well-used pair of headphones. Photograph the arrangement from directly above, then move one item and notice how the balance changes. The objects document routines and interests, offering a personal perspective without asking you to pose for the camera.
To document a place, choose a small area such as a void deck, neighbourhood green, or familiar market street. Make 5-7 shots that convey its character. Include a wide view, a detail, a repeating pattern, and an interaction between people and place. Photographing the same area at a different time can reveal how light, activity, and mood change its story.
Portrait practice can focus on emotion rather than a polished pose. Ask a willing friend to show joy, contemplation, excitement, and serenity, then vary the distance and angle for each expression. A close frame draws attention to the eyes, while a wider portrait shows posture and surroundings. Compare the results to see which techniques communicate each feeling most clearly.
A 100 Strangers project develops observation and conversation alongside portrait skills. Approach someone politely, explain the project, and ask permission before taking a picture. After the first portrait, the project repeats that process 99 more times. Start with a willing acquaintance if approaching someone new feels uncomfortable; candid images can convey genuine emotion, but consent and respectful interaction matter.
In Singapore, follow notices and instructions at each park or public location, keep paths clear, and avoid disrupting other visitors. Ask before making someone the subject of a portrait, especially a stranger or child. Beginner-friendly settings include a familiar neighbourhood park, a sheltered walkway, or a market street; choose a spot where you can pause without obstructing people. If a project uses a phone, guided mobile photography practice can help you make more deliberate portraits and daily images.
These exercises offer essential support as you build your creative confidence. Flat-lay photographs of items from students’ bags can serve as non-traditional self-portraits that do not show their faces. Documenting routines and daily activities develops storytelling skills and helps photographers notice routine details; portraits can explore joy, contemplation, excitement, and serenity.
3. Finding and using available natural light
Try a Found Light Challenge: photograph using available light, without flashes or strobes. This restriction encourages you to look for light already shaping a scene, such as a bright window, an open doorway, or sunlight passing through leaves. Choose one small subject and move it through different patches of light. Keep the subject still so you can compare the lighting.
First, notice where the light falls, then position your subject before lifting the camera. Side lighting can reveal ridges on a shell, folds in cloth, or the grain of a wooden table. Front lighting tends to soften those surface details. Take a frame from each position and compare which gives the subject clearer shape and texture. This simple sequence makes shooting a practical lesson in light direction and contrast.
For a shadow study, set a small object near window blinds and watch the stripes cross its surface. Shift the object closer to the window, then farther away, to change the pattern’s size and position. Leaves create irregular patches, while a flashlight lets you control direction indoors. Aim it across a plain wall or paper, not directly at the camera. A dramatic shadow can become the main subject rather than a dark area behind it.
Paper gives this exercise a tactile focus. Crumple one sheet, fold another into a fan, and leave a third flat. Place each beside a window, then turn the paper until side lighting skims across its ridges. Photograph from above to record the shapes, then lower the camera to make the shadows appear deeper. Keep the background plain so the differences in texture remain easy to see.
Natural light changes throughout the day, so photograph the same subject at different times. A plant on a desk might receive soft light in the morning and stronger, more directional light later. Keep its position and the camera angle consistent. Compare the highlights, shadows, and colour in each frame. This helps you see how changing conditions affect one subject without adding new variables.
For a quiet morning project, use available light to capture a mood or small moment. Photograph a breakfast cup, a half-open curtain, or a book beside a chair. Notice how light describes the scene instead of arranging every detail. Try a wide frame that includes the room, then move closer to isolate one detail. Comparing the pair shows how framing and light work together to guide attention.
Make a short note beside each frame: where the light came from, what cast the shadow, and which surface showed the most texture. After several examples, patterns become easier to recognise. You’ll know when to move a subject, change your position, or wait for the light to shift. Careful observation is central to working with natural light.
4. Short photography exercises for creative practice
A timed exercise can replace the pressure to find a perfect subject with a clear action. Try “30 Photos in 30 Minutes” at home or along a familiar route. Keep moving, and photograph details you might usually pass, such as a lift button, a coffee cup, or rain on a railing. Limiting the session to one theme, like circles, reduces choices and gives your attention a direction.
For “One Subject, 10 Photos,” choose an object and make 10 distinct images before putting it away. Show it whole, crop tightly, photograph its reflection, or let it appear partly hidden. Change the object’s position or your camera height instead of relying on filters. Comparing the images afterwards helps you spot which visual choices make a familiar subject feel fresh.
Make an abstract shadow series with window light or a flashlight. Cast the shadow of a spoon, plant, or folded cloth onto a plain wall, then change the object’s distance and angle. Frame only the dark shape, leaving the object outside the image. Sharp edges create geometric patterns, while softer outlines may suggest movement. These images help you practise shape and visual balance.
A texture study gives your search for subjects a simple purpose. Find and photograph five surfaces with distinct textures, such as rough tree bark, smooth tile, woven fabric, pebbles, or brushed metal. Fill the frame with each surface, then include a familiar object for scale in another image. Comparing the two approaches shows how close framing can turn an ordinary material into a compelling subject.
To build a themed photo series, choose one colour and make a connected sequence of 5-10 images. A blue theme might include a sign, a cup, a painted wall, and a piece of clothing. Keep the colour as the link, but vary distance and framing so every image adds something new. The finished sequence can express calm, energy, or other emotions through repeated visual choices.
Tell a small story in three images: a beginning, a middle, and an ending. For example, photograph a table before someone starts drawing, hands at work, then the finished sketch. Focusing on hands instead of faces keeps attention on the action. This exercise practises sequencing and gives each frame a clear role in the story.
Creative block often eases when the next step is specific. Try “36 Exposures”: take 36 images before looking at any of them, as if working through a 35mm film roll. Or use Story Roulette by writing a one-sentence story or six-word memoir, then finding objects and scenes that suggest it. Download the images later and select the frames that best express your prompt.
5. Beginner photography project ideas and experimentation
Experimentation works best when a project has one clear rule and room for personal choices. Try photographing from one chosen spot without moving your feet. Change only the camera angle, height, or distance by leaning or extending your arms. A bus stop, sheltered walkway, or bedroom window can become a study in perspective. Staying in place makes small changes in framing easier to notice.
For a month-long project, photograph only in black and white. Look for contrast, shape, and light rather than relying on colour to make pictures interesting. Wet pavement, a patterned gate, or a takeaway cup can offer different tones and textures. Keep the original colour files too, then compare how removing colour changes the subject’s mood and visual weight.
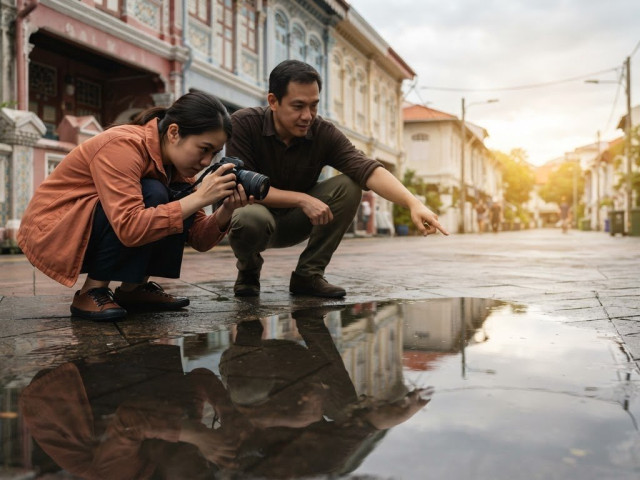
Low-cost project ideas in Singapore can use a phone and objects already at home. Photograph reflections in a metal spoon, the folds of a reusable bag, or plants along a neighbourhood path. A weekly photowalk gives the project a simple rhythm: choose a different route, look for one visual theme, and make a small set of images. These limits provide inspiration without requiring new equipment.
In nature reserves, follow the site’s posted access and photography conditions, as requirements depend on the location and activity. On private property, get the owner’s permission before photographing and respect any conditions they set.
Plan the project in one sentence, such as “I’ll photograph reflections on my walk.” Shoot first, then review the pictures after the session. Select images that support the idea, arrange them in a sequence, and add a short caption explaining the theme. Share the finished series with friends or keep it in a personal album. Stay focused on the sequence instead of posting every frame.
Common mistakes include choosing a theme so broad that the subjects feel unrelated, changing several project rules at once, and judging progress from one photograph. Set a clear boundary, such as photographing reflections only, and keep it steady for the session. Don’t rely on heavy editing to rescue an unclear frame; adjust your position or wait for a better moment while shooting. Reviewing the strongest and weakest images gives you a useful next step.
The “Currently” project offers seven prompts for a series, such as documenting what you’re reading, making, or noticing. Choose one prompt and interpret it through places or objects from daily life. For instance, “something I use” might lead to pictures of a transit card, lunch container, or worn umbrella. Look at the images together afterward. Their differences can reveal which subjects hold your attention and which creative rule you might explore next.
Pictorial
Pictorial can help turn personal photography projects into guided practice when you want feedback on camera technique, composition, and light. Its courses include hands-on outdoor practice in small groups limited to three participants, and a complimentary loaner camera is available if you need one. You can also use your own camera and practise with familiar equipment while strengthening the skills behind each frame.
The Photography Starter Session is a practical first step, while Mobile Photography Essentials focuses on taking pictures with a phone. For broader camera practice, the Complete Photography Course offers a more comprehensive path. Choose guided learning when you want support applying what you’ve observed to real shooting situations.
If you’d like to discuss a suitable next step, contact Pictorial.
Let Your Next Frame Teach You Something
A project becomes more valuable when you treat each finished image as a clue, not a verdict. Notice what drew your eye, what you left outside the frame, and what you might try differently next time. This review turns photography projects for beginners into a personal practice, shaped by curiosity rather than pressure to get everything right.
If you’re ready to build on what you’ve learned, Pictorial’s Intermediate Photography Course offers guided learning to develop your camera skills. Or keep your next step simple: choose one idea that still interests you, make a few pictures, and give yourself time to understand them.
Keep looking closely. Your way of seeing grows with every thoughtful frame.
Frequently Asked Questions
What are easy photography projects for beginners?
A photography project for beginners can start with a visual alphabet: look for everyday shapes resembling letters and photograph them in context. A curved handrail might suggest a C, while intersecting window frames could form an H. Frame closely enough for the shape to read clearly, but include a little of the surroundings for context. Arrange the finished pictures alphabetically, or select a few to make a playful title.
What are beginner photography projects to practise composition and lighting?
Photograph one subject against two different backgrounds, such as a cluttered shelf and a plain wall. Notice how the background changes the subject’s prominence, then try leaving open space beside it. For lighting practice, place a white sheet of paper opposite a window to reflect light onto the darker side. Compare frames with and without the paper, paying attention to detail in the shadows.
How can beginners create a photo series with a smartphone?
Choose a simple idea you can revisit, such as signs, doorways, or patterns on your usual walk. Hold your phone in the same orientation and keep a similar distance from each subject so the images feel connected. Before each shot, tap the main subject on the screen to set focus. Put the strongest opening image first, then arrange the rest to create a clear visual flow.

Disclaimer
© Pictorial | All Rights Reserved.