
Learn DSLR Photography: Practical Beginner Guide 2026
What if you could learn DSLR photography by making a few clear choices each time you take a picture, instead of memorising every setting? It’s easy to feel unsure when the camera has unfamiliar buttons and photography terms seem more complicated than they need to be. But you don’t need expensive gear or editing skills to start taking more intentional photographs.
This guide gives you a practical path from getting comfortable with your camera to choosing settings for the photograph you want. You’ll learn what to practise first, how aperture, shutter speed and ISO affect an image, and how to build repeatable habits by taking and reviewing photographs.
Progress comes from trying a setting, seeing what it changes and adjusting with purpose. Hands-on guidance can make that process less daunting. Pictorial’s small classes have a maximum of three participants, include practical outdoor shooting, and offer a Complimentary camera loan (if needed), so you can learn without owning a DSLR. Take it one step at a time, and your camera can become a tool you understand and trust.
Key Takeaways
- To learn DSLR photography, connect each camera choice to the result you see rather than trying to memorise every menu.
- Use a simple learning loop: notice the scene, adjust one control, take a photo and compare what changed.
- Start practising with the camera and equipment you have. Extra lenses aren’t a prerequisite for learning the fundamentals.
- Focus each practice session on one skill, such as focusing, framing or capturing movement, so you can see what you’re improving.
- Patient, hands-on guidance can help you understand how your settings affect real photographs and what to try next.
Learn DSLR Photography by Starting with What the Camera Helps You Do
A DSLR can seem like a collection of buttons, menus and unfamiliar terms. You don’t need to master them all before you begin. DSLR photography is the practice of making intentional images with a digital single-lens reflex camera. The key is to connect a choice you make with a result you can see, then use that understanding in your next photograph.
A DSLR’s viewfinder lets you look through the lens to frame a scene. The lens affects what you include and how large or small your subject appears in the frame. Inside the camera, a mirror directs the view to the optical viewfinder, then moves when you take a picture. The Digital Single-Lens Reflex Camera overview explains this design in more detail. For learning, the practical value is simple: you can look, frame and make a photograph with the scene in front of you.
What makes a DSLR useful for learning photography?
Many DSLR controls give you a direct way to change how a photograph looks. Adjust the focus point and check which part of the scene becomes sharp. Change the shutter speed and observe how movement appears. These comparisons help you understand cause and effect. You don’t have to learn every menu first. Start with the controls that answer a question you have about the picture.
What should a beginner learn first?
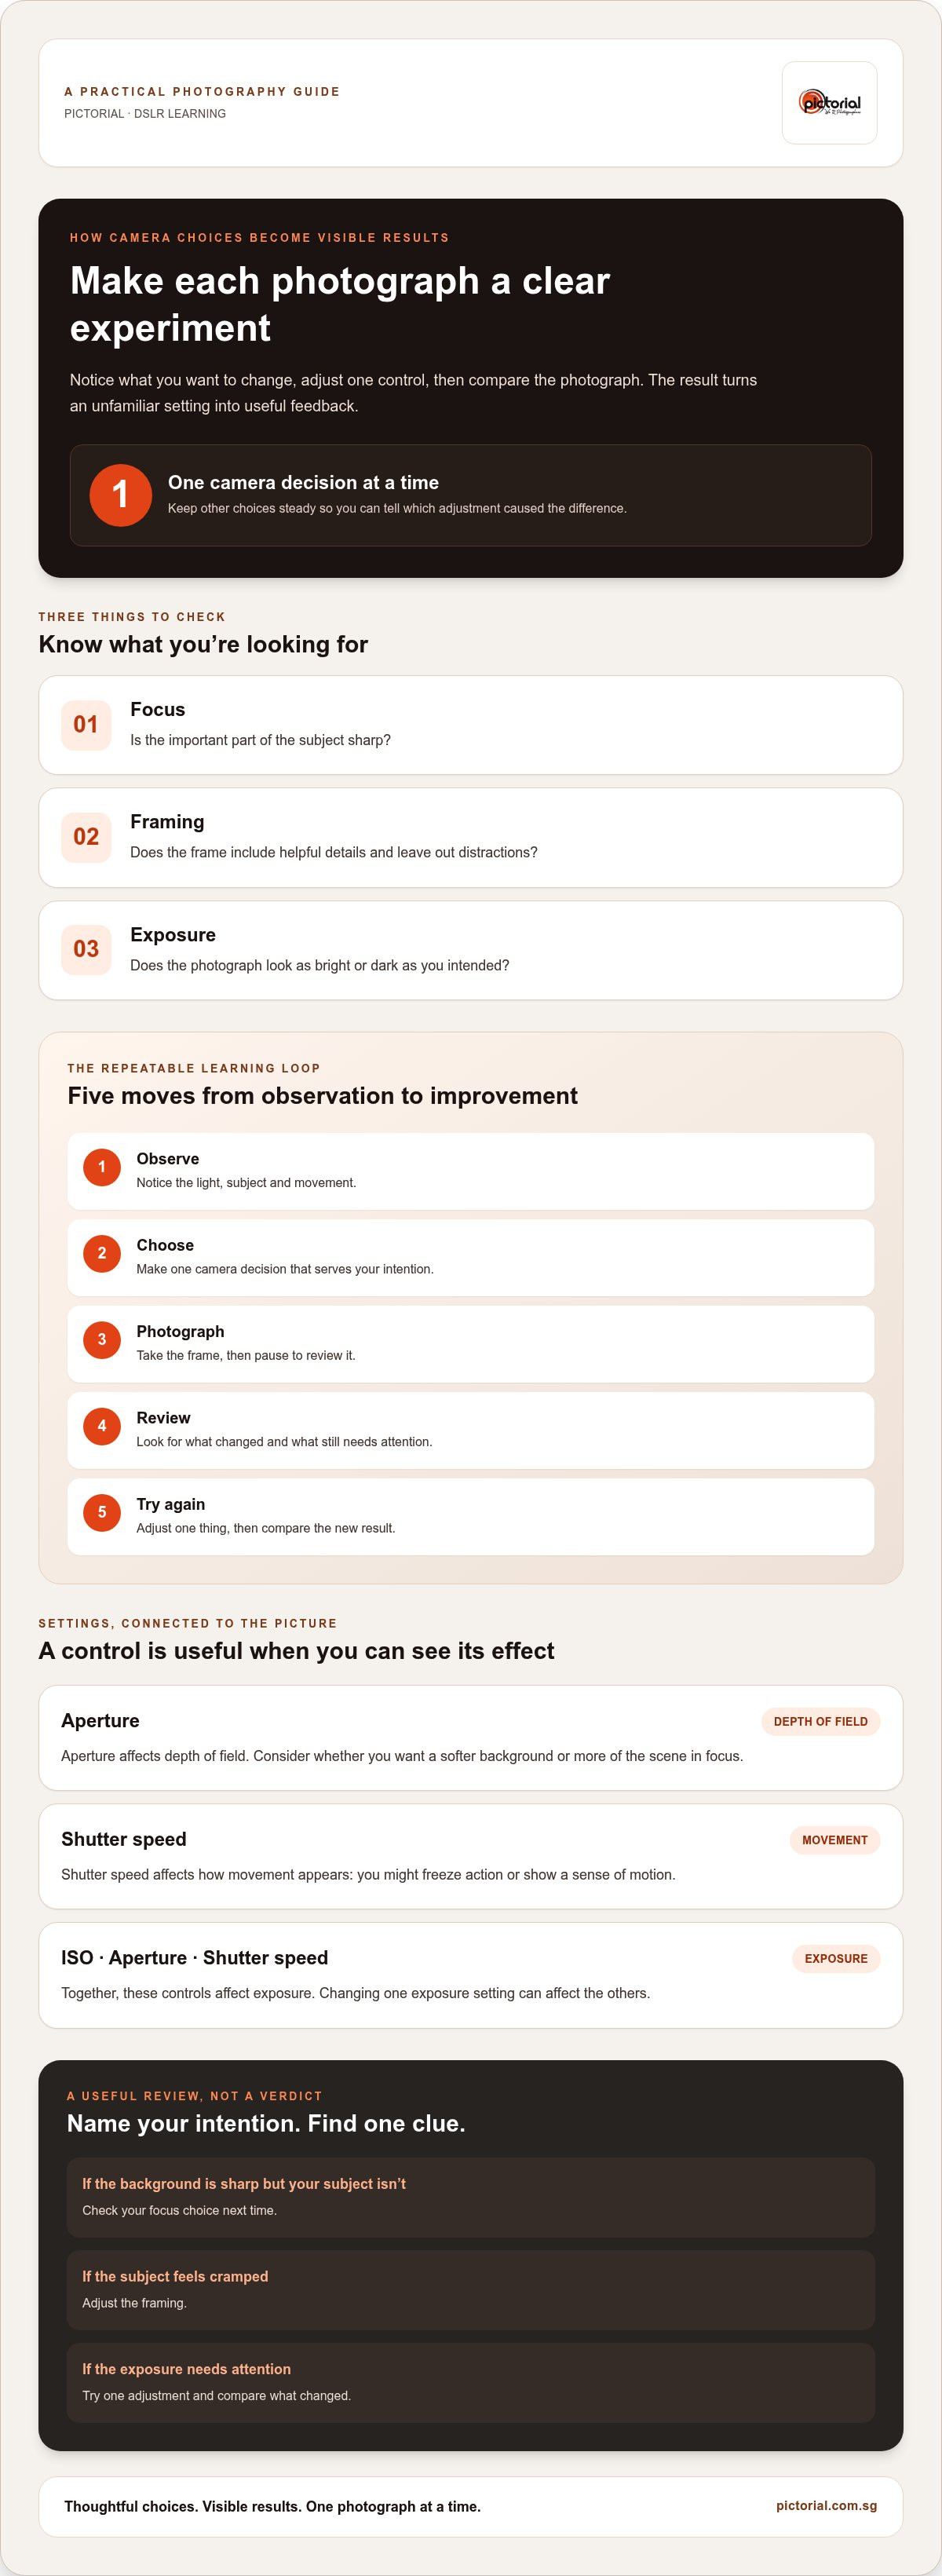
Begin with steady handling, finding your subject through the viewfinder, focusing and composing a deliberate frame. Then explore ISO, aperture and shutter speed as connected controls. Together, they affect exposure; aperture also influences depth of field, and shutter speed affects how movement is shown. Try one adjustment at a time, while remembering that changing one exposure setting can affect the others.
To move beyond auto mode with confidence, practise a simple sequence instead of trying to memorise settings. Pick a clear subject, such as a cup on a table. Decide whether you want the cup sharp against a softer background or more of the scene in focus. Take a frame, review it and choose one adjustment to try next. If the result is too bright, too dark or not quite sharp, treat it as useful feedback, not a failure.
Keep returning to this learning loop:
- Observe: Notice the light, subject and movement.
- Choose: Make one camera decision that serves your intention.
- Photograph: Take the frame, then pause to review it.
- Review: Look for what changed and what still needs attention.
- Try again: Adjust one thing, then compare the new result.
This is how you learn DSLR photography as a practical skill. You build confidence by making thoughtful choices and seeing what they do, one photograph at a time.
How DSLR Photography Works: Connect Camera Choices to the Photograph
A camera setting makes sense when you can see what it changes. Rather than treating the camera as a puzzle, use each photograph to test one small idea. Notice what’s in front of you, choose a control to adjust, take a frame and compare it with the previous one. The comparison turns an abstract setting into a visible result.
Start by separating three questions. Focus: is the important part of the subject sharp? Framing: have you included details that support your idea and left out distractions? Exposure: does the photograph look as bright or dark as you intended? Considering one question at a time makes it easier to decide what to try next.
Use one camera decision at a time
Choose a stationary subject, such as a mug beside a window, and keep your camera position and framing steady. If you’re practising focus, change where the camera focuses while leaving other choices alone. If you’re exploring exposure, adjust one setting and compare the result. Changing several controls at once makes it harder to tell which adjustment caused the difference.
Once you can see what changed, add a new challenge. Photograph the same subject in brighter or dimmer light, or try a person walking past. Light affects the exposure the camera needs, while movement influences whether you want to freeze the action or show a sense of motion. Your intention matters: a crisp image and a deliberately blurred one may both work, depending on what you want the viewer to notice. Keep detailed exposure study for a dedicated settings guide. Here, the aim is to observe one change at a time.
Review photographs as feedback, not a verdict
Before deciding whether a frame worked, name your intention. Perhaps you wanted to keep a face sharp, include a bright window without losing the subject, or leave space in front of someone walking. Then review a short sequence and identify one visible difference. Did the focus land on the subject? Did a small change in framing remove a distraction? Did the exposure reveal more detail in a shadow?
A missed focus point or awkward crop isn’t proof you’re bad at photography. It’s a clue. If the background is sharp but the subject isn’t, check your focus choice next time. If the subject feels cramped, adjust the framing. The Professional Photographers of America also offers photography education and resources, but your own frames give you immediate material to study.
Deliberate repetition turns camera controls from unfamiliar choices into familiar tools. Keep a brief note of what you intended and what changed. With practice, patterns become easier to recognise. If you’d value support while applying these ideas, Pictorial’s Basic Photography Course offers guided photography practice.
Do You Need Special Gear or Editing for DSLR Photography?
It’s easy to assume you need several lenses, accessories and editing software before you can make a photograph you’re proud of. You don’t. To learn DSLR photography, begin by understanding the camera in your hands and using what you already have with intention. More equipment can open up new possibilities, but it can’t replace noticing the light, choosing a subject and practising how to photograph it.
Can you learn DSLR photography with the camera you already have?
Start with the controls you’ll use regularly: how to hold the camera steadily, focus on a subject, adjust exposure and review a frame. Familiarity with those basics makes it easier to understand what a lens can add. A different lens may help you frame a distant subject or capture a wider view, but it won’t decide what belongs in the picture or when the light looks right. Those skills grow through observation and practice.
Before considering another lens, try photographing the same subject from different positions and distances. You’ll learn how your current equipment frames a scene and whether you’ve found a genuine limitation or simply need more practice.
- Extra gear can help when you have a specific need, such as photographing a subject that’s far away.
- Extra gear can distract if comparing equipment takes time away from practising focus, framing and exposure.
If you don’t own a DSLR, Pictorial offers a Complimentary camera loan (if needed), so you can take part in hands-on learning without buying a camera first.
Is editing necessary to take a good photograph?
Editing can be part of a photographer’s workflow, but it’s separate from learning to make considered choices with the camera. Focus, framing, timing and exposure all shape the original photograph. Editing may adjust an image later, but it can’t teach you why your subject was out of focus or why a bright background drew attention away from it.
Make a habit of looking at the original frame before changing anything. Ask yourself what you intended, what the camera captured and what you’d try differently next time. If you later edit, compare the edited image with the original so you can see which changes came from your camera choices and which came from post-processing. This builds understanding rather than dependence on software.
A simple approach keeps practice focused: use the equipment you have, choose one photographic challenge and review the unedited result before deciding whether new gear or editing would genuinely help. If you’d like support building those foundations through guided practice, Pictorial’s Basic Photography Course for Beginners is a relevant next step.
A Practical DSLR Photography Learning Plan You Can Repeat
A useful practice session doesn’t need a complicated subject or a long list of settings. It needs one clear question and time to compare what happens. This five-step routine helps you learn DSLR photography through small experiments, so each outing can build on what you’ve already noticed.
- Choose a subject. Pick something uncomplicated, such as a plant, a bag or a simple building detail. A familiar subject leaves more attention for your camera choices.
- Observe the light. Notice where it falls, whether it looks soft or harsh, and which parts of the subject it brightens or darkens.
- Make a frame. Decide what you want the viewer to notice, then take a photograph with that intention in mind.
- Review the result. Check focus, framing and whether the photograph looks the way you hoped.
- Repeat with one change. Adjust one camera choice or viewpoint, then compare the next frame with the first.
A first exercise for learning the camera
Place a small object near a window, or photograph a detail of a building in steady light. Make one frame from where you’re standing, then move to a different viewpoint and make another. Keep your intention simple: perhaps you want the object to stand out clearly, or you want its surroundings to add context. Between frames, change only one thing, such as your focus point, camera position or a setting you’re practising.
Review the sequence side by side. Is the subject in focus? Does the framing include anything distracting? Which frame comes closest to your intention, and what changed to make it work better? Write a short note after the sequence: “I wanted to show ___; I noticed ___; next time I’ll try ___.” This turns a set of pictures into a record of decisions you can learn from.
How to keep progressing without feeling overwhelmed
Keep the first exercise familiar while you learn to handle the camera and recognise what your choices do. Then change one condition, perhaps the light or the subject’s movement, while keeping your practice question clear. Repeating an exercise isn’t going backwards. It helps you notice more because you’re no longer working out every part of the process at once.
Choose one question for each session: “Is my subject sharp?”, “Does this framing feel balanced?” or “How does my shutter choice affect movement?” When a result surprises you, note it and try again rather than changing several settings at once. A short practice note can help you remember which adjustment made a visible difference.
Over time, the sequence becomes more natural. First, you become comfortable handling the camera and making a deliberate frame. Then you recognise how light, focus and movement affect your choices. With practice, you can respond to a scene with greater confidence instead of pausing over every control. For another practical way to improve photography skills through practice, work through guided exercises that connect camera decisions with real photographs, and build confidence by joining a beginner photography course with Pictorial.
Learn DSLR Photography with Patient, Hands-On Guidance
Camera instructions can explain what a control does, but it can still be hard to know which choice suits the scene in front of you. A patient instructor can help connect the setting you choose with the photograph it produces, while you’re holding the camera and looking at the result. That immediate feedback gives you a chance to ask questions, notice a habit and try a different approach during practice.
What guided DSLR practice can add
Outdoor shooting gives you real conditions to observe. Light changes as you move between shade and open areas, and a subject may be still one moment and moving the next. An instructor can help you decide what to pay attention to, such as where the focus falls or how a change in framing affects the image. The point isn’t to get every frame right. It’s to understand the choices behind it.
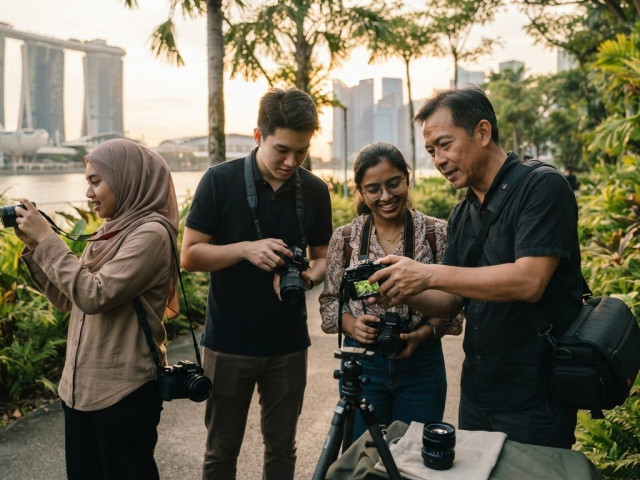
Pictorial’s classes have a maximum of three participants and include practical outdoor shooting. Small classes give you room to work through a camera question while practising, rather than trying to make sense of a setting in isolation. Led by professional photographer Keith, Pictorial has taught over 20,000 students. The focus is on a calm, practical learning environment and guidance as you practise.
Choose a next step that feels manageable
You can bring your own camera or use Pictorial’s Complimentary camera loan (if needed). Either way, your learning can centre on the scene and the decisions you make, not on having the newest equipment.
Think about what would help you most right now. If you’re still getting comfortable holding the camera, focusing and making a considered frame, a beginner learning path may be a good place to start. If you already know the basics and want to practise with more challenging scenes, you may prefer a course with greater depth. Choose a next step that feels useful rather than overwhelming.
Guided practice can make it easier to connect a camera choice with what appears in the photograph. You can ask about a result as it happens, make an adjustment and see whether it better suits your intention. This kind of learning won’t remove every uncertainty at once, but it can help you build familiarity through real photographs and thoughtful feedback.
If you’re ready to learn DSLR photography with practical support, explore Pictorial’s photography courses and choose a learning path that fits your current confidence and the kind of practice you want.
Take Your Next Camera Choice Into the Field
Your next step doesn’t need to be a perfect photograph. Choose one scene you’d like to understand better, then give yourself time to make a few considered attempts. You might return to a familiar subject in different light or notice how a new viewpoint changes the feeling of a frame. Each outing gives you another chance to make choices with purpose.
As you learn DSLR photography, let curiosity guide your practice. Keep track of the questions you want to answer and use them to shape what you try next. Gradually, the controls that once felt unfamiliar can become part of a more natural way of seeing and photographing.
Take it at your own pace. One thoughtful frame can be the beginning of a more confident approach.
Frequently Asked Questions
Can I learn DSLR photography by myself?
Yes, you can learn DSLR photography by practising on your own. Try photographing a familiar object near a window, then check the camera’s playback display for focus and brightness. Keep a brief record of the setting or position you changed so you can repeat a result that worked. If a control remains confusing, a guide or instructor can help explain it, while regular practice builds familiarity.
How long does it take to learn DSLR photography?
There’s no fixed timeline. Your progress depends on how often you practise, what you want to photograph and how quickly the camera’s controls become familiar. You might notice a useful difference in one session, such as a clearer focus choice, while making decisions more confidently takes repeated practice. Set a small goal, like keeping a moving subject sharp, and revisit it until you can explain which choice helped.
Do I need a lens other than the one that came with my DSLR?
No, you can begin with the lens that came with your camera. For example, use it to photograph a friend across a room, then move closer and compare how the scene feels in each frame. This helps you notice how distance and framing affect the picture before adding another variable. A different lens can suit a particular subject or viewpoint, but it isn’t required to learn the basics.
Can I learn DSLR photography without editing software?
Yes. You can practise taking considered photographs without editing software. Start by checking the original image on your camera: is the main subject clear, and does the brightness suit the scene? For example, compare a photograph of a shaded subject against a bright background with one made from a different angle. That comparison helps you understand your in-camera choices. Editing can be explored separately, but it isn’t needed to begin.
Is a DSLR difficult for a complete beginner to use?
A DSLR can feel unfamiliar at first, but you don’t need to understand every button before taking pictures. Begin by learning how to switch the camera on, look through the viewfinder, focus and review a frame. Then explore one control that’s relevant to your next photograph. If a menu feels confusing, leave it for now and use the controls you already understand. Small steps make the camera easier to approach.
Can I learn DSLR photography if I don’t own a camera?
Yes. Pictorial offers a Complimentary camera loan (if needed), so you can take part in practical photography learning without first buying a DSLR. During an exercise, pay attention to how the camera feels in your hands and how its controls affect the frame. That experience can help you understand what you enjoy photographing before deciding what equipment suits your interests.
Ready to take your next step? Explore Pictorial’s photography courses and find a practical way to learn.

Disclaimer
© Pictorial | All Rights Reserved.