
Outdoor Photography Class: Learning in the Field
What if camera settings made more sense once you could see their effect in a real scene? An outdoor photography class connects exposure, focus and composition to what you see through the camera. You can test a setting, look at the result and compare it with the scene instead of trying to imagine how a control might change a photograph. If you’re worried about keeping up or bringing the wrong gear, practical guidance can help you focus on one decision at a time.
This guide explains what to practise during an outdoor lesson, from choosing a composition to adjusting camera settings and reviewing the result. It also covers how to prepare and what to look for in a class that makes room for questions and individual practice.
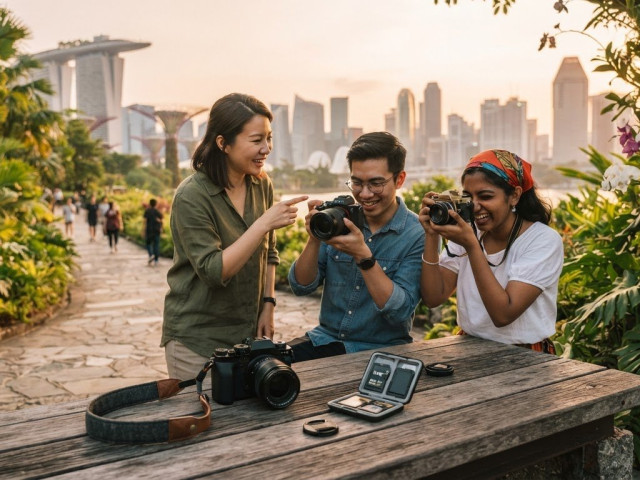
At Pictorial, hands-on photography courses include outdoor shooting practice and personalised guidance in classes of up to three participants. Bring your own camera or use a Complimentary camera loan (if needed). As you practise, camera controls become choices you can see and repeat, helping you build confidence one photograph at a time.
Key Takeaways
- An outdoor photography class connects camera settings to what you see in the frame, making it easier to understand what each adjustment does.
- Use a simple fieldwork sequence: observe the scene, choose a frame, adjust one setting, take the photograph, then review the result.
- Choose a class that suits your experience and goals, whether you want a first introduction or a way to keep developing your skills.
- Prepare your camera, battery, memory card and comfortable clothing so you can give more attention to the scene.
- Pictorial’s classes have a maximum of three participants, allowing space for questions and individual practice outdoors.
What Is an Outdoor Photography Class, and Who Is It For?
An outdoor photography class is a guided opportunity to practise observing, framing and making camera choices in real scenes. Instead of learning settings in isolation, you can see how an adjustment changes the photograph. A self-guided photo walk gives you time to explore independently; a taught class adds instruction, feedback and a chance to ask questions as you work.
The subject might be a landscape, a plant, a bird or another detail that catches your eye. Nature photography covers subjects such as landscapes and wildlife, but outdoor practice can also help you notice more in everyday scenes. The central skill is learning to look carefully at what’s in the frame, then making deliberate choices about how to photograph it.
You don’t need to be an experienced photographer to take part. Beginners can connect unfamiliar camera controls with visible results, while developing photographers can practise making more considered choices. The aim isn’t to produce a perfect image every time. It’s to understand why a photograph looks the way it does and have a practical way to decide what to try next.
How a field lesson differs from practising alone
When you practise alone, it can be hard to tell which change affected the result. With an instructor nearby, you can talk through a choice, take a photograph and compare it with the scene. If a picture looks too bright or the subject is hard to see, you can ask about it while the light and camera settings are still in front of you. The guidance relates to the moment, not just a general explanation.
Outdoor lessons give you opportunities to learn through observation and questions. At Pictorial, hands-on photography courses include outdoor shooting practice and personalised guidance in classes of up to three participants. The small class size leaves room to raise questions and receive individual attention while you practise.
What beginners can reasonably expect to practise
A useful starting point is straightforward: observe a subject, decide what belongs in the frame, then make one deliberate camera adjustment before taking a picture. You might compare how the image changes when you adjust exposure or focus. Looking at the photograph beside the scene helps turn a technical term into something you can see and respond to.
You don’t need to arrive knowing every setting or piece of terminology. A useful explanation can start with the photograph itself: what appears sharp, how bright the image looks or where the viewer’s attention falls. At Pictorial, you can use your own camera or receive a Complimentary camera loan (if needed). A basic photography course for beginners is one option for guided support with foundational skills. One lesson won’t make every decision automatic, but it can give you a clearer way to practise and learn from each frame.
What Happens During an Outdoor Photography Class?
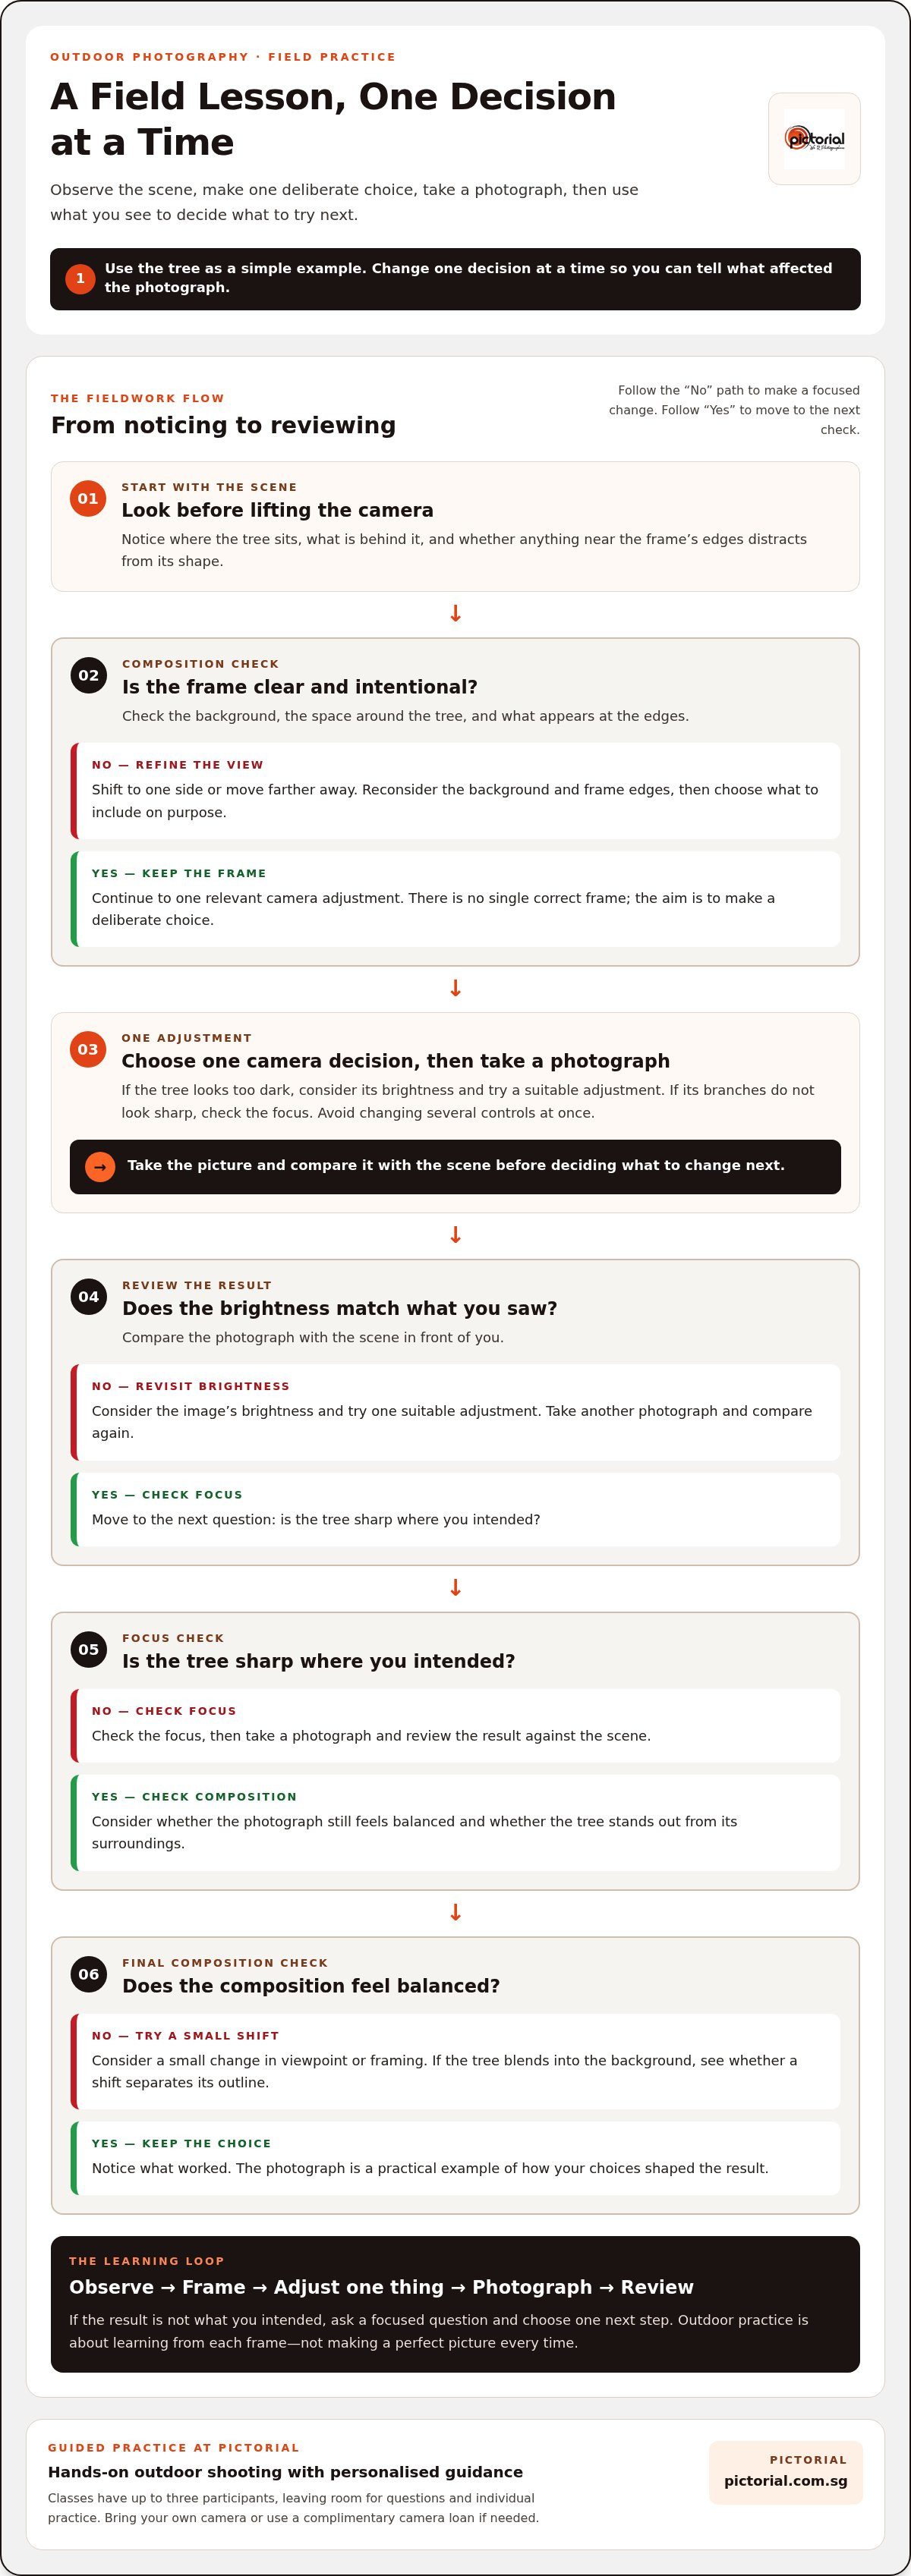
A field session feels more manageable when you treat it as a series of small decisions. Rather than trying to remember every camera control at once, use a simple rhythm: observe, choose a frame, adjust, shoot and review. Even a familiar subject, such as a tree, gives you details to consider, from its shape against the sky to the way light falls across its trunk.
From noticing a subject to framing the photograph
Look before lifting the camera. Notice where the tree sits, what’s behind it and whether anything near the frame’s edges distracts from its shape. Then change your position. Stepping to one side or moving farther away can alter the background and the space around the subject. Before pressing the shutter, make one clear compositional choice, such as placing the tree off-centre or including more of its surroundings.
There’s no single correct frame. The point is to recognise that distance and viewpoint affect what the photograph includes, then choose your framing on purpose. An instructor can help you spot a busy background or show how a small shift changes the balance of the image while the scene is still in view.
From camera adjustment to reviewing the result
Once you’ve settled on a frame, choose one relevant camera adjustment, take a photograph and look at what changed. If the tree looks too dark, for example, you can consider its brightness and try a suitable adjustment. If its branches don’t look sharp, check the focus. Avoid changing several controls at once. Isolating one decision makes it easier to see how it affected the image.
Review the photograph against the scene. Is the tree sharp where you intended? Does the brightness match what you saw? Does the composition still feel balanced? Comparing the image with what’s in front of you gives you a reason to keep, refine or try another choice. Each photograph can serve as a practical example, showing how one decision shaped the result and what you might change next.
Keep your review focused on what you can see rather than trying to diagnose every setting at once. If the tree blends into its background, for instance, consider whether a small change in viewpoint would separate its outline. A beginner-friendly basic photography course can also help make exposure and camera controls easier to understand before you practise them in the field.
Reviewing in an outdoor photography class isn’t about judging whether you’ve made a perfect picture. It’s a chance to notice what worked, ask a focused question and choose one next step. Pictorial’s photography courses include hands-on outdoor shooting and personalised guidance.
Which Outdoor Photography Class Fits Your Experience and Goals?
The right class is one that meets you at your current level and gives you room to practise what matters to you. You don’t need a complete list of skills to work on. Start by considering how comfortable you are with your camera, what you want to improve and how much guidance would help you stay focused during practical work.
| Experience | Learning goal | Preferred guidance |
|---|---|---|
| New to photography or unsure of camera controls | Build confidence with basic choices while photographing a real scene | Frequent explanations and time to ask questions as you practise |
| Comfortable with basic camera use | Make more deliberate choices about framing or camera settings | Guidance when needed, with space to try adjustments independently |
| Developing photographer | Continue building skills or explore a particular subject | Feedback that helps you reflect on your decisions and next steps |
Choose a class around the skill you want to practise
It can help to name one question before class: “How can I make the subject stand out?” or “Why does this image look darker than the scene?” A clear question gives you something practical to notice while leaving room for other discoveries as you shoot. If you’re starting from the beginning, a basic photography course for beginners can provide a foundation for learning the fundamentals.
Consider group guidance and equipment comfort
It’s understandable to worry about slowing others down if you need to ask basic questions. In a small class, you have more opportunity to ask about a setting or composition while you’re working. Pictorial’s classes have a maximum of three participants, with personalised guidance and space for individual questions.
Advanced equipment isn’t a prerequisite for learning photography. Using a camera you already have can help you become familiar with its controls, and Pictorial offers a Complimentary camera loan (if needed). Choose a learning format that helps you feel at ease enough to practise, ask questions and make your own decisions. An outdoor photography class should give you a useful next step, whether you’re getting comfortable with the basics or continuing to develop your eye.
How to Prepare for an Outdoor Photography Class
Preparation doesn’t mean learning every camera function before you arrive. A few simple checks can prevent avoidable distractions, leaving you more attention for noticing light, choosing a frame and listening to guidance. The aim is to arrive ready to practise, not to prove how much you already know.
Use this short checklist before heading out:
- Camera: Bring a camera you can comfortably hold and operate, if you have one. Check where the shutter button and basic controls are.
- Battery: Charge it beforehand, and bring a spare if you already have one.
- Memory: Check that your memory card has room for new photographs.
- Clothing: Choose comfortable clothing and footwear for spending time outdoors. Consider the day’s weather when deciding what to wear.
- Question: Think of one thing you’d like to understand, such as how to keep a subject in focus or make it stand out in the frame.
Bring a camera you can comfortably handle
A familiar camera can make it easier to follow the lesson because you won’t need to search for every control before trying an adjustment. You don’t need advanced equipment to learn how photographs are made. If you don’t have a camera to bring, Pictorial offers a Complimentary camera loan (if needed). Before the lesson, check how your camera turns on and how to take a photograph.
Make space for observation and practice
A charged battery and available memory mean you can take photographs without pausing to solve avoidable equipment problems. Comfortable clothing and footwear also help you focus on the lesson. Keep your preparation simple. You don’t need perfect kit; you need to be comfortable enough to observe and try things out.
Checking the basic controls in advance can help, but don’t worry if you’re not confident with them yet. Knowing where to find a setting leaves more room to notice what’s happening in the scene, and questions about controls can become part of your practice. Bring one question, then stay open to what catches your eye. A change in brightness, a distracting background or a subject that’s difficult to focus on can all give you something to explore.
Arrive ready to observe, not to perform. You’re there to learn through practice, so it’s fine if you’re still finding your way around the camera or aren’t sure what you want to photograph. One useful question is enough to give your attention a starting point.
Explore Pictorial’s photography courses
Learn Through Guided Outdoor Photography at Pictorial
Good field practice gives camera choices a clear purpose: notice something in the scene, decide how you want to photograph it, then see what your settings do to the result. Pictorial’s hands-on photography courses include outdoor shooting practice and personalised guidance, so you can work with real scenes while developing your understanding of the camera.
What guided learning looks like at Pictorial
As you photograph, an instructor can help connect a choice, such as where to focus or how to frame a subject, with the image it produces. That makes it easier to ask a question while the photograph and camera controls are in front of you. Classes have a maximum of three participants, giving space for individual questions and guidance during practical learning.
Bring your own camera or use a Complimentary camera loan (if needed). You don’t need to arrive confident with every control. Guided practice gives you room to work through a choice, look at the result and understand what you might try next. You can bring your own questions and work at a manageable pace, with personalised guidance in a small class.
Pictorial was founded in 2005 and is led by professional photographer Keith. The school has taught over 20,000 students. Its practical approach connects camera choices to real scenes, with time for questions and guidance as you learn to relate what you see to what appears in your photographs.
Choose a next step that feels manageable
If you’re new to photography, begin by learning the basics and becoming more comfortable using a camera. If you already have some experience, you may want to continue developing your skills. You don’t need to settle every learning goal before you start. Identify what you’d like guidance with, then compare course options with that goal in mind.
For a first introduction, a basic photography course can be a suitable pathway to explore. If you’re considering broader learning, review the course options and choose one that fits your current experience and interests. The aim isn’t to rush into advanced material, but to find a learning experience that gives you space to practise and ask questions.
An outdoor photography class can make camera learning feel more grounded because you’re working with visible subjects and real photographs. If guided outdoor practice sounds like a helpful next step, explore Pictorial’s photography courses.
Take Your Next Photograph With Intention
You don’t need to wait until every camera setting feels familiar before you begin. Choose one small intention for your next outing: notice how light falls across a subject, try a different viewpoint or pay attention to what appears at the edge of the frame. A clear focus gives you something useful to practise, even if the photograph doesn’t turn out as planned.
An outdoor photography class can help you build that habit with guidance while you work. As you compare what you saw with what your camera recorded, each image gives you a chance to make a more considered choice next time. Progress can begin with looking closely, trying something and staying curious about the result.
If you’re ready to find a learning pathway that suits your interests, explore Pictorial’s course options.
Bring your questions and a willingness to observe. Your next photograph is a good place to start.
Frequently Asked Questions
Do I need photography experience before joining an outdoor photography class?
No. You can join while you’re still learning how your camera works, and you don’t need to memorise technical terms first. Start with a simple question, such as why a moving subject looks blurred or how to keep a background from competing with your subject. Sharing your goal with the instructor helps make the guidance relevant, whether you’re new to photography or returning after a break.
Can I attend an outdoor photography class without owning a camera?
Yes. Pictorial offers a Complimentary camera loan (if needed) with every course. If you already have a camera, bringing the one you use most often can make practice feel familiar and help you apply what you learn later. You don’t need extra accessories to get started. Focus on making thoughtful choices with the camera in your hands.
What should I wear to an outdoor photography class?
Wear comfortable clothes and footwear that let you move around to find a good viewpoint. Check the weather before setting out, then bring sun or rain protection if it suits the conditions. A secure, comfortable way to carry your camera can also keep your hands free between photographs. Choose practical layers so you can focus on the scene.
Is an outdoor photography class useful if I mainly take pictures on my phone?
Yes. You can practise noticing light, choosing a viewpoint and arranging elements in the frame with a phone. Those visual decisions matter whatever device you use. If you want lessons focused on using a phone, Pictorial offers Mobile Photography Essentials.
What is the difference between an outdoor photography class and a photo walk?
A photo walk may simply give you time to explore and take pictures, while a class includes a learning purpose and instruction. The distinction is whether guidance is part of the activity. For example, a class might help you understand why a subject looks small in the frame, then give you a chance to test a different viewpoint and discuss the result.
How can I get more from my first outdoor photography class?
Choose one or two questions to keep in mind rather than trying to change everything at once. For instance, notice whether your subject stands out from its background. After taking a photograph, make a note of what you changed and what you noticed. That gives you a useful reference later. Ask the instructor about anything unclear so you can decide what to practise next.

Disclaimer
© Pictorial | All Rights Reserved.