
Travel Photography: A Practical Guide to Better Photos
What if better travel photos had less to do with your camera and more to do with what you notice? It’s easy to come home with a phone full of similar landmark shots, especially when the light changes, people move, and unfamiliar scenes compete for attention. Building photography skills for travel starts with learning to pause, look around, and anticipate a moment, not buying more gear.
You don’t need to master complicated settings before making thoughtful images. A few practical choices can help you recognise useful light, find a clearer frame, and capture details that bring a place back to mind. The camera or phone you already carry is enough to begin.
In this guide, you’ll learn how to work with changing light, choose what to include, and photograph a mix of scenes and small moments instead of repeating the same snapshot. The aim is a varied, personal record of your trip, made with more confidence as you explore.
Key Takeaways
- Give your photography skills for travel a simple focus by choosing a subject or question to guide the images you make throughout the day.
- Notice whether light is soft, direct, or creating strong contrast, then use its effect to shape the mood of a scene.
- Try a higher or lower viewpoint to change what stands out and help your subject read more clearly in the frame.
- Photograph everyday moments thoughtfully, and consider a friendly request when you want to make a direct portrait of someone.
- Use a repeatable shooting routine, then review your photos at day’s end for variety, clarity, and a sense of story.
Photography skills for travel: start by noticing the story
You don’t need advanced gear to make memorable travel photos. Attention matters more. Before taking a picture, ask what caught your eye and what it tells you about the place. A food stall setting up for the day, a pattern of old windows, or the contrast between a quiet lane and a busy street can all give your images a clear point of view.
Choosing a simple subject or question gives your photographs a visual thread. You might follow morning routines, notice how architecture changes along a walk, or look for how a landscape shifts from one stop to the next. The idea isn’t to photograph only one thing. It’s to give yourself a reason to look more closely. Travel photography includes documenting landscapes, people, and cultures, so a thoughtful set of images can show more than a destination’s most recognisable view.
How to find a visual story while travelling
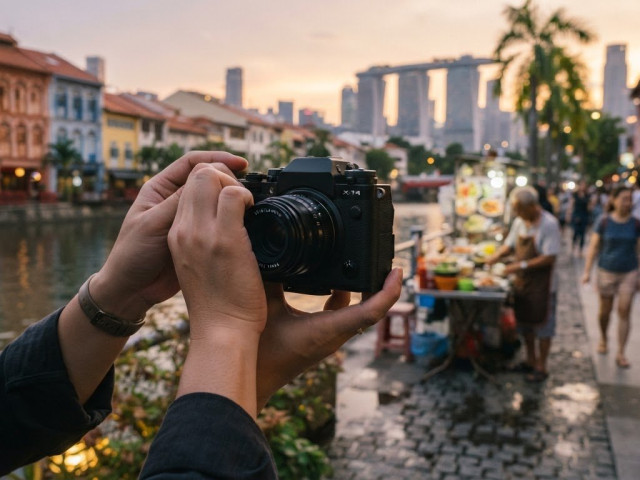
Pick a theme you can spot as you explore, then vary how you photograph it. At a market, start with a wide view that establishes the setting. Move closer to show a vendor arranging produce, then look for a revealing detail, such as handwritten prices or a well-used basket. Together, these frames offer more context than several similar wide shots.
Include people, small details, and transitions between places when they help explain the day. A doorway opening, a train pulling away, or the change from a crowded street to a calm courtyard can suggest how a place feels. Ask what each image adds to the story. If two frames say the same thing, look for a different moment or viewpoint.
What to carry without overpacking
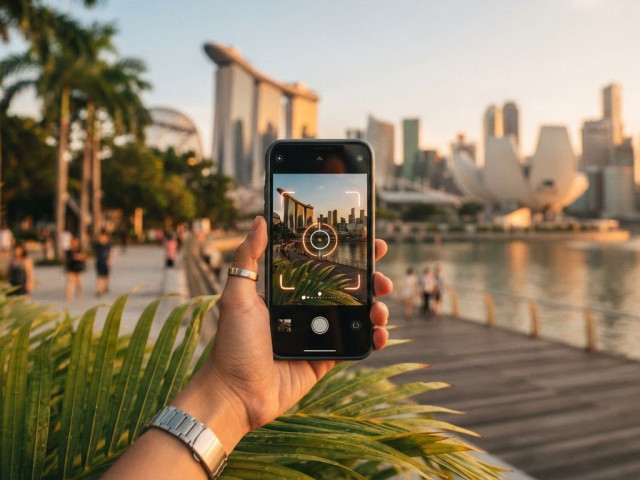
Start with the phone or camera you already know. Before your trip, practise the basic controls you’re likely to use, such as focusing, adjusting exposure, switching between camera views, and reviewing a photo. Familiarity makes it easier to respond when a moment appears instead of searching through menus.
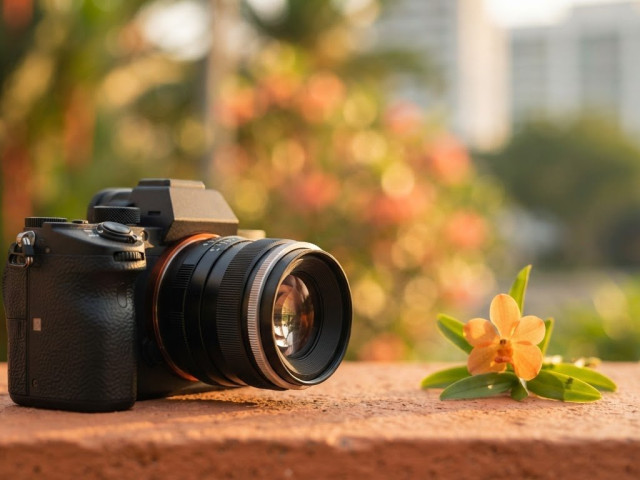
Keep your kit light enough to carry comfortably and your camera easy to reach. A charged phone or camera and any accessory you regularly use may be all you need. No single lens or extra item is essential for every traveller. Good photography skills for travel grow through looking, choosing, and practising with the equipment at hand. If you’d like structured practice with phone photography, Pictorial’s Mobile Photography Essentials offers hands-on learning to help build those habits.
Use changing light to make travel photos feel more deliberate
Light can make the same street feel welcoming, dramatic, or flat. Before you raise your phone or camera, notice where the light is coming from and what it does to your subject. This pause helps you decide whether to take the picture now, change your position, or wait for a better moment.
Front light falls on the side of a subject facing you, making colours and details easier to see. Side light skims across a textured wall or food stall, bringing out shape and depth. Backlight comes from behind the subject, which can create a bright outline or a silhouette but may leave the subject’s face in shadow. For a broader look at planning and capturing a place, explore these professional travel photography tips.
Recognise the light before choosing camera settings
Look at the scene first. Is the light soft or harsh? Are bright patches pulling attention away from your subject? In open shade, such as beneath a covered walkway, light is often more even, helping colours and details show without the deep shadows of direct sun. If you spot a promising scene but the light feels unhelpful, move to change its direction or return later if your plans allow.
When light weakens your subject, move yourself or wait. A small shift to the side can change the background and the way light falls across a face or object. This is one of the most useful photography skills for travel, and it often matters more than changing several settings.
Adapt to bright sun, shade, and evening scenes
Bright sun can create strong contrast between sunlit areas and shadows. Check the brightest parts of the scene before taking the photo. If important details look washed out, try a different angle or move your subject into softer light where possible. A shaded doorway or covered path can offer a calmer, more even look.
In shade, steady your phone or camera and focus on the subject before pressing the shutter. If the scene is dim, hold still or brace your hands against a stable surface. In the evening, a sharp, simple frame is often more useful than rushing to adjust controls you don’t yet understand. Keep the subject clear and avoid unnecessary setting changes.
For guided practice using your phone camera in different conditions, Mobile Photography Essentials helps you build confidence with its controls through practical learning.
Compose travel photos with clear subjects and stronger frames
Composition isn’t a set of rules you have to get right. It helps someone looking at your photo notice what matters to you. First choose the main subject, then decide what belongs around it. A person crossing a bright doorway, for example, may stand out more if the frame includes the doorway but leaves out nearby distractions.
Use the scene to support the subject. A railing or path can guide the eye towards it, while open space can give it room to breathe. Foreground details can add depth if they don’t compete for attention. Before taking the picture, check the frame edges. A bright sign, cropped object, or passer-by may pull the eye away from the moment you meant to capture.
Change your viewpoint to change the feeling
At eye level, a scene often feels direct and familiar. Raise the camera to show patterns in a busy street or the layout of a market. Lower it to make a nearby detail feel prominent or include more of the surroundings above a person. Take a step to either side, too. A small position change can separate your subject from a cluttered background.
Try this simple sequence to give your travel photos variety:
- Wide scene: Step back to show where the moment is happening and how the setting fits together.
- Close detail: Move nearer to a sign, object, or texture that adds character or context.
- Environmental portrait: Include a person within their surroundings so the frame suggests a connection between them and the place.
These frames serve different purposes, so avoid relying on several versions of the same view. Move closer or change position before using digital zoom or planning to crop heavily. The aim is to make the subject clearer as you take the photo.
Make each frame feel intentional
Composition can guide attention without making a photograph feel stiff. Use leading lines when they draw the eye towards your subject, and leave open space when it helps the subject stand out. For examples, see these travel photography tips from National Geographic. Practising these choices builds photography skills for travel with any camera you have.
For feedback while practising composition with your phone, Mobile Photography Essentials offers guided learning to help you develop your phone photography skills.

Photograph people and everyday moments with care
Photographing strangers can feel awkward, especially when you’re still deciding how to frame the scene. You don’t have to force the shot. Pay attention to the setting, local expectations, and your own comfort, then choose an approach that feels considerate. Rules and customs vary between places, so follow posted guidance and don’t treat every scene as an invitation to photograph.
Make people photographs feel natural and respectful
A direct portrait is a conversation, even if it’s brief. Approach calmly, explain that you’d like to take a photo, and give the person space to decide. If they decline or seem uncomfortable, accept that and move on without pressure. A friendly request can help the person settle into the moment rather than feel surprised by the camera.
Candid photographs observe a moment as it unfolds, such as friends sharing a meal or a shopkeeper arranging a display. Keep a respectful distance where appropriate, and don’t interrupt someone’s work or interaction just to improve your frame. If the scene feels private or the person appears uneasy, lower your camera.
Context can make a portrait more specific. Instead of filling the frame only with a face, include part of the person’s surroundings, such as the stall where they work or the street they’re walking through. These details show a connection between the person and the place without needing a posed expression.
Notice small moments beyond the obvious landmark
A trip’s character often appears in ordinary details: a hand passing a plate, a meal being shared, a sign worn by the weather, or the pause between one stop and the next. Look for gestures and interactions that suggest what’s happening, rather than photographing people as background decoration. Consider what the moment says about the place and the people in it.
Landmarks can anchor your visual record, but quieter frames bring a personal note. After photographing a familiar view, change your timing or position. Wait for a passer-by to enter the frame, turn towards a nearby detail, or step aside to include more of the surroundings. This creates variety without repeating the same viewpoint.
These choices build photography skills for travel: noticing when a person adds context, choosing a respectful distance, and deciding when not to take the picture. For structured practice with your phone camera, Mobile Photography Essentials helps you develop your skills with guidance.
Explore Mobile Photography Essentials
Use a simple travel photography routine to practise and improve
A steady routine helps you make choices without turning every photo into a technical exercise. Use the same sequence whether you’re photographing a street, a meal, or a passing moment. With practice, these small decisions become more natural, and your photography skills for travel grow one outing at a time.
A six-step routine for taking better travel photos
- Observe: Pause and notice what’s happening before you lift the camera.
- Choose: Decide what caught your attention and what you want the photo to show.
- Check the light: Look at how light falls on the subject and whether it helps the scene read clearly.
- Frame: Choose a viewpoint, place the subject, and check the frame edges for distractions.
- Capture: Hold the phone or camera steadily and take the picture when the moment feels right.
- Review: Look at the result when convenient. If it feels unclear, adjust one thing and try again.
You don’t need to complete every step slowly each time. The pause before shooting is the useful part. It gives you a chance to notice a stronger angle, wait for a gesture, or decide that the moment is better left unphotographed.
Turn each outing into useful practice
Choose one skill to focus on for an outing rather than trying to improve everything at once. You might look for varied viewpoints, pay attention to light, or make a mix of wide scenes and close details. A single focus gives you a manageable way to practise while still enjoying the place you’re exploring.
At the end of the day, select a few images and ask yourself what makes each one work. Is the subject easy to see? Does the frame include enough context? Do the photographs show different parts of the day, or are several telling the same story? Treat this as observation, not a test. Your answers can guide what you try next time.
Small, repeated practice is more useful than trying to master every technique in one trip. If you’d like feedback and a more structured way to practise with your phone camera, Mobile Photography Essentials is a relevant next step.
Keep noticing, practising, and shaping your travel photos
Better travel photography doesn’t depend on carrying more gear. It grows from noticing a story, reading the light, and choosing a clear frame. Build your photography skills for travel one decision at a time: pause before shooting, look for details and human moments, and review your photos for variety and clarity.
Your phone or camera is enough to begin. If you’d like feedback and guided practice, Pictorial offers hands-on photography courses with small classes of up to three participants, personalised guidance, and practical outdoor shooting. A complimentary camera loan is available for courses if needed.
Keep practising with curiosity, not pressure. Each thoughtful frame helps you bring home a more personal record of the places and moments that mattered to you.
Frequently Asked Questions
How can I improve my travel photography skills as a beginner?
Improve your photography skills for travel by practising one decision at a time. Before each shot, identify the subject, notice the direction and quality of the light, then choose a viewpoint that makes the subject clear. If the scene allows, take a wide view and move closer for a detail. Later, review a small selection of images and consider what worked, without turning every outing into a technical exercise.
Do I need a camera to take good travel photos?
No, a phone you know how to use can take strong travel photos. What matters most is noticing light, choosing a clear subject, adjusting your position, and checking the frame before you shoot. Learn your device’s basic controls before travelling, then practise using them. Familiarity helps you respond naturally when an interesting moment appears, whether you’re using a phone or a dedicated camera.
What is the best time of day for travel photography?
There isn’t one best time for every scene. Softer light can make portraits and outdoor details easier to photograph, while stronger light can bring out bold shapes and contrast. Look at how the light falls on your subject rather than relying only on the clock. If a scene matters to you, consider returning when the light changes, as long as your plans allow.
How do I take better travel photos in harsh sunlight?
Look for open shade or a position where light falls more evenly across your subject. Check bright areas in the frame to see whether important details are being lost, and try changing your viewpoint before adjusting several settings. Harsh sunlight can also create striking shapes and contrast. Decide whether that effect supports the photograph instead of assuming bright conditions are unusable.
How can I photograph people while travelling respectfully?
Consider the situation and the person’s comfort. For a direct portrait, approach politely, explain what you’d like to photograph, and accept a refusal without pressure. In candid scenes, avoid interrupting people or making them the focus if that feels intrusive. Pay attention to local expectations, and choose another subject if a photograph could make someone uncomfortable. A thoughtful choice may mean putting the camera away.
How do I make my travel photos look less like snapshots?
Give each image a clear subject and a purpose within your wider travel story. Change your distance and viewpoint, check the frame edges, and include details that help explain the scene. Rather than photographing every landmark from the same position, look for a change in light, a moment of human activity, or a quieter detail. These choices help your photos feel varied and personal.
Should I use a phone or a camera for travel photography?
Use the device that suits your trip and feels comfortable to operate. A phone is convenient and close at hand, while a dedicated camera may offer different controls and handling. Neither guarantees a compelling photo. Practise composition, light, and timing with the device you choose, and learn how it works before your trip. Familiarity can help you respond more easily when a moment catches your attention.

Disclaimer
© Pictorial | All Rights Reserved.