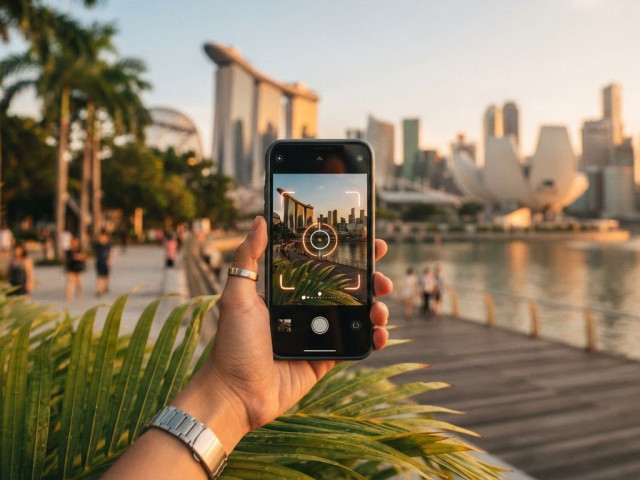

Phone Photography Course: How to Choose the Right Hands-On Class
What if the problem with your phone photos isn’t your phone, but not knowing what to look for before you tap the shutter? It’s frustrating when a scene looks bright and clear in front of you but turns out dull or cluttered in the image. Camera controls and photography terms can add to the confusion, while online tips may leave you practising without useful feedback. A practical phone photography course can help connect what you see with the choices you make.
You don’t need a new device or a long list of technical settings to take more deliberate photos. With clear guidance and time to practise, you can learn how light, focus, framing and exposure affect the result, then make small adjustments with confidence.
This guide explains which hands-on skills to look for, how to assess practice and guidance, and how to choose a learning format that suits your experience and schedule. You’ll also find out how Pictorial’s Mobile Photography Essentials fits, so you can build on the phone you already own.
Key Takeaways
- A useful phone photography course helps you apply camera techniques through practice, rather than simply memorising phone features.
- Use a repeatable shooting process: observe the light, choose a subject, frame it, focus, take the photo, then review the result.
- Free online tips suit self-paced exploration, while a hands-on class can add guided practice.
- Match your learning format to your goals, whether you want more confidence with everyday photos, travel images, or creative practice.
- Pictorial’s Mobile Photography Essentials is a group course with 2 sessions, 2 hours each, and a maximum of three participants.
What Does a Phone Photography Course Actually Teach?
A phone photography course helps you make more deliberate images with a smartphone. The aim isn’t to memorise a list of camera features. It’s to practise choices such as where to stand, what to include in the frame, and where to focus, then understand how those choices affect the photo.
Those decisions draw on the fundamentals of photography, including light, composition and exposure. A useful class connects those ideas to actions you can try with your phone. Guided practice gives you a chance to test a technique, review the image and decide what to adjust next.
Which practical phone photography skills should beginners look for?
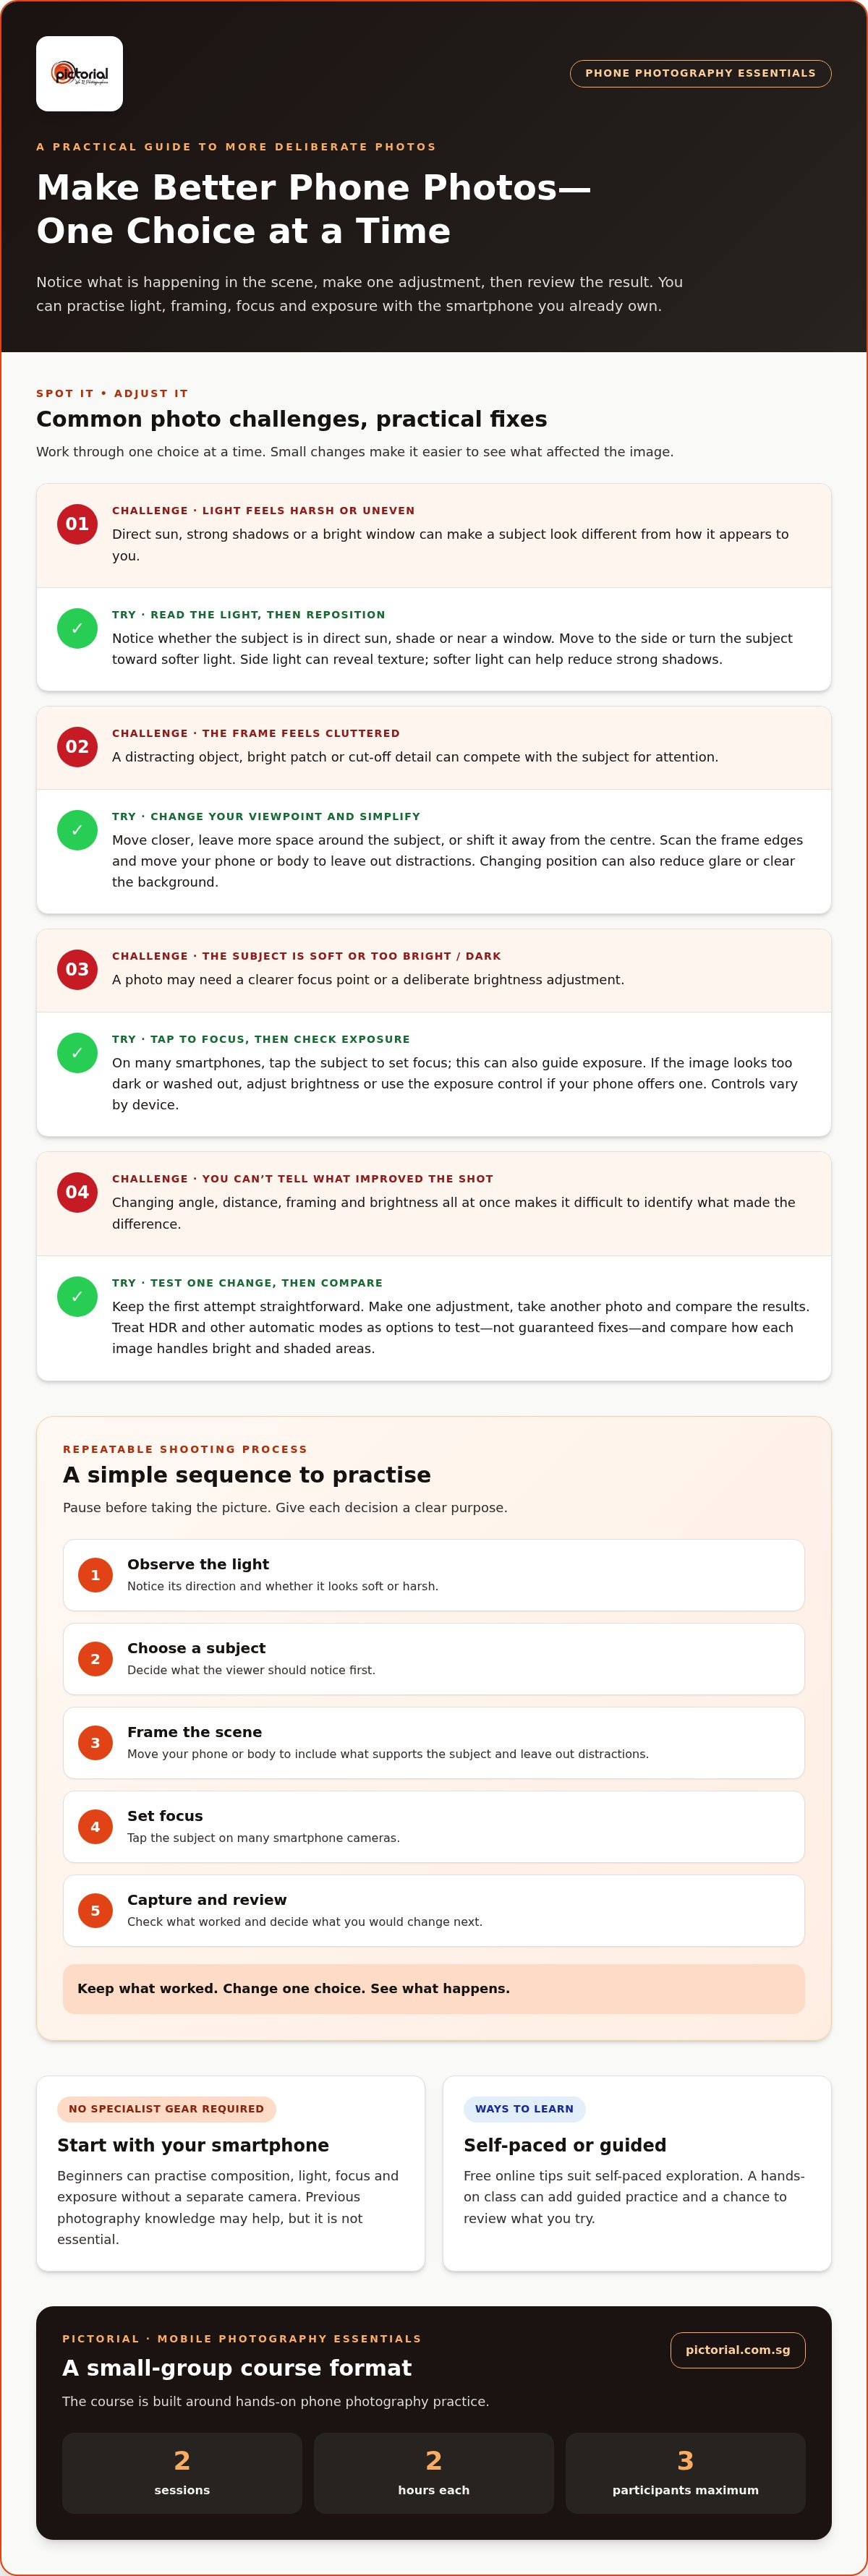
Start with light and position. Before taking a photo, notice whether your subject is in direct sun, shade or near a window. Move a step to the side or turn the subject towards softer light, then compare how the image changes. Changing where you stand can also reduce glare or move a distracting object out of the background.
Composition is another practical skill. Try moving closer, leaving more space around your subject, or shifting it away from the centre. Check the edges of the frame and simplify anything that competes for attention. Focus and exposure help refine the result: tap the subject to set focus, and adjust brightness if the image looks too dark or washed out. If your phone provides an exposure control, change it deliberately and compare the outcome.
These skills work together. If a face looks dim against a bright window, you might change your position, reframe to reduce the bright background, then focus on the face and adjust brightness. Practising one decision at a time helps you see what made the difference.
Do you need photography experience or a separate camera?
No. Your smartphone is a familiar starting point, and beginners can practise composition, light, focus and exposure without specialist camera equipment. Previous photography knowledge may help, but it isn’t essential. The useful habits are simple: observe the scene, experiment with one choice, and review the photo rather than assuming the first result is the only one.
Look for instruction that explains camera terms through practical exercises. Pictorial offers a range of photography courses, including the intermediate photography course and Mobile Photography Essentials, which focuses on phone photography.
How to Practise Better Phone Photography: A Repeatable Shooting Process
A simple routine makes practice easier to learn from. Before taking a picture, pause long enough to make one choice at a time. Use this sequence:
- Observe the light: Notice its direction and whether it looks soft or harsh.
- Choose a subject: Decide what the viewer should notice first.
- Frame the scene: Move your phone or body to include what supports the subject and leave out distractions.
- Set focus: Tap the subject on many smartphone cameras.
- Capture and review: Take the photo, then check what worked and what you’d change.
Keep the first attempt straightforward. If you change your angle, distance, framing and brightness all at once, it’s difficult to tell which adjustment improved the result. Try one change, take another photo, and compare. A phone photography course can make this deliberate practice easier by giving you a clear process and practical guidance as you learn.
How can you use light and framing more deliberately?
Notice where the light is coming from and how it falls on your subject. Light from the side can reveal texture, while softer light can help reduce strong shadows. Then change your position before reaching for digital zoom: move closer to give a subject more presence, or step to one side to separate it from the background. Before you press the shutter, scan the frame’s edges for cut-off objects, bright patches or other distractions.
Try this exercise with a cup, plant or other still subject. Take one photo from where you’re standing, then move closer and change your viewpoint for a second. Keep the light as similar as you can. Compare which version gives the subject more space, a cleaner background or a stronger sense of shape.
How should you use focus, exposure, and phone-camera features?
Tap the part of the scene you want sharp. On many phones, this also guides the camera’s exposure. If your image looks too bright or dark, try the exposure adjustment if your camera offers one. Its location and controls vary by device, so learn what the function does rather than expecting every phone to look the same. Oklahoma State University’s guide to the basics of smartphone photography offers additional background on phone-camera settings.
Treat HDR and other automatic modes as options to test, not guaranteed fixes. Take a photo with the setting on and another without it, when your phone allows, then compare how each handles bright and shaded areas. Reviewing each image gives your next attempt a clear purpose: keep what worked, change one choice, and see what happens.
For guided practice with your phone, explore Pictorial’s Mobile Photography Essentials.
Phone Photography Course vs Online Tips: Which Learning Format Fits?
The right way to learn depends on what you need from practice. Free tips and self-study let you explore at your own pace. Online courses can offer a more structured path, while a hands-on class adds a chance to practise with guidance. Each format has different strengths.
- Self-guided tips: Flexible and easy to revisit, but you assess your own photos and choose what to try next.
- Online courses: Often more organised than scattered tips, with lessons you can follow at a time that suits you. Practice and guidance depend on the course format.
- Hands-on classes: Give you a setting to try techniques as you learn, with an instructor available to guide your practice.
When are online tips or self-study enough?
Self-study can be a comfortable starting point if you’re exploring your phone’s camera or want to practise without a fixed schedule. Try one tip, take a few photos, and compare the results. The trade-off is that you have to decide for yourself whether a photo is out of focus, poorly framed or affected by the light, then work out what to change.
If you keep running into the same problem and can’t tell why your adjustments aren’t helping, guided instruction can help you work through it. A specific question, such as why a subject looks dark against a bright background, gives you something concrete to investigate during practice.
What does hands-on instruction add to phone photography learning?
Practice with guidance helps connect a camera choice to its visible effect. You can try an adjustment, look at the result and use what you learn to make your next attempt more intentional. That immediate link between action and image can help you recognise habits you might not notice while practising alone.
Group size also affects how much individual attention is possible. Pictorial’s group classes have a maximum of three participants, with practical outdoor shooting and personalised guidance. For a closer look at what to consider when choosing a class, read how to choose a photography class, then weigh those ideas against the way you prefer to learn.
Mobile Photography Essentials is Pictorial’s phone-focused option for learners who want guided practice, not just tips to follow on their own.
How to Choose a Phone Photography Course That Matches Your Goals
Start with what you want to photograph more confidently. Everyday images may call for help with light, focus and framing. Travel photography may ask you to make quick choices in changing conditions, while creative practice might mean exploring unusual viewpoints or building a more personal style. A clear goal helps you judge whether a class’s format and practice opportunities suit you.
Before choosing a phone photography course, look for clear instruction and time to apply what you learn. Useful practice means making images, reviewing them and understanding what to try differently, rather than only hearing about camera features. Consider the session commitment, whether you prefer learning with a group or in a private workshop, and how much structure helps you stay engaged.
Which course format suits your time and learning style?
Group learning offers a shared setting to practise alongside other participants. A private workshop may suit someone who prefers individual attention and a pace shaped more closely around their learning needs. Neither format is automatically better; consider whether you gain energy from learning with others or prefer a more focused teaching experience.
Pictorial’s Mobile Photography Essentials is a group course with 2 sessions, 2 hours each. Its age descriptor is All age, min. 9. Group sessions run Monday-Sunday (11 AM – 1 PM or 2 PM – 4 PM). These details can help you decide whether the format and time commitment fit your schedule.
What should you look for in practice and instructor guidance?
Look for opportunities to try techniques with your phone and get practical guidance as you learn. If a photo looks different from what you saw, consider whether light, framing, focus or another choice affected the result. Pictorial’s group classes have a maximum of three participants, allowing room for practical guidance and outdoor shooting.
If you’d rather start practising independently, Pictorial’s smartphone photography tips offer a place to begin. You can then decide whether self-guided learning is enough or whether practising with an instructor would better support your goals.
Mobile Photography Essentials combines phone-focused learning with hands-on group practice.
What to Expect from Pictorial’s Mobile Photography Essentials
If you want to make more deliberate images with the phone you already use, Pictorial’s Mobile Photography Essentials is a phone photography course designed around mobile photography. It runs as a group course over 2 sessions, 2 hours each. The age descriptor is All age, min. 9. The group fee is $188 per participant.
Pictorial was founded in 2005, is led by professional photographer Keith, and has taught over 20,000 students. Its small-group classes offer practical outdoor shooting and personalised guidance. You can learn through practice without needing to arrive with technical terms already mastered.
How does the course format support practical learning?
Pictorial takes a hands-on approach to photography learning. With a maximum of three participants in a group class, there is room to practise and receive guidance in a small-group setting. Bring your phone and curiosity about photography, then build your understanding through doing rather than memorising camera terms first.
Complimentary camera loans are available if needed across Pictorial’s courses. For Mobile Photography Essentials, you can practise phone photography with your smartphone, so a separate camera isn’t a requirement.
Beginners can start with simple acts of observation: notice where the light falls, consider what belongs in the frame, and review how those choices shape the image. You don’t need prior expertise to begin practising these habits. A class gives you a structured setting to develop them with guidance.
What is a simple next step before enrolling?
First, consider what you want to improve, such as everyday photos, travel images or a more thoughtful approach to composition. Then compare that goal with the course format: 2 group sessions, 2 hours each, with sessions scheduled Monday-Sunday (11 AM – 1 PM or 2 PM – 4 PM). This makes it easier to judge whether the time commitment and learning setting suit you.
Review the Mobile Photography Essentials course details and decide whether guided practice is the right next step for you.
Take Your Next Phone Photo with More Intention
A good phone photography course helps turn camera choices into habits you can use: notice the light, compose with care, and review each image to guide your next attempt. Choose a learning format that gives you the balance of flexibility and practice you need. You don’t have to master every setting before you begin.
Pictorial has taught more than 20,000 students since it was founded in 2005. Led by professional photographer Keith, its group classes have a maximum of three participants, creating room for practical guidance and outdoor shooting.
Explore Mobile Photography Essentials and decide whether its learning format fits your goals. Each thoughtful photo is a chance to learn, and your phone is already a useful place to start.
Frequently Asked Questions
What does a phone photography course teach?
A phone photography course teaches you to make more deliberate images using your smartphone. Lessons can help you practise noticing light, choosing a viewpoint, composing a frame, setting focus and adjusting exposure where your phone allows. The useful part is applying these choices and reviewing the results, rather than simply memorising camera features. With practice, you can better understand why a photo looks different from the scene you saw.
Can I take a phone photography course as a complete beginner?
Yes. You can begin without photography experience. A smartphone gives you a familiar tool for practising observation, composition and focus, and you can learn camera terms as you use them. Start by noticing where the light falls and deciding what you want the viewer to see. Reviewing your photos helps you make sense of each attempt. Curiosity and a willingness to practise matter more than arriving with technical knowledge.
Do I need a special camera for a phone photography course?
No. The point of a phone photography course is to learn with a smartphone, so a separate camera isn’t needed to practise phone photography. You can work with the camera on your own phone and learn to make deliberate choices about framing, focus and exposure. Pictorial offers complimentary camera loans across its courses if needed, but a separate camera isn’t a requirement for learning phone photography.
Is an in-person phone photography course better than online tutorials?
Neither format is best for everyone. Online tutorials are flexible and useful for exploring tips at your own pace, but you’ll need to assess your photos and decide what to change next. In-person instruction adds guided practice as you work. If you’re comfortable experimenting independently, tutorials may be enough. If repeated trial and error leaves questions unanswered, a hands-on class may suit you better.
How long is Pictorial’s Mobile Photography Essentials course?
Pictorial’s Mobile Photography Essentials is a group course with 2 sessions, 2 hours each. Its age descriptor is “All age, min. 9”. Group classes have a maximum of three participants, and group sessions run Monday-Sunday (11 AM – 1 PM or 2 PM – 4 PM). These details help you understand the time commitment and learning format.
How do I choose the right phone photography course?
Choose a course based on what you want to photograph and how you prefer to learn. You might want more confidence with everyday images, travel photos or creative practice. Look for clear instruction, opportunities to practise techniques and time to review the images you make. Then consider the session length, schedule and whether you prefer group learning or individual attention. A good fit should support your goals and feel manageable to attend.

Article by
Keith Low
Photography Mentor & Founder
Disclaimer
© Pictorial | All Rights Reserved.