
ISO, Aperture & Shutter Speed: 2026 Beginner’s Guide
Photography Starter Session likely stood in a dimly lit room or under the bright afternoon sun, only to find your photos are either a blurry mess or completely blown out. It’s frustrating when the gear you invested in doesn’t seem to perform any better than a basic smartphone. Most beginners feel this exact sting of disappointment. You want to capture the moment as you see it, but the technical manual feels like a wall of jargon, leaving you stuck on Auto mode and hoping you can fix mistakes later in editing.
We’re here to tell you that photography is a tactile craft of balancing light, not a complex mathematical equation. Once you have ISO aperture shutter speed explained in a way that actually makes sense, the intimidation starts to vanish. This 2026 guide is designed to help you master these three pillars so you can take sharp, well-exposed photos directly in-camera. We will show you how to control background blur and freeze fast motion, giving you the steady confidence to finally move away from Auto mode and start making your own creative decisions.
Key Takeaways
- Understand the exposure triangle as a simple balance of light, using the window analogy to visualize how your settings interact.
- Master the f-stop scale to easily control how much of your background is in focus or beautifully blurred.
- Learn to manage time with your shutter speed so you can freeze motion or create intentional blur without the stress of technical jargon.
- Get ISO aperture shutter speed explained simply to help you choose the right sensitivity for clean, sharp images in any lighting condition.
- Discover why moving from theory to outdoor practice is the most effective way to build the confidence needed to leave Auto mode behind forever.
Understanding the Exposure Triangle: How Light Reaches Your Sensor
When you first pick up a camera, the buttons and dials can feel like a barrier between you and a great photo. You might feel tempted to stay on Auto mode because it’s safe, but that often leads to results that don’t match what your eyes actually see. To take control, you need to understand the Exposure Triangle. This concept isn’t a math problem; it’s simply a way to visualize how light travels through your lens to hit the sensor. Having ISO aperture shutter speed explained as a connected system is the first step toward creative independence.
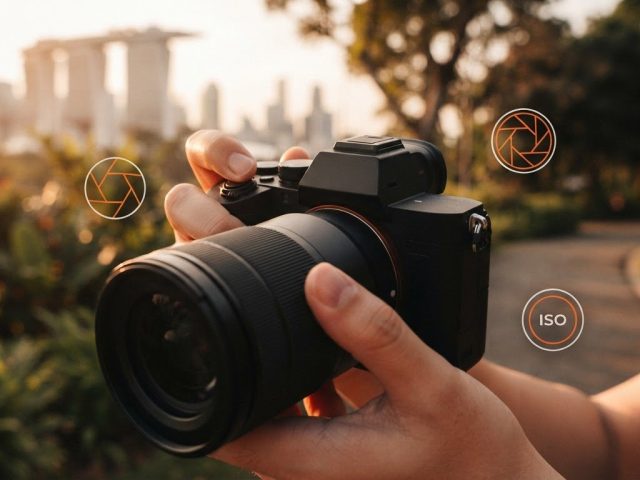
Think of your camera like a window with shutters. Aperture is how wide you open those shutters. Shutter speed is how long you keep them open. ISO is like the sensitivity of your eyes; if you’re wearing dark sunglasses, your eyes are less sensitive to the light coming through the window. To get a balanced photographic exposure, these three elements must work in harmony. If you open the shutters wider to let in more light, you must either close them faster or make your sensor less sensitive to keep the image from becoming a white, “blown-out” mess. The goal is a natural look where details are visible in both the bright sky and the dark shadows.
The Three Pillars of Light Control
Each pillar of the triangle has a specific job. Aperture acts like the pupil of your eye, physically changing the size of the opening in your lens. A wide opening lets in a lot of light but blurs the background. Shutter speed acts like a curtain, determining the exact duration the sensor is exposed to that light. It can freeze a splashing wave or blur a moving car. Finally, ISO determines how the camera processes the light it receives. A low ISO keeps your images clean and crisp, while a high ISO helps you see in the dark at the cost of adding “noise” or grain to your shot.
Why Manual Mode is Your Creative Key
Auto mode is designed to play it safe, but it can’t read your mind. It doesn’t know if you want to blur the background of a portrait or keep every detail of a landscape sharp. By learning how these settings interact, you gain the freedom to make those choices yourself. This is why we focus on hands-on outdoor practice in our Photography Starter Session. Getting ISO aperture shutter speed explained while you’re actually holding a camera helps turn these abstract concepts into physical muscle memory. You don’t need to own a high-end kit to start; we even provide complimentary loaner cameras so you can focus on the craft of making images rather than the cost of gear.
Aperture Explained: Controlling Light and Background Blur
Aperture is the physical opening inside your lens that controls how much light passes through to the sensor. Think of it as the pupil of your eye. When you walk into a dark room, your pupils dilate to let in more light; when you step out into the bright Singapore sun, they constrict. In photography, we measure this opening using the f-stop scale. Technically, an f-stop is the ratio of focal length to the diameter of the opening.
The numbering system often confuses beginners because it feels backwards. A small number like f/1.8 represents a wide, large opening that floods the sensor with light. A large number like f/22 represents a tiny, pinhole-like opening. When you have ISO aperture shutter speed explained, you realize that aperture isn’t just about brightness. It’s your primary tool for deciding what parts of your image are sharp and what parts melt away into a soft blur. This relationship is a core part of Understanding the Exposure Triangle, where aperture acts as the primary gatekeeper for light volume.
Mastering Depth of Field
Depth of field refers to the “slice” of your photo that stays in sharp focus. Wide apertures, such as f/1.4 or f/2.8, create a shallow depth of field. This produces the creamy, blurred backgrounds known as “bokeh” that make subjects pop. It’s a favorite for portrait photographers. A helpful tip for beginners is to always focus on the subject’s eyes when using these wide settings. Because the focus slice is so thin, even a small movement can make the eyes look soft. Conversely, narrow apertures like f/11 or f/16 are better for landscapes, ensuring the foreground grass and distant hills are both crisp.
Aperture and Light Volume
Choosing a wide aperture is essential when you’re shooting indoors or in low-light conditions. It allows you to gather enough light to keep your images bright without needing a tripod. However, there’s always a trade-off. While a wide opening lets in more light, it also makes your focus much less forgiving. You have to be deliberate about where you place your focus point to guide the viewer’s eye exactly where you want it. Understanding how this works alongside your other settings is the key to having ISO aperture shutter speed explained in a way that feels practical rather than academic. If you’re feeling unsure about which dial to turn, our Photography Starter Session offers a stress-free environment to practice these adjustments in person with professional guidance.
Shutter Speed Demystified: Freezing Motion and Managing Light
Shutter speed represents time. It’s the physical curtain that opens to reveal the sensor to light. The faster it opens and closes, the less light hits the sensor, but the more you “freeze” a moment. That distinctive mechanical click you hear is the sound of this curtain in action. Getting ISO aperture shutter speed explained helps you realize that shutter speed is your primary tool for managing movement. When the shutter stays open, anything moving in front of the lens becomes a blur; when it snaps shut instantly, motion is locked in place.
In 2026, technology has pushed these limits further than ever. Professional cameras like the Sony a9 III now feature global shutters capable of speeds up to 1/80,000 of a second. This allows photographers to capture subjects that are completely invisible to the naked eye. On the other end of the scale, long exposures lasting several seconds allow you to paint with light, turning busy Singapore traffic into smooth, glowing ribbons of color. Understanding how this fits with aperture, shutter speed, and ISO is vital for consistent, sharp results.
Freezing Action vs. Capturing Motion
If you’re photographing active children or pets, you’ll need a fast speed, typically 1/500 of a second or higher. Slowing the shutter down to 1/2 or 1 second creates intentional motion blur, which is perfect for making waterfalls look silky. A good starting point for handheld shooting is the “Reciprocal Rule.” This suggests your shutter speed should be at least one over your focal length. For example, if you’re using a 50mm lens, try to stay above 1/50 to avoid blur. Modern gear helps here; the Canon EOS R6 Mark III offers up to 8.5 stops of in-body image stabilization, making sharp handheld shots easier than they were a decade ago.
Avoiding the “Blurry Photo” Trap
Many beginners mistake camera shake for a focus problem. If your entire photo looks slightly smeared, your shutter was likely open too long for you to hold the camera steady. This happens most often indoors where light is scarce. The camera tries to stay open longer to “see” better, but your natural hand tremors cause blur. If you need to shoot at speeds slower than 1/60, a tripod becomes a necessary tool. Learning to balance these settings is a core part of mastering manual mode, where you practice identifying these common mistakes in real-time outdoor settings rather than just reading about them in a manual.

ISO Settings: Finding the Balance Between Brightness and Quality
ISO is the final piece of the exposure puzzle. While aperture and shutter speed physically control how much light enters the lens, ISO tells your camera how to handle that light once it reaches the sensor. Think of it as an internal amplifier. When you have ISO aperture shutter speed explained as a single system, you’ll see why ISO is often called the “last resort.” You generally want to keep it as low as possible to ensure your photos remain crisp and clear. It’s the setting you change only after you’ve pushed your aperture and shutter speed as far as they can go for the look you want.
Most cameras have a “Base ISO,” which is typically ISO 100. This setting provides the highest image quality with the least amount of digital noise. Noise appears as tiny, grainy speckles that can muddy the details in your shadows. As you increase the ISO number, you’re essentially turning up the volume on the light signal. This makes the image brighter in dark conditions, but it also amplifies the static, leading to that grainy look. Understanding this balance helps you decide when to accept a little grain in exchange for a visible image.
When to Push Your ISO Higher
There are times when raising your ISO is necessary, especially if you’re shooting in a dim indoor venue or during a late evening walk. In these moments, it’s better to have a slightly noisy photo that is sharp than a “clean” photo that is ruined by motion blur. As of September 2026, camera technology has made high ISO much less intimidating. Reviews for professional models like the Nikon Z8 show they can produce clean, detailed images even at ISO 25,600. Some enthusiast models now deliver usable results at ISO 32,000 with minimal post-processing. This means you have more room to breathe in low light than photographers did just a few years ago. Don’t be afraid to use these higher settings if it means getting the shot.
Maintaining Image Clarity
The visual cost of high sensitivity is a loss of dynamic range and fine detail. When you push the ISO too far, the colors might look a bit flat, and the sharp edges of your subject can start to soften. To avoid this, try to open your aperture wider first. If that isn’t enough, then nudge your ISO up. A common mistake is forgetting to lower your ISO when you move from a dark room back into the bright Singapore sunlight. Always double-check your settings when the environment changes. If you want to see exactly how these adjustments impact your specific camera, joining a Basic Photography Course will give you the hands-on time needed to master these balances under expert guidance.
From Theory to Field: Mastering Manual Mode Without the Stress
Reading about photography is a great first step, but there is a significant difference between understanding a concept and applying it in the field. You can have ISO aperture shutter speed explained to you a dozen times, yet still feel a wave of hesitation when you’re actually holding your camera. The transition from theory to muscle memory happens when you stop thinking about numbers and start reacting to the light. It’s about moving past the technical manual and learning to trust your own eyes.
Since 2005, we’ve helped over 20,000 students bridge this gap. We believe that the best way to learn is through deliberate, guided practice. Instead of sitting in a classroom looking at slides, you should be outdoors, physically turning dials and seeing the immediate impact on your images. This hands-on approach takes the stress out of the learning process, turning what feels like a complex puzzle into a series of simple, logical choices. If you’re ready to take that step, you can learn more about our Photography Starter Session and see how we simplify the craft.
The Value of Hands-On Mentorship
Learning in a crowd often leads to frustration. If you’re in a large class, it’s easy to get left behind when a specific setting doesn’t make sense. That is why Pictorial keeps groups small, with a maximum of three participants per session. This ensures you get the personal attention you need. When we work together in natural light, a professional mentor can spot your specific “Auto mode” habits. Maybe you’re over-relying on a high ISO or forgetting to check your shutter speed. We identify these small friction points in real-time, providing immediate resolutions that build your confidence far faster than any textbook could.
Learning Without the Gear Anxiety
One of the biggest barriers for beginners is the belief that you need expensive equipment to take professional photos. It’s a common anxiety, but it’s simply not true. While 2026 has brought us incredible tech like global shutters and 100-megapixel sensors, the core principles of light haven’t changed. You don’t need the latest flagship model to master the exposure triangle. To make things even easier, we provide complimentary loaner cameras for our students. This allows you to learn the craft without any immediate financial pressure. We focus on getting the shot right “in-camera,” which saves you hours of post-editing and gives you the creative control you’ve been looking for. Having ISO aperture shutter speed explained through physical practice is the most reliable way to gain personal independence as a photographer.
Taking Your First Steps into Manual Mode
Mastering your camera isn’t about memorizing a technical manual; it’s about understanding how light behaves. Now that you’ve had ISO aperture shutter speed explained, you can see how these three pillars work together to create a balanced exposure. Whether you’re blurring a background for a portrait or freezing motion in a busy street, you now have the conceptual foundation to move away from Auto mode and start making your own creative choices.
The next step is turning that theory into physical muscle memory. Since 2005, Pictorial has mentored over 20,000 students, helping them gain confidence through practical, outdoor practice. We keep our groups small, with a maximum of three participants, so you never feel lost in a crowd. You don’t even need to own gear to get started, as we provide complimentary camera loaners for every session. If you’re ready to see the difference professional guidance makes, Join a Hands-On Photography Workshop in Singapore. We’ll walk alongside you as you develop your eye and master your craft.
Frequently Asked Questions
What is the most important setting in the exposure triangle?
No single setting holds more weight than the others because they function as a balanced system. Your choice depends entirely on your creative goal for the specific shot. If you want to blur a background, aperture becomes your priority. If you are tracking a fast-moving subject, shutter speed takes the lead. Having ISO aperture shutter speed explained as a trio helps you realize that changing one always requires a thoughtful adjustment to another.
How do I know if my photo is properly exposed?
You can rely on your camera’s built-in light meter or the histogram to check your exposure. A perfect exposure typically shows a balance of tones without losing detail in the brightest or darkest areas. While your LCD screen can be misleading in bright Singapore sunlight, the histogram provides a factual graph of the light captured. We teach students how to read these tools during our outdoor sessions to ensure every shot is technically sound.
Will a higher ISO make my photos look bad?
Modern cameras are incredibly capable of producing clean images even at higher sensitivities. While a very high ISO can introduce digital grain, it won’t necessarily ruin your photo. It’s often better to accept a small amount of noise rather than ending up with a blurry image caused by a shutter speed that was too slow. In 2026, professional sensors can produce detailed, usable results at ISO levels that were previously considered unusable.
Can I learn these settings without owning a professional camera?
You absolutely don’t need to own expensive gear to start your photography journey. We provide complimentary camera loaners for all our students so you can practice the core principles before making a purchase. This approach allows you to focus on the tactile experience of shooting rather than worrying about equipment costs. Learning the craft is about observation and physical practice, which you can do with any camera that offers manual control.
What is a “good” shutter speed for handheld photography?
A safe rule of thumb is to keep your shutter speed at 1/60 of a second or faster to avoid camera shake. If you’re using a longer lens, you’ll need even faster speeds to keep the image sharp. Having ISO aperture shutter speed explained in the field helps you identify when your hands aren’t steady enough for the current setting. For stationary subjects in low light, 1/60 is a reliable baseline for most beginners.
How does aperture affect the brightness of my photo?
Aperture acts as the gatekeeper for light volume entering your lens. A wider opening, represented by a lower f-stop number like f/2.8, allows a large amount of light to hit the sensor quickly. This makes your photo brighter and is very helpful in dim environments. However, it also creates a thinner area of focus. You’ll learn to balance this brightness against the amount of background blur you want to achieve in your final image.
Why are my photos still blurry in Manual mode?
Manual mode gives you control, but it doesn’t automatically fix physical movement. If your photos are blurry, your shutter speed is likely too slow for the motion in the scene or the movement of your hands. It’s a common friction point that we address by teaching you how to brace yourself and select settings that freeze action. Understanding the physical mechanics of the camera is just as important as knowing the settings on the dial.
Is it better to fix exposure in the camera or in Photoshop?
It’s always better to get the exposure right in-camera. While editing software is powerful, it can’t recover details that were never captured in a heavily overexposed or underexposed shot. Our philosophy at Pictorial is to teach you how to master your settings so you don’t have to rely on complex post-editing. Getting it right the first time saves you hours of work and results in a much higher quality final image.