
How to Nail Exposure In-Camera Every Time: A Practical Beginner’s Guide
Imagine standing in the golden afternoon light, ready to capture a perfect moment, only to find your photo looks like a muddy, dark mess on your screen. You’ve likely felt that sinking frustration when your camera’s Auto mode guesses wrong, leaving you with a washed-out sky or a subject hidden in deep shadows. Many beginners feel stuck behind a wall of technical jargon like f-numbers and stops, believing that professional shots only happen after hours of digital editing. The truth is that learning how to nail exposure in camera isn’t about memorizing complex math; it’s about understanding how your specific tool sees the world.
It’s completely normal to feel intimidated by the buttons and dials on your gear, but you don’t need a degree in physics to get clear, vibrant results. This guide offers a stress-free way to master your settings so you can capture professional-looking photos without ever needing to touch Photoshop. We’ll walk through the practical “why” behind your camera’s settings and how to use modern tools like your electronic viewfinder to see exactly what you’ll get before you click. By the end, you’ll have the confidence to step out of Auto mode and take creative control in any lighting condition.
Key Takeaways
- You’ll preserve the maximum amount of detail and color in your photos by getting the light right the first time, rather than trying to fix muddy shadows later.
- Gain complete creative control over your images by mastering the “Big Three” pillars of the exposure triangle.
- Stop guessing your brightness levels by learning to read the light meter and histogram instead of trusting the LCD screen.
- Use a practical 4-step workflow to simplify your settings, which helps you achieve consistent results even in tricky lighting.
- Discover why hands-on practice is the most effective way to learn how to nail exposure in camera and build lasting confidence.
Why Getting Exposure Right In-Camera Beats Fixing It Later
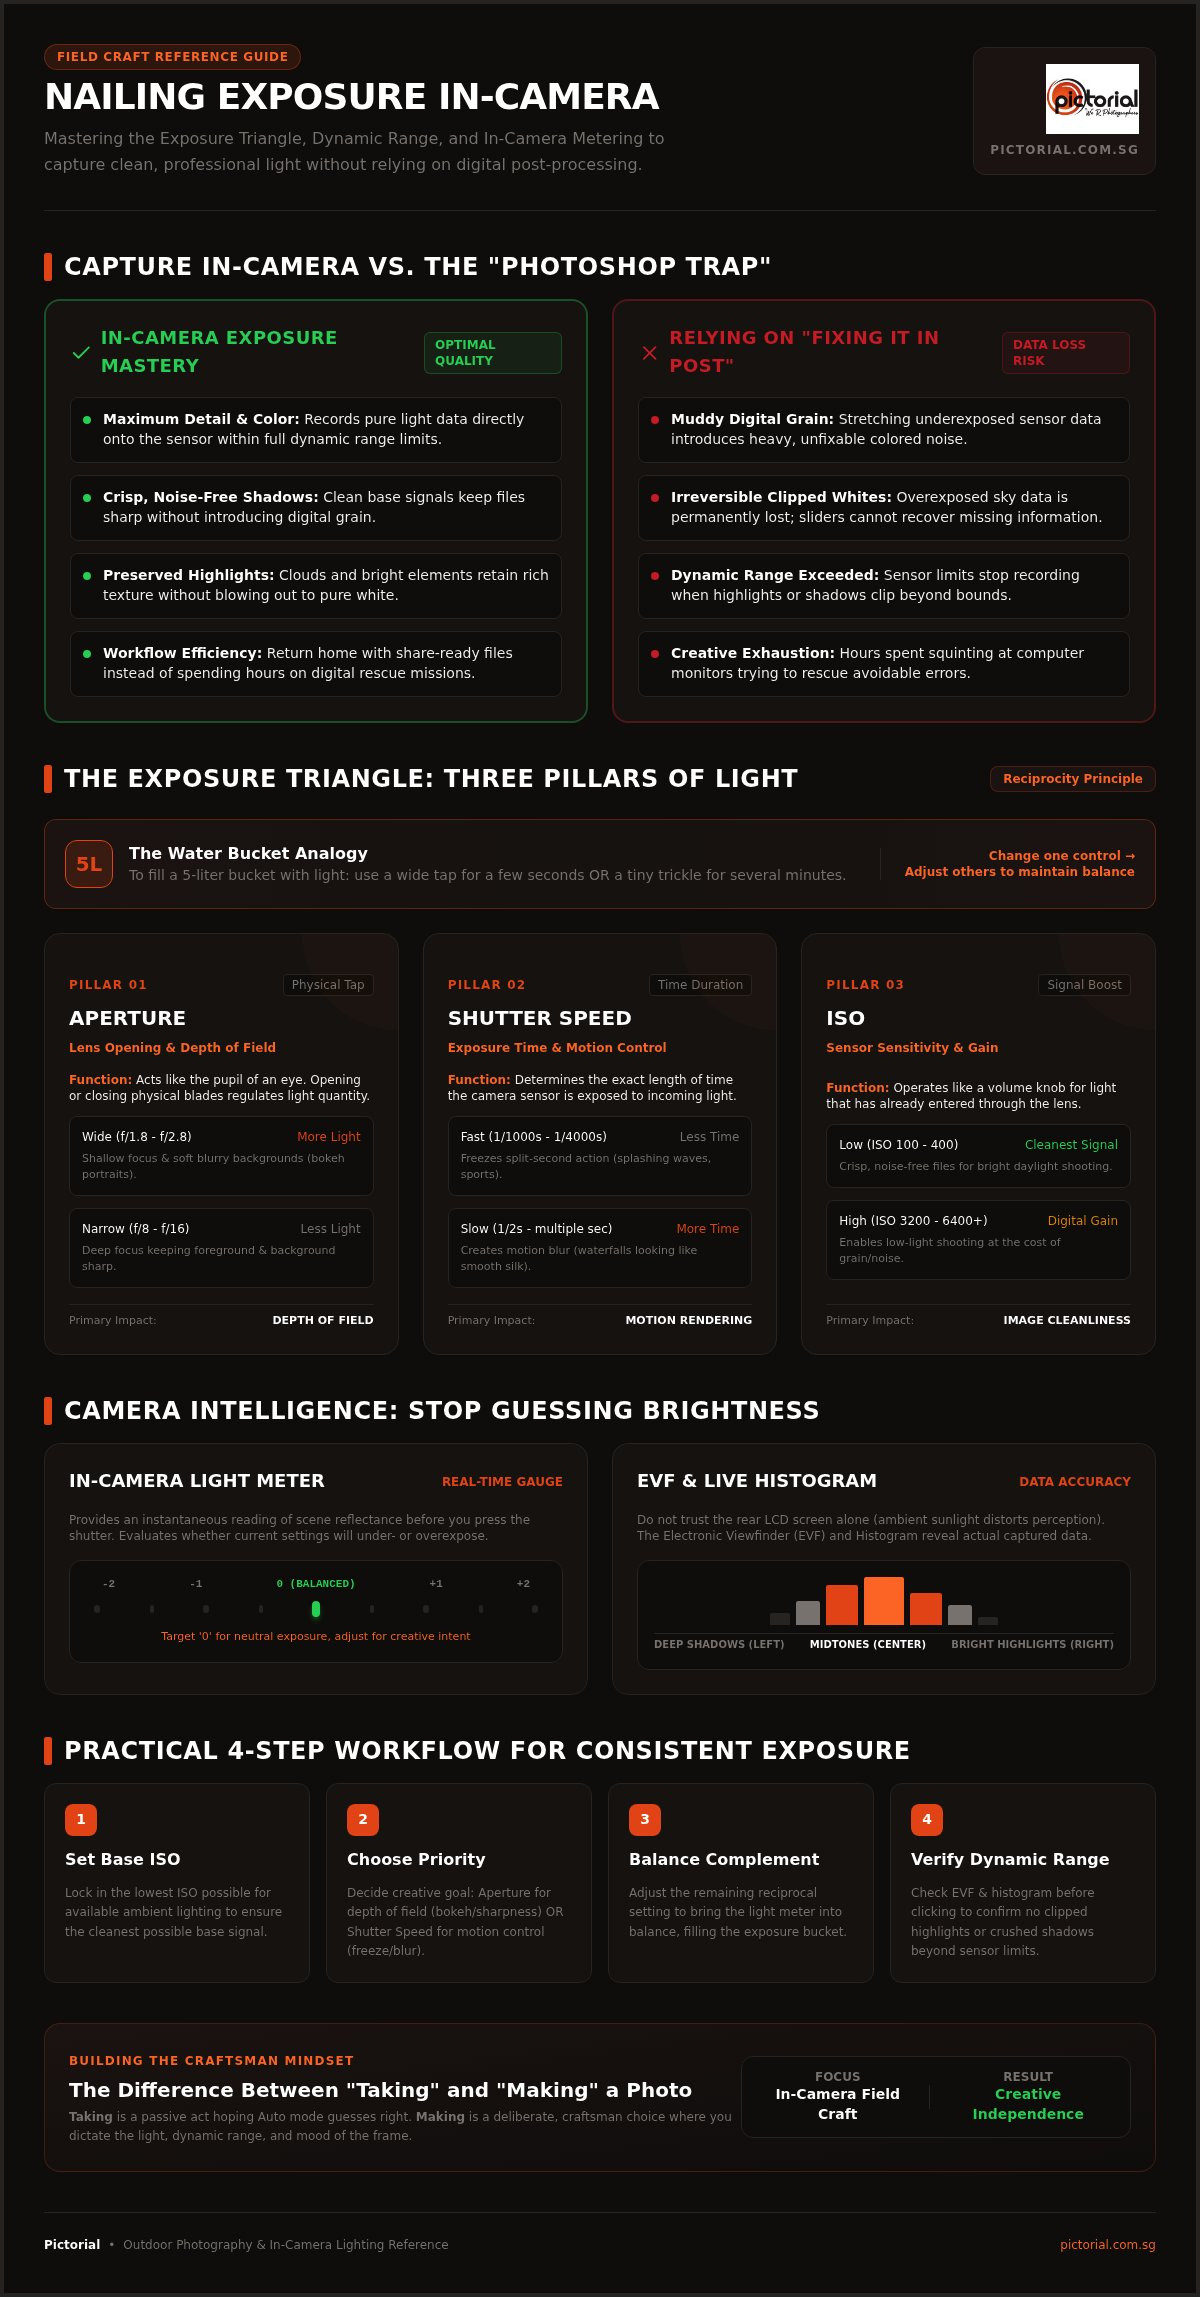
Many beginners start their journey believing that software can rescue any image. This is what we call the “Photoshop Trap.” While editing tools are powerful, they can’t recreate light that wasn’t there to begin with. When you rely on post-processing to fix a dark photo, you often end up with muddy shadows and distracting digital grain. Learning how to nail exposure in camera is the only way to ensure your files remain clean, crisp, and professional from the start.
Getting your photographic exposure right at the moment of capture ensures you retain the maximum amount of color and detail. Your camera sensor has a specific limit to how much information it can record. If you overexpose a sky until it’s pure white, that data is gone forever. No amount of slider-tugging will bring back the clouds. By mastering your settings in the field, you’ll spend less time squinting at a computer screen and more time enjoying the actual craft of photography.
There’s also a significant psychological boost that comes with getting it right. Seeing a perfectly lit, finished shot on your LCD screen immediately builds your confidence. It proves you’re in control of your gear. Instead of coming home to a library of “fixer-uppers,” you return with a collection of images that are ready to share. This efficiency allows you to focus on your creative vision rather than technical rescue missions.
The True Cost of ‘Fixing it in Post’
When you try to brighten a dark photo in software, you’re essentially stretching the existing data. This process introduces digital noise, which looks like ugly, colored grain in your shadows. Conversely, “blown-out” highlights occur when the light is so bright that the sensor simply stops recording detail, leaving you with empty white patches. Dynamic range is the camera’s ability to see and record detail in both the brightest and darkest areas of a single scene simultaneously. If you step outside this range during capture, the detail is lost for good.
Building a Craftsman’s Mindset
There’s a big difference between “taking” a photo and “making” one. Taking a photo is a passive act where you hope the Auto mode gets it right. Making a photo involves a deliberate choice, where you decide exactly how the light should look. This transition builds your reputation as a skilled photographer who truly understands their tools. It’s a rewarding journey, and it’s okay if it doesn’t click instantly. With a bit of patience and practice, perhaps during a Photography Starter Session, you’ll start to see the light differently and gain the independence every artist needs.
The Exposure Triangle: Balancing the Three Pillars of Light
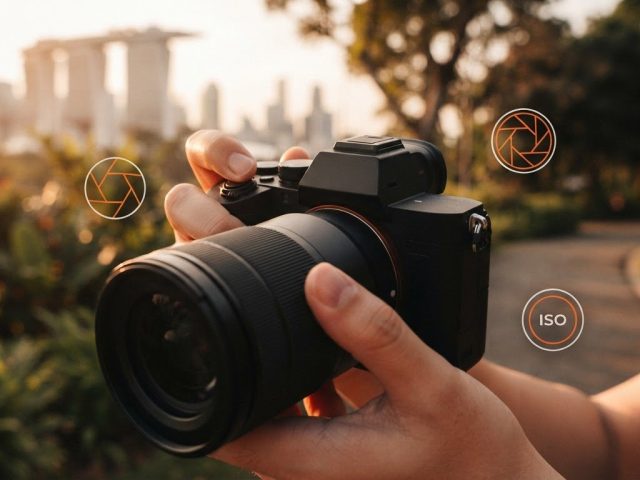
Understanding how to nail exposure in camera starts with three fundamental controls: aperture, shutter speed, and ISO. Think of these as the legs of a tripod. If one is too short or too long, the whole structure tips over. In photography, we call this the “Exposure Triangle.” While the terms might sound technical, they are simply physical ways to manage how much light reaches your camera sensor. Mastering this balance is what allows you to move away from the guesswork of Auto mode and start making deliberate creative choices.
A helpful way to visualize this is the bucket analogy. Imagine you need to fill a bucket with exactly five liters of water. You can open the tap very wide for a few seconds, or you can let a tiny trickle run for several minutes. Both methods result in the same amount of water. In your camera, the “tap” is your aperture, and the “time” is your shutter speed. If you change one, you must adjust the others to keep your “bucket” of light at the perfect level. This relationship is known as reciprocity, and it’s the secret to consistent photos.
Aperture and Shutter Speed: The Physical Controls
Aperture acts like the pupil of an eye. By changing the f-number, you physically open or close the blades inside your lens. A wide opening lets in a rush of light but creates a shallow focus, giving you that soft, blurry background often seen in professional portraits. Shutter speed, on the other hand, is all about time. It determines how long the sensor is exposed to the light. A fast shutter speed freezes a splashing wave, while a slow speed can make a waterfall look like smooth silk. These two settings work together to define the “feel” of your image.
ISO: The Sensor’s Sensitivity
ISO is slightly different because it doesn’t change how much light enters the lens. Instead, think of it as a volume knob for the light that’s already there. If you’re shooting in a dim room, you might turn up the ISO to make the sensor more sensitive. However, this comes with a trade-off. Just like turning up a radio too loud creates static, a high ISO creates digital noise or graininess. To keep your images clean and sharp, it’s a practical rule to keep your ISO as low as the lighting conditions allow. As you learn to use your camera’s histogram to check these levels, you’ll see how these three pillars interact in real-time. If you find these concepts easier to grasp with a camera in your hand, joining a Photography Starter Session can provide the immediate, hands-on feedback you need to master this balance in the field.
Reading Your Camera’s Secret Weapons: Light Meters and Histograms
Many beginners rely on the back of their camera to judge if a photo looks good. Unfortunately, your camera’s LCD screen often lies. In the bright, midday glare of a typical Singapore afternoon, the screen might look too dark, tempting you to overexpose your shot. Conversely, at night, that same screen can look brilliantly bright even if your photo is actually underexposed. Learning how to nail exposure in camera is much easier when you stop trusting your eyes and start trusting your camera’s internal data.
Your first secret weapon is the internal light meter. This is the small scale you see in your viewfinder or on your screen, usually marked from -3 to +3. The camera is designed to look at a scene and try to turn everything into “middle gray.” While this is helpful, it can sometimes be fooled by very bright or very dark subjects, like a white wall or a black cat. Understanding this tool is a foundational step in your progression toward creative independence.
Mastering the Internal Light Meter
The light meter scale acts as a real-time guide, where the “0” mark represents what the camera believes is a neutral exposure. By adjusting your aperture, shutter speed, or ISO, you can move the indicator along this scale to balance the light. The light meter scale, ranging from -3 to +3, serves as a visual map for your manual adjustments in the field. When the camera gets confused by tricky lighting, you can “cheat” the meter using exposure compensation, which tells the camera to make the image slightly brighter or darker than its initial guess.
Deciphering the Histogram
If the light meter is your compass, the histogram is your map. It’s a simple graph that shows the distribution of tones in your image, with the left side representing shadows and the right side representing highlights. Ideally, you want to see a “mountain” of data in the middle. If the graph is crammed against the far right edge, you’re experiencing “clipping,” which means your highlights are blown out and detail is lost. Using the histogram is the most reliable way to verify your exposure under harsh national sunlight, where your eyes might struggle to judge the screen accurately.
Finally, don’t ignore the “blinkies” or highlight alerts. These are flashing areas on your playback screen that warn you when a part of the image is too bright to contain any detail. By combining these tools, you’ll develop a craftsman’s eye for light. If you want to see these tools in action, a Photography Starter Session offers a great opportunity to practice these techniques with immediate guidance on a professional camera body.
A Practical 4-Step Workflow for Consistent In-Camera Exposure
Instead of trying to memorize specific settings for every possible scene, it’s more effective to follow a repeatable workflow. This “Priority First” approach helps you make decisions based on what matters most in the moment. By following a logical order, you’ll find that how to nail exposure in camera becomes a matter of habit rather than a stressful calculation. This process ensures you address the physical limitations of your environment before you start making creative adjustments.
- Step 1: Set your ISO. Look at the available ambient light. If you’re under the bright national sun, keep it at 100. If you move into deep shade, you might need to bump it to 400 or 800 to keep your sensor sensitive enough.
- Step 2: Choose your Aperture. Decide how much of the scene you want in focus. A lower f-number like f/2.8 is great for portraits, while f/8 or f/11 works better for landscapes.
- Step 3: Adjust Shutter Speed. Dial your shutter speed until your internal light meter hits the center “0” mark. This balances the light based on the ISO and Aperture you’ve already chosen.
- Step 4: Check the Histogram. Take a test shot and look at the graph. Ensure the “mountain” of data isn’t touching the right edge to avoid losing detail in the highlights.
Following these steps in order prevents you from chasing your tail by changing three things at once. It grounds you in the physical reality of the light you’re standing in. If you want to practice this workflow with immediate feedback, consider joining a Photography Starter Session where you can build this muscle memory in a small, supportive group.
Adapting to Changing Light
Light is rarely static, especially when you’re moving between buildings or under changing cloud cover. When you transition quickly from bright sun into the shade, your first move should always be to adjust your ISO or Aperture to compensate for the drop in light. If you’re in a rush, you can use the exposure compensation shortcut to quickly brighten or darken the image. Many beginners worry that Manual mode is slow, but once the physical habit is formed, it’s actually faster and more reliable than Auto mode because the camera won’t get distracted by a stray light source.
Troubleshooting Common Exposure Errors
One common issue is finding that your shutter speed has become too slow, which leads to blurry photos from camera shake. If your speed drops below 1/60th of a second while handheld, it’s time to either open your aperture or increase your ISO. There are also times when you should intentionally “underexpose” by a small amount, such as during a vibrant sunset. This helps preserve the rich oranges and reds that might otherwise get washed out. Balancing these settings while maintaining sharp focus is a craft that takes time, but staying patient with yourself is the key to long term progress.
Mastering Field Craft: Why Hands-On Practice Trumps Theory
Reading a book about light is like reading a cookbook without ever stepping into a kitchen. You might understand the ingredients, but you won’t know how the heat feels or when the balance is just right. Learning how to nail exposure in camera is a tactile, physical skill that requires you to be out in the field, observing how shadows fall and how highlights shift. Pictorial has operated on this philosophy since 2005, guiding over 20,000 students through the practical reality of outdoor photography rather than sticking to classroom lectures.
Theoretical knowledge is a good start, but real-world light is unpredictable. Unlike a static diagram in a textbook, the sun moves, clouds drift, and light reflects off glass buildings in ways that Auto mode simply can’t handle. By practicing in these conditions, you learn to trust your instincts and your camera’s tools. This hands-on approach transforms technical data into a craftsman’s intuition. This direct experience is the most reliable way to learn how to nail exposure in camera while building the confidence to handle any lighting situation you encounter.
The Benefits of Small 3-Student Classes
In a crowded classroom, it’s easy to feel lost or embarrassed to ask why your screen looks dark. Pictorial keeps classes tiny, with a maximum of three students, ensuring you get the personal attention you deserve. This small-group setting means no one gets left behind. It allows a mentor to stand right next to you, adjusting your grip or showing you exactly which dial to turn to fix your specific mistakes. If you’re ready to move past the theory and start making real progress, the Photography Starter Session is designed to give you that immediate, practical feedback in a relaxed setting.
Starting Your Journey Without the Gear Stress
Many beginners hesitate because they think they need the most expensive full-frame camera to get professional results. That simply isn’t true. Exposure is about physics, not the price tag on your lens. You can learn the fundamentals on almost any device, and Pictorial even provides professional loaner cameras if you don’t have your own yet. This allows you to see the difference quality settings make before you commit to a purchase. It’s a patient, encouraging environment where every question is valid, and the focus is always on your personal growth as an artist rather than the gear you carry.
Step Out of Auto and Into Creative Control
Mastering your camera settings isn’t a technical hurdle meant to keep you out; it’s a gateway to artistic independence. By understanding the physical balance of the exposure triangle and trusting tools like the histogram, you move away from the frustration of inconsistent results. You’ve learned that getting it right in the field saves time and preserves the delicate details that software simply can’t recreate. Each shutter click is an opportunity to practice this balance until it becomes second nature.
The most important step now is to take this theory and apply it to real-world light. Learning how to nail exposure in camera is a journey that feels much easier when you have a patient guide by your side. At Pictorial, we believe in the power of doing. Our sessions offer hands-on outdoor guidance from Keith, a professional with over 20 years of experience. You’ll learn in a relaxed, small group of maximum three students, ensuring you get the personal attention you need. We even provide complimentary loaner cameras for all students who need them.
Ready to stop guessing? Join our Photography Starter Session and master your camera in the field.
Take your time, keep practicing, and don’t be afraid to experiment. The confidence to capture perfectly exposed photos is well within your reach, and we’re here to walk that path with you.
Frequently Asked Questions
What is the ‘Exposure Triangle’ and why does it matter for beginners?
The Exposure Triangle is the relationship between aperture, shutter speed, and ISO. It matters because it gives you physical control over how light enters your lens rather than letting the camera guess. Beginners who master this balance can create specific effects like soft backgrounds or sharp action shots. Understanding these three pillars is the essential first step to gaining creative independence and ensuring your photos look professional straight out of the camera.
Can I fix an underexposed photo in Photoshop without losing quality?
You can brighten a dark photo in editing, but you’ll almost always lose image quality. Stretching the data in software introduces digital noise, which makes shadows look grainy and muddy. This is why learning how to nail exposure in camera is so important. It preserves the original detail and color, giving you a clean file that doesn’t require technical rescue missions in Photoshop later.
How do I know if my photo is perfectly exposed just by looking at the camera?
Trust your camera’s histogram and light meter instead of just looking at the LCD screen. The screen’s brightness can be deceptive, especially in bright sunlight. A well-exposed photo will show a distribution of tones in the center of the histogram without hitting the right edge. If your highlight alerts or “blinkies” are flashing, it’s a clear sign that you need to reduce the light hitting your sensor.
What is the best camera setting for exposure in bright sunlight?
In bright sunlight, start by setting your ISO to 100 for the cleanest results. You’ll likely need a faster shutter speed to prevent overexposure, especially if you’re using a wide aperture for portraits. In Singapore’s intense midday sun, using an aperture of f/8 or f/11 is often ideal for keeping landscapes sharp. These settings help you manage the high volume of light while maintaining the best possible image quality.
Why does my camera’s light meter sometimes give me the wrong reading?
Your light meter is designed to turn every scene into a neutral “middle gray.” When you photograph something very bright, like a white beach, or very dark, like a black cat, the meter gets confused. It will try to make the white beach darker and the black cat brighter. Understanding this helps you know when to use exposure compensation to override the camera’s guess and achieve a truly accurate result.
Do I need a professional DSLR to get perfect exposure in-camera?
You don’t need a professional DSLR to master these techniques. The core principles of light apply to almost every camera, from entry-level mirrorless models to high-end professional bodies. At Pictorial, many of our 20,000 students start their journey using our complimentary loaner cameras. What matters most is your ability to understand the settings and read the light, rather than the price tag or the complexity of the gear you own.
Is it better to underexpose or overexpose a digital photo?
It’s usually better to underexpose slightly if you can’t get a perfect balance. In digital photography, blown-out highlights are pure white and contain no data, meaning they can’t be recovered in editing. Shadows are a bit more forgiving, though brightening them can add grain. However, the best approach is to use your tools to find a neutral exposure in-camera, ensuring you keep the maximum amount of detail in every part of the frame.
How long does it take to learn how to use manual mode properly?
You can understand the theory of manual mode in a few hours, but the “feel” for light comes through practice. Most beginners find that a hands-on workshop, like a Photography Starter Session, helps them move past the confusion very quickly. Since 2005, we’ve helped thousands of students build this confidence in the field. With personalized guidance in a small group, you’ll likely feel comfortable adjusting your own settings after just one session.