
Bokeh Effect: How to Achieve Soft, Intentional Background Blur
A wider aperture isn’t always the answer to softer, more attractive background blur. If you’re wondering about the bokeh effect and how to achieve it with the camera you already own, manage more than one setting. A busy background can stay distracting at f/1.8, while a phone or kit lens can create pleasing separation when you position your subject and background thoughtfully.
It’s understandable if aperture feels confusing: opening it wider can blur the background, but it also makes the area in focus thinner. An eye may be sharp while the rest of a face softens. The good news is that you can make deliberate adjustments without buying new equipment. This guide explains how aperture, subject-to-background distance, focal length, composition, and light work together, and why the same blur can look calm in one frame but messy in another.
You’ll also see how optical blur from a lens differs from the software-made effect in Portrait Mode, then try practical ways to test both. Start with a simple scene, notice what changes, and build confidence through repeatable practice. Small adjustments to where you stand and what sits behind your subject can make a visible difference.
Key Takeaways
- Judge bokeh by the look of the out-of-focus areas, not just by how much blur is visible.
- Balance aperture, subject distance, background distance, and focal length to create separation without making focus too shallow.
- For “bokeh effect how to achieve,” follow a simple field exercise that changes one setting or position at a time.
- Work with your current lens first: thoughtful positioning and background light can matter as much as equipment.
- Review subject sharpness, background texture, and highlight shapes to refine the result and keep the blur pleasing.
What Is the Bokeh Effect, and What Makes Background Blur Look Good?
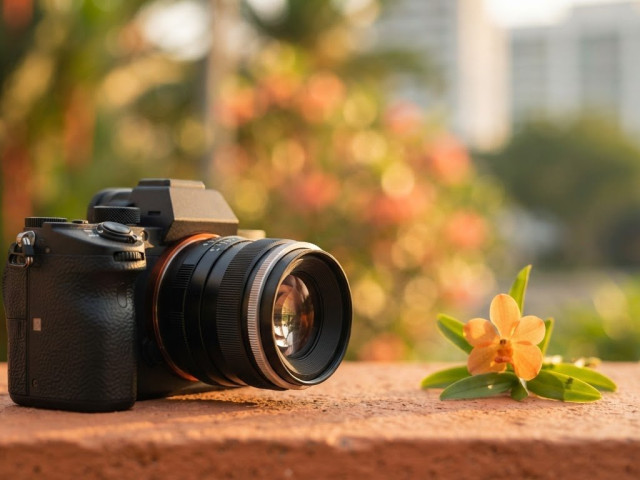
A soft background can help a subject stand out, but blur alone doesn’t make a photograph feel polished. Bokeh describes the appearance and character of the areas that fall outside focus. The term is often used to discuss the aesthetic quality of the blur, including how out-of-focus details and points of light are rendered.
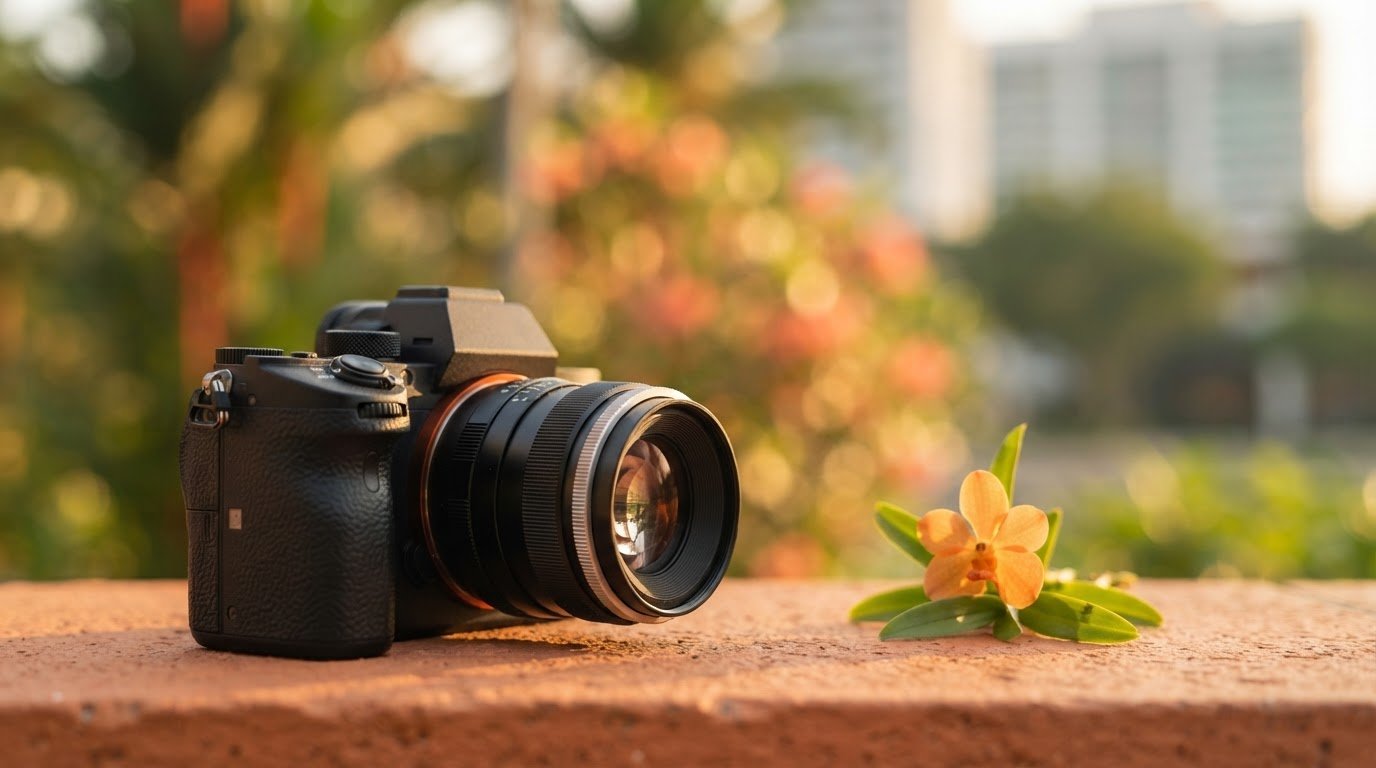
Think of a portrait with a sharply focused face and softly rendered foliage behind it. The background recedes, keeping attention on the person. If the foliage turns into harsh patches or bright, distracting shapes, the background may be blurred but the bokeh may not feel pleasing. A smooth, unobtrusive result is often more useful than the strongest possible blur.
Bokeh versus background blur: what is the difference?
Blur describes what happens when an area sits outside the plane of focus. Bokeh describes how that area looks. Its character can vary with the lens, the scene, and where you place the camera and subject. Soft transitions can frame a subject gently, while high-contrast edges or scattered highlights may draw the eye away.
A blurry background doesn’t guarantee attractive bokeh. Ask whether its shapes support the subject or compete with it. The answer depends on the whole frame, not just how much of it is out of focus.
Which subjects and scenes make bokeh easiest to see?
Start with a simple subject and a background with visible detail. Try a portrait in front of foliage, a close-up of a flower with leaves behind it, or a small object against a textured surface. Distant points of light can also show how highlights appear when they fall outside focus.
Detail matters because a plain wall may look much the same whether it’s sharp or blurred. Leaves, fine branches, or small lights make the change easier to notice. Keep the subject clear in the frame and avoid extra objects or bright patches around it while you practise.
The bokeh effect depends on several parts of the scene working together: what you focus on, what sits behind it, the lens, and your position. A lens influences the look, but it doesn’t make every background suitable. Shift your viewpoint, simplify the frame, or choose a background with gentler detail before deciding that your equipment is the problem.
For now, judge the result by two things: does the subject look clear, and does the out-of-focus area keep attention there? That gives you a practical starting point before adjusting camera settings or comparing lenses.
How Aperture, Distance, and Focal Length Create Bokeh
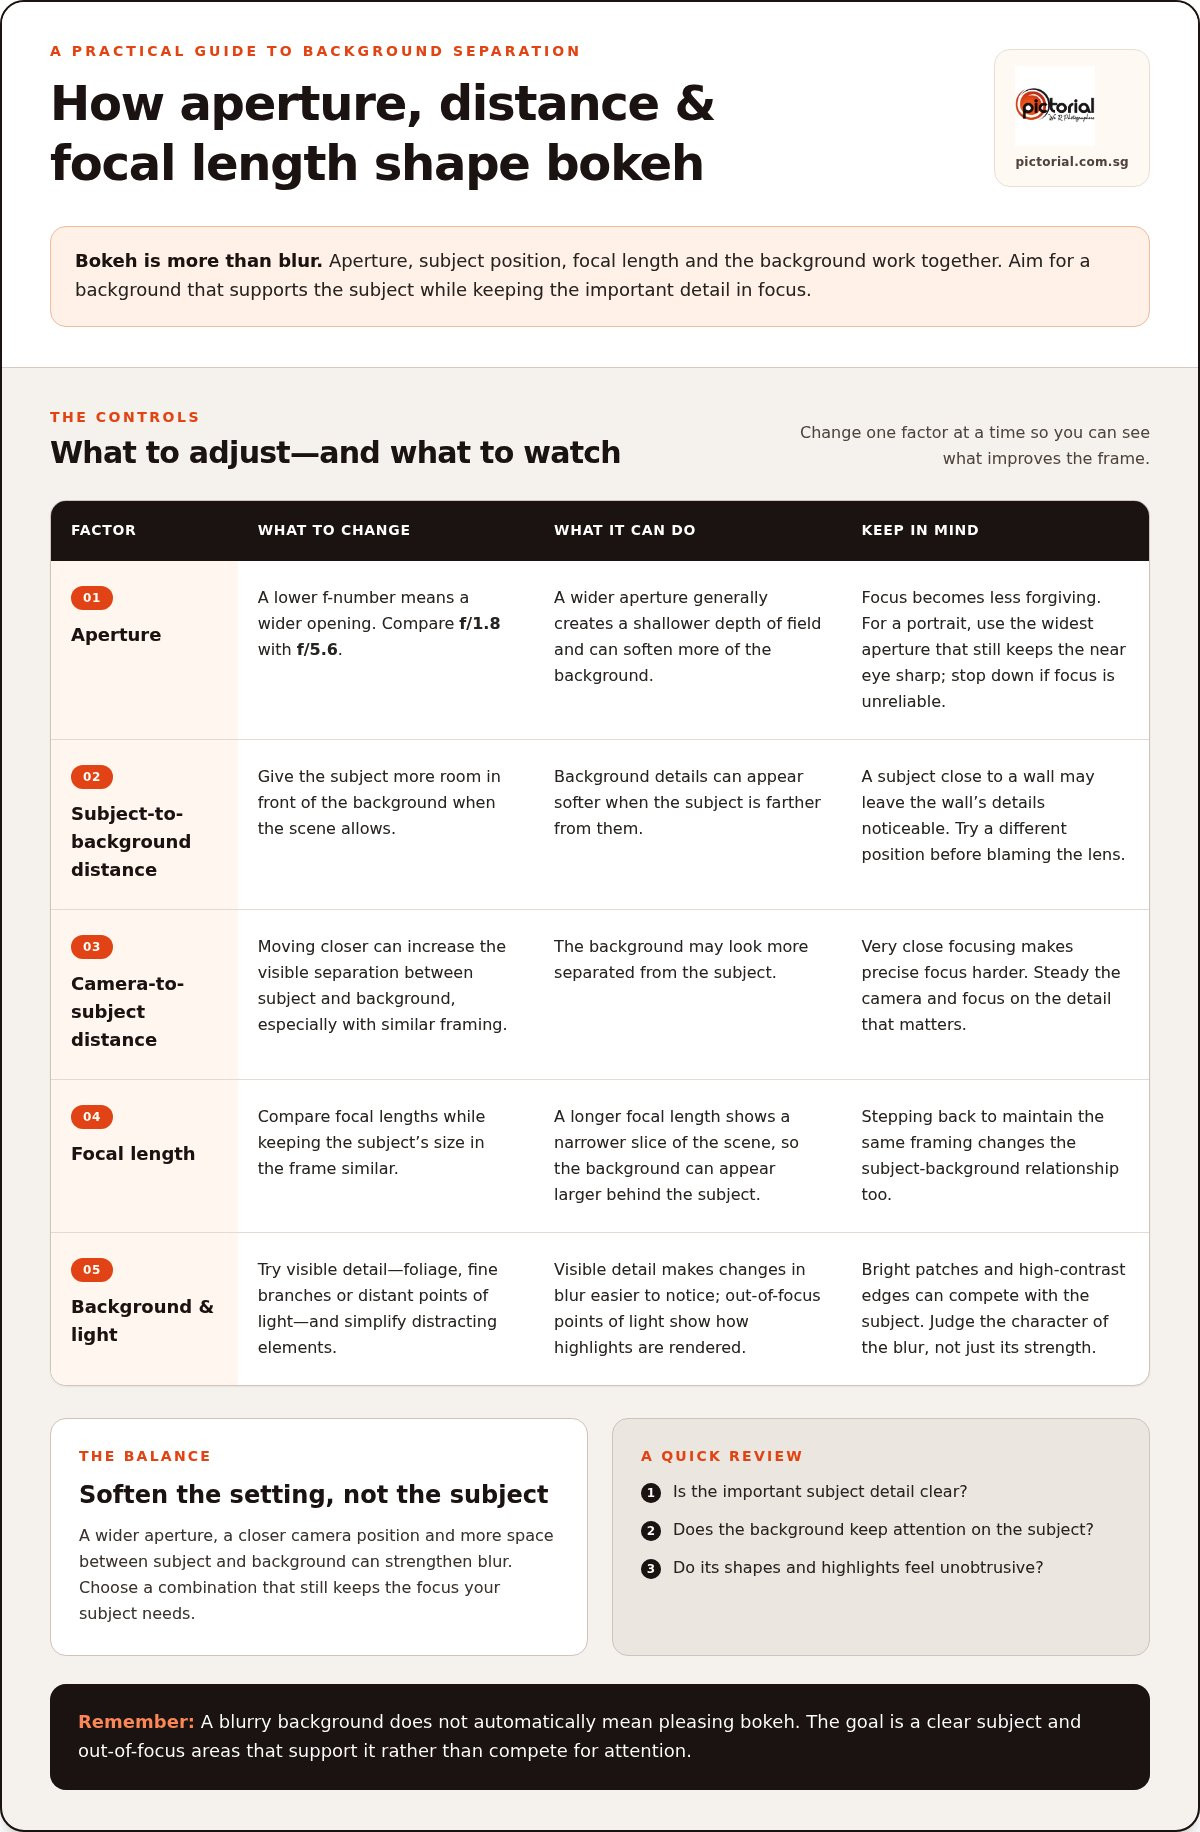
Background separation comes from several choices working together. Aperture controls how much of the scene appears in focus, while your position and focal length affect how the subject relates to the background in the frame. Adjust one factor at a time to see which change improves the result.
How do you choose an aperture for a bokeh photo?
The f-number describes the aperture opening: a lower number, such as f/1.8, means a wider opening than f/5.6. A wider aperture generally creates a shallower depth of field, which can soften more of the background. But the focus area also gets less forgiving, so a small shift can leave an eye or another important detail soft.
For a portrait, try the widest aperture that still lets you keep the near eye sharp. Check the result, then stop down to a higher f-number if focus is unreliable or too little of the face is clear. Nikon’s How to Achieve Bokeh also discusses how aperture and subject-background distance affect the look.
Why do subject and background distance matter?
Give your subject room in front of the background whenever the scene allows. If a person stands close to a wall, the wall’s details may remain noticeable. Moving the person farther from it can make those details appear softer. Moving closer to your subject can also increase the visible separation between subject and background, especially when you keep the subject framed similarly.
Very close focusing makes precise focus harder, and a moving subject adds another challenge. Take a moment to steady your camera and focus on the detail that matters most. If the subject moves, check focus again before shooting.
Focal length changes your angle of view and framing. A longer focal length shows a narrower slice of the scene, so the background can appear larger behind the subject. If you step back to maintain the same framing, the subject-background relationship changes too. Compare focal lengths by keeping the subject’s size in the frame similar, then observe how the background looks.
In short: A wider aperture, a closer camera position, and more space between subject and background can strengthen blur, while focal length shapes the framing and apparent background. Choose the combination that softens the setting without sacrificing the focus your subject needs.
If you’d like guided practice with camera fundamentals, a basic photography course for beginners can help you build confidence through hands-on learning.
Do You Need a Special Lens to Achieve the Bokeh Effect?
No. A lens affects how much optical blur you can create and the character of that blur, but it isn’t the only factor. Background distance, subject position, framing, and light all shape the result. Before considering new equipment, try separating your subject from the background and using the widest aperture your current camera allows. Nikon’s guide to bokeh also explains how lens choice and subject-background distance work together.
Can you get bokeh with a kit lens?
Yes. Set your kit zoom to its widest available aperture at the focal length you’re using, then move closer to the subject and place the background farther behind it where possible. The blur may be less pronounced than with a lens that opens wider, but a thoughtful setup can still separate your subject clearly. Review the frame and adjust your position before assuming the lens is holding you back.
How do phone cameras create portrait-style background blur?
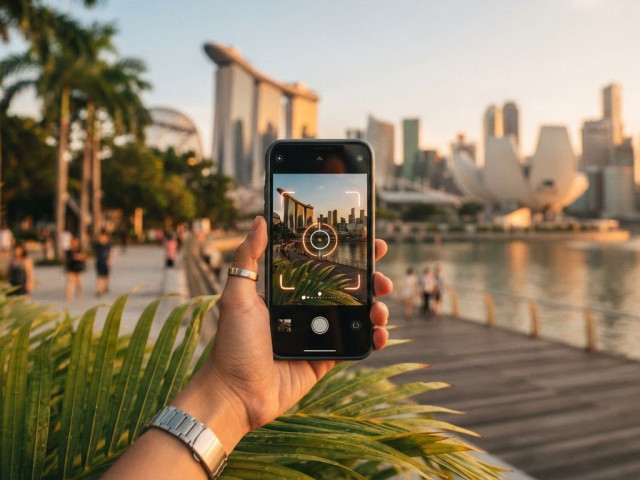
Many phones use computational photography to estimate depth and soften the background in Portrait Mode. Give the phone a clear subject outline and create space behind the subject to help the effect look natural. Fine hair, glasses, transparent objects, and overlapping edges can confuse edge detection, leaving a halo or an oddly sharp patch. Check the image around these areas before sharing it.
Use this comparison to choose a practical starting point with the equipment you have:
| Available equipment | Useful adjustments | Likely limitations |
|---|---|---|
| Kit zoom | Use its widest aperture; move closer and increase background distance. | Maximum aperture may be narrower, especially as you zoom in, so blur can be more modest. |
| Longer focal length | Try a tighter framing and watch how the background appears behind your subject. | You may need more room to frame the subject, and camera movement can be more noticeable. |
| Fast prime | Use a wide aperture for stronger optical separation, then stop down if focus is too shallow. | Fixed framing means you may need to move to change composition; focus still requires care. |
| Phone Portrait Mode | Keep the subject clearly separated from the background and check the outline. | Software blur can look uneven around complex edges or transparent details. |
The practical answer to “bokeh effect how to achieve” isn’t simply “buy a faster lens.” First use distance, framing, and light to make your current setup work. A fast prime can offer stronger optical blur, while a phone can create a convincing portrait-style effect in suitable scenes. Each option has trade-offs, so choose the approach that keeps your subject clear and the background quiet.
How to Achieve Bokeh Effect: A Repeatable Shooting Method
Use this exercise to practise one change at a time. Choose a stationary subject and work in good light, so you can concentrate on focus and background rather than motion or camera shake. Take a test frame, review it, then make one adjustment before shooting again.
Set up your first bokeh photograph
- 1. Choose a subject. Pick a still object with a clear outline, such as a cup or flower. A person works too, if they can hold a steady pose.
- 2. Find background separation. Place the subject well in front of a detailed background. Look through the viewfinder or screen and move your position until the background sits where you want it in the frame.
- 3. Set the aperture. Use aperture priority or manual mode. Choose a suitably wide aperture, but don’t assume the lowest available f-number will give the best result. You still need enough of the subject in focus.
- 4. Focus deliberately. For a portrait, focus on the nearest eye when appropriate. For an object, focus on its most important detail. Hold the camera steady and take a frame.
- 5. Review before changing anything. Zoom in to check the subject’s sharpness, then look at the background. Notice whether its shapes are soft and supportive or still distracting.
Adjust the frame when the blur does not look right
If the background remains busy, move the subject farther from it or shift your camera position to place simpler details behind them. If the subject looks soft, refocus carefully and try a less extreme aperture. For a portrait, check both eyes if they aren’t on the same plane, and decide which detail needs to stay sharp.
Bright points can become prominent blur shapes. If they pull attention away, reframe to move them out of the background behind your subject, or choose a calmer angle. Make just one change at a time so each test frame teaches you what affected the result.
Repeatable bokeh checklist: Pick a still subject, find a clean background position, choose a wide but workable aperture, focus on the key detail, take a frame, and inspect both focus and blur. Repeat the same steps in another scene, changing one factor at a time.
If you’d like to practise camera fundamentals with guidance, explore the basic photography workshop.
How to Refine Bokeh and Keep Your Subject Sharp
A successful bokeh photo isn’t simply the one with the most background blur. Check whether the important part of your subject is sharp, then see if the background supports it rather than competing for attention. Look closely at bright highlights and the edges around your subject too. Smooth transitions often feel natural, while abrupt patches or bright shapes can pull the eye away.
There’s a balance to find. A wider aperture can make the background softer, but it also reduces the area in focus. If a portrait’s eyes are sharp but the nose or far eye is unexpectedly soft, try a slightly narrower aperture. Change one thing at a time, such as aperture, subject position, or camera position, so you can tell what improved the frame.
Why does my bokeh look busy, harsh, or uneven?
Detailed backgrounds, strong contrast, and bright objects behind the subject can make blur feel busy. Before thinking about equipment, shift your camera or reposition the subject so distracting details and highlights move out of the frame. A small change in viewpoint can simplify the background without changing the subject.
Blur also varies from lens to lens, so compare results across different scenes rather than judging your setup from one photograph. A background that looks harsh in one location may appear smooth against softer, more evenly lit details.
How can you practise bokeh with feedback?
Try a short exercise with one stationary subject and three different backgrounds, such as foliage, a plain wall, and distant lights. Keep the subject and framing as consistent as you can. For each background, take a frame at a wider aperture, then another with a slightly narrower aperture. If you can, also change your distance from the subject or increase the space behind it.
Review the results side by side. Which frame keeps the key detail sharp? Which background feels calm, and which has highlights or textures that distract? This comparison helps answer “bokeh effect how to achieve” in a practical way: observe the result, make one adjustment, and see what changes. The same deliberate practice can help you improve photography skills with practical exercises.
If you’d like guided practice with camera fundamentals, Pictorial’s Photography Starter Session offers hands-on learning. It’s a way to build confidence with your camera while exploring techniques like background separation.
Build Your Bokeh Skills One Frame at a Time
You don’t need a new lens to make more intentional background blur. Pay attention to the whole setup: use an aperture that keeps your subject sharp, create space between subject and background, and review how the blur looks in the finished frame. If you’re wondering about bokeh effect how to achieve, practise changing one factor at a time so you can see what makes the difference.
Try the same subject against different backgrounds, then compare focus, texture, and highlights. Each frame gives you a clearer sense of when blur supports your subject and when it distracts from it. Small, deliberate adjustments build useful camera skills.
Pictorial offers hands-on photography courses, including the Photography Starter Session. A complimentary camera loan is included with every course, so you can practise even if you don’t have your own camera.
Frequently Asked Questions
How do you get the bokeh effect on a camera?
To create bokeh, focus on your subject and let the background fall out of focus. Place the subject well in front of the background, use a wide aperture if your camera allows it, and focus carefully on the detail you want sharp. If you’re asking “bokeh effect how to achieve” with your current gear, start by changing the subject’s position and reviewing a test frame before adjusting other settings.
What camera setting is best for bokeh?
A wide aperture is a useful starting point, which means choosing a lower f-number such as f/2.8 rather than f/8, if your lens supports it. Aperture priority mode lets you set this while the camera selects a shutter speed. Check that your subject remains sharp, especially in a portrait. If focus is too shallow or unreliable, choose a slightly higher f-number and try again.
Do you need an expensive lens to create bokeh?
No. A lens with a wide maximum aperture can make optical background blur stronger, but you can practise bokeh with the lens you already have. First try moving your subject away from the background and adjusting your shooting position. Lens choice affects the blur’s strength and character, but it doesn’t decide whether a photograph works. A simple background and careful focus can matter just as much.
How do you make bokeh with a phone camera?
Use your phone’s Portrait Mode, which typically simulates shallow depth of field by estimating which parts of the scene are subject and background. Keep the subject distinct and separate from what’s behind them, then check the outline in the finished image. Hair, transparent objects, or overlapping shapes can confuse the effect and create uneven blur. A simpler background can help the result look more natural.
Why is my subject blurry when I use a wide aperture?
A wide aperture makes the area in focus shallower, so a small focus error can leave important details soft. In a portrait, focus on the nearest eye when appropriate and keep the camera steady. If the subject is moving, motion can also cause blur. Try a slightly narrower aperture to bring more of the subject into focus, then check that your shutter speed is fast enough for the scene.
What is the difference between bokeh and background blur?
Background blur describes an area that is outside the camera’s focus. Bokeh describes the visual character of that out-of-focus area, including how shapes, textures, and points of light appear. A photograph can have a strongly blurred background that still feels distracting if bright patches or harsh details compete with the subject. Pleasing bokeh depends on how the blur looks in the frame, not only how much blur there is.

Article by
Keith Low
Photography Mentor & Founder
Disclaimer
© Pictorial | All Rights Reserved.